Well I guess I decided to go crazy and I’ve started building a gigantic room box to use as a backdrop in my doll photography. This particular room box was designed with my Mio/Zaoll hybrid in mind who is 52cm, as well as my future plans for a 65cm boy, as well as leaving the window open for it to work well with the 60cm dolls. Beyond that I also have the hope that my MSD sized dolls could also make use of the space as well despite it being more to the scale of the 52cm to 65cm dolls. Another key point in making this piece is that it absolutely has to be collapsible because I just do not have the space for the sheer size of this thing! Anyway enough introductory blabber and on with the production. 🙂
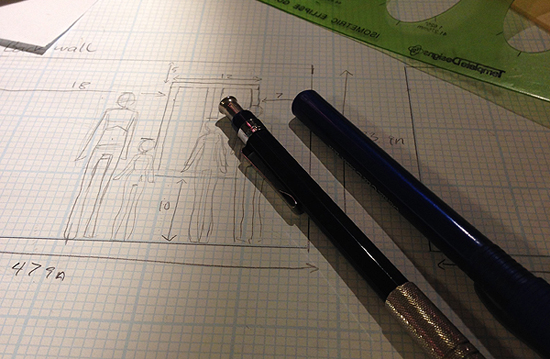
So as with all large projects, it’s best to start out with a plan on some graph paper. I spent a couple days researching other room boxes and then took extensive measurements of my current dolls as well as the few key props they have like chairs. Because this house must also work for 60-65cm dolls as well I also sketched their sizes into my plan mock-up so I could have a better idea of how big my window needed to be. I knew I wanted the window to be large and I also wanted all of the dolls to be able to look out it and to be able to open it (it will be a casement window on pin hinges that I will have swing out and/or in). In the end my window ended up being 10 inches wide by 18 inches long….it’s a long window, but it enables all the heights of dolls to look out it.
Speaking of measurements, here is what I arrived at for my final dimensions…The room box is 47 inches wide, 31 inches deep and 33 inches tall. To keep this in perspective, it’s about 75cm in height so even a 70 cm doll could stand and be photographed in it, though I feel those dolls are probably a bit too big for me to handle. ^^;
Now on to the materials I chose. For the walls I decided to go with 1/4inch birch plywood, because the walls will be hinged, I knew that the weight and size of the 1/2 birch plywood would be too unwieldy for me to comfortable handle. The only problem with using 1/4 birch plywood for the walls though is that at the size needed for the 60cm range dolls, they wouldn’t be very stable. My dad gave me the idea though that to rectify it we could make a “frame” on the back of the boards out of 1 inch thick 2 inch wide boards the length of the walls. For those boards I just used some packaged Aspen because I didn’t want to deal with the less expensive but lesser quality boards which could have warping or cause other problems. For the base I chose 1/2 inch pine plywood. The base needs to be solid to hold the walls and they will also suffer the most as it is the floor afterall. Lastly I needed hinges and they needed to be long with how we were going to butt the walls together in the corner, so we went with strap hinges.
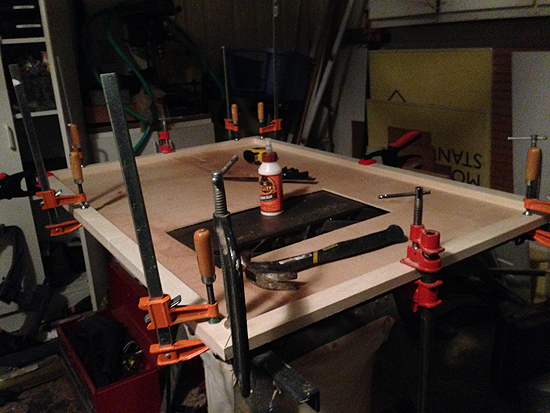
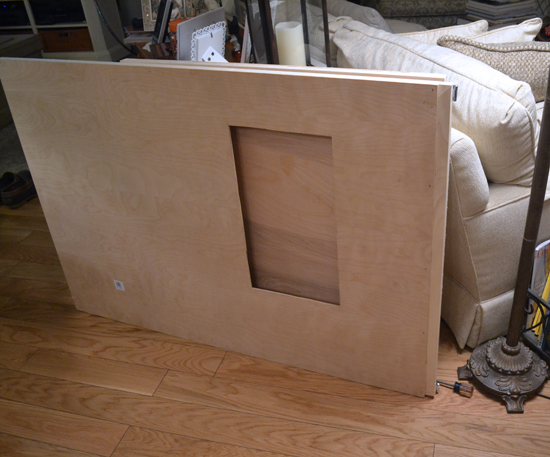
Ok, so after planning and buying all of the necessary wood, we started on building it the next day. I’m going to say that if you have help, getting the bare base of your room box done is totally do-able in a day. The above picture was taken after we had cut down all the of the boards to their proper size and had cut out the window. I will mention that to cut a window you will need a saber saw and a drill. You drill a hole somewhere in the middle of your window (the part that will be cut out and scrapped). The hole needs to be big enough that you can fit the saber saw blade into it. Once you do that start up the saber saw and start sawing at a smooth curve towards your cut line so that when you meet with your cut line you will be parallel to it, then just follow your line as straight as humanly possible. If you fudge up a little bit, it won’t matter, and don’t expect the window cut to be perfect…you will frame it out later anyway so if there are a couple little wobble gaps, those will get filled in with putty and eventually covered with the window trim. That’s getting a bit ahead of ourselves at the moment though, so I’ll talk more about that later.
So, after everything is cut and ready to go, it’s time to apply the frames, we mitered the edges of the frame, but you don’t need to get as fancy if you don’t have the appropriate saw for the job. Just butting the wood together in L-shapes will suffice. After cutting all of our frames to the proper length we started by gluing the frames to the back side of the wall. Because the walls had a slight warp in them we clamped down all of the frames to the wallboard and let the glue dry for around an hour. Afterwards we put a nail through where the two frames met for added support and then used a special long and narrow staple to really secure the walls to the frame boards. It was keep at the minimum though because each staple creates a hole in the wall that will then need to be puttied and sanded to finish…less holes equals less work! However we were sure to do as many as we felt we needed too.
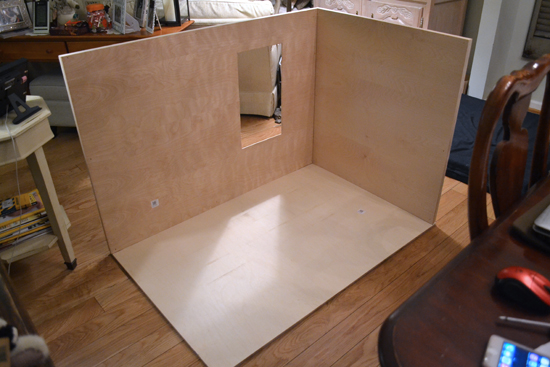
Ok, so after putting the frames on both walls, we then applies the hinges and set it on the base. You can kind of tell from the house interior that this thing is HUGE! XD Haha, maybe it’s overkill, but I’d rather have it be bigger than is needed than too small. Anyway I’ll go more into detail about the exact construction here with a few more photos.
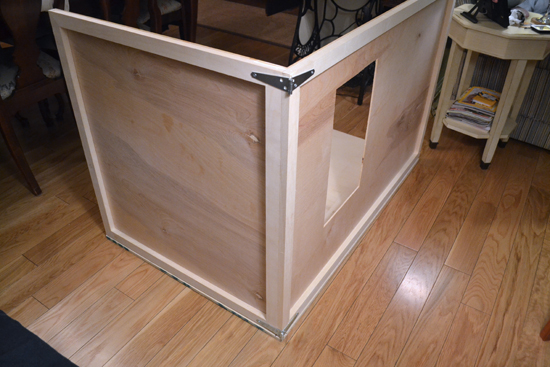
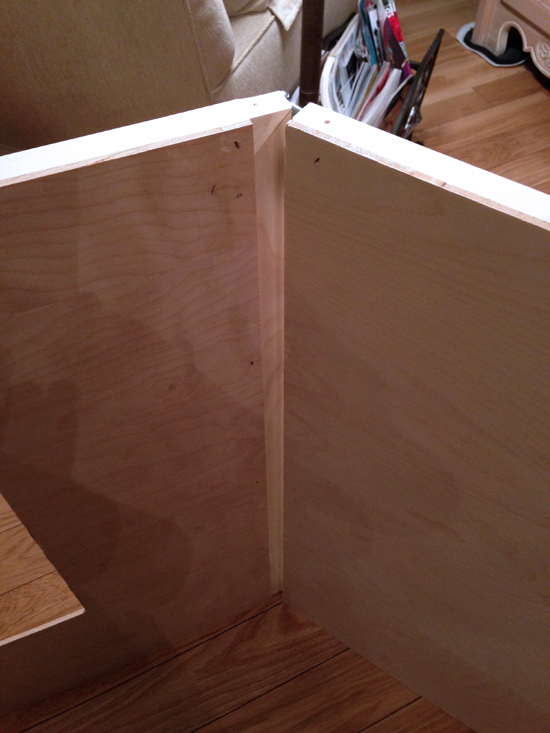
So here is a shot of the back of the box and you can see how the hinges are situated. The side wall “nests” against the back wall but the back wall’s frame edge comes out and meets flush with the edge of the side wall frame. It’s probably easier to see it so I got a close-up shot of the hinge.
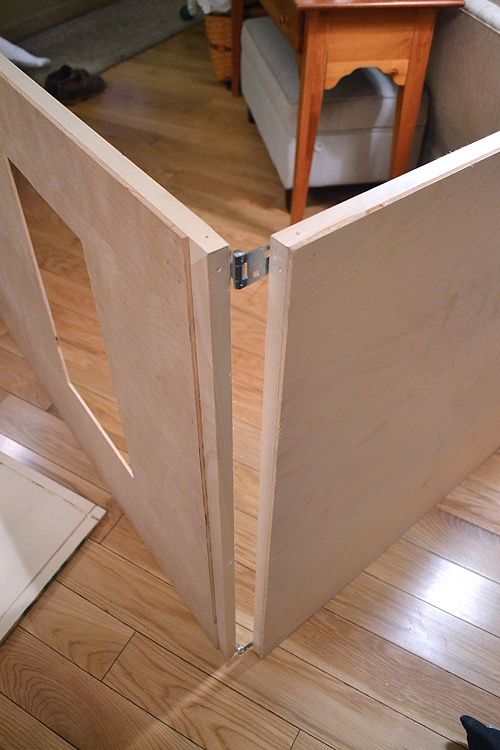
Here I think you can see the construction a little better. Basically you need to have your boards in position so that each hinge flap is PARALLEL to the board it is on so that it will come around and fold flat. This is how we arranged the wood so it does that. There is only one problem here however, but it will get fixed tomorrow and that is that the way the screw holes are positioned on the hinge, only one screw (the far one) is on the side wall’s frame. Tomorrow we plan to drill a hole through the metal in order to attach one more screw close to the edge for the frame board to prevent jiggling.
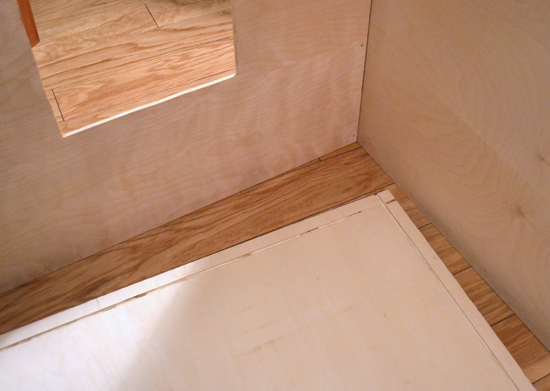
Now I want to show you the base real quick. We decided to try out sawing small channels for the walls to drop into for added stability. I feel the verdict is still out on whether or not it was a good idea, lol. Because the base also has some slight warping it’s a bit tricksy to get the walls to fall into the slot proper, but when it does it looks fine. If you were planning to make a room box of your own you could consider this an option, but I also tested setting my walls directly on my base (without slipping into the channels) and it also seemed fine. Lastly it pays to keep in mind that you can add baseboards to your walls to cover up any gaps you may have and make things look nice and tight.
I thought I would go ahead and show you how this thing closes over on itself. I think it also helps to illustrate how it was constructed. You may also notice in this picture the small holes left by the nail gun from the staples. As I said before, those will be filled in with wood putty and made to be invisible. 🙂
And further we go….Here you can see how the two hinge holes on the side wall don’t really get any purchase, on the side wall’s frame board. This gets fixed tomorrow though as we will make a new hole and add a screw.
Lastly you can see here how it folds up. The side wall will end up protecting the window nicely from one side. If I do store this between the bedframe and the wall I will more than likely secure the window and then have the window side face the wall. If under the bed storage, I’d probably lay the window side down on the base.
So there you have it, this is the basic construction of the room box. Now comes the painting, flooring, window making and etc… to truly finish the piece. I’m hoping to have a little more time to work on it this weekend, but come Monday it’s back to work for me. XP Anyway I’ll be sure to share more things as I get them done…thanks for reading! I hope if you decide to build your own room box you have success!


