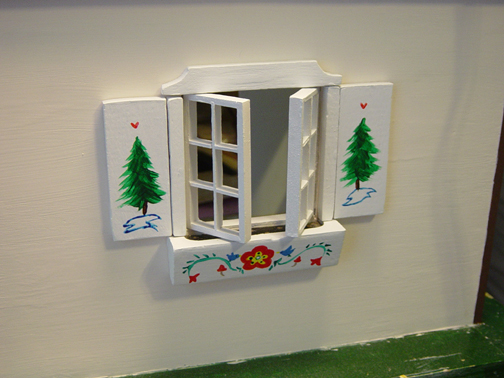
I’ve been making more progress than this on the dollhouse, but a lot of that has been spackling, sanding and painting, all of which don’t make for the best of progress pics. I did however finish my first window finally. Because I really don’t like those tiny brass hinges, and I can’t use pins because of the way the house has been constructed, I decided I would try out using fabric hinges. I had read about fabric hinges online while looking for dollhouse related tips while building my last dollhouse, but there wasn’t much in depth information about how to create/use them. Anyway I’ll go ahead and share my experiences here, if anyone else is interested in trying out fabric hinges to see if they work for them. Just keep in mind I’m doing this on a 1:12 scale dollhouse, not playscale, and I’m not sure how it would work with playscale.
My Little Brownie Arrived! :D
Yay, she’s finally here! Today I made sure to be awake for the postman, and then much to my dismay, she was not delivered! So I carted off to the post office with my pick-up ticket from yesterday, and thankfully she was there. 😀 I didn’t have much time to take pics since I had to run off and get my hair cut, but I did manage to snap off a few box opening pics.
Dollhouse Rehab – Day 3
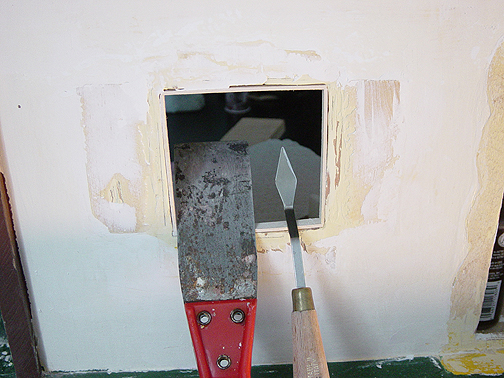
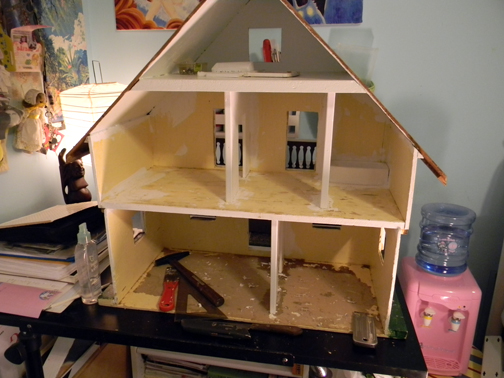
I got all of my spackling and sanding done today, and currently as I type this, the first coat of paint is drying on the exterior of the house. I thought I would share a spackling tool tip though. It is something I kind of took for granted in having being as I am an artist, but the artist palette knives you can get at any art supply are really excellent spackling tools for those hard to reach spaces. You can see my palette knife on the right in the above pic, resting next to the red handled spackling knife. You can get palette knives in varying sizes and they are also inexpensive. I got my palette knife for a couple bucks or less. Of course some art supply stores have better prices than others.
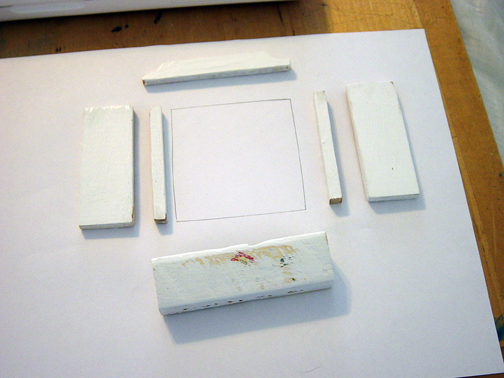
I also decided to start sanding down all of the exterior window trimmings and I wanted to start planning to put them together, which brings me to my next tip. When dealing with custom windows and you have no plans to go by, you can always take a sheet of copy paper, and using a firm back board, hold the paper up to your window hole and trace your window in pencil. This makes a great guide for you to sit at your table and put your windows together. Of course for this house I think I will have to do each window separately seeing as there seems to be subtle differences between each hole my grandfather cut.
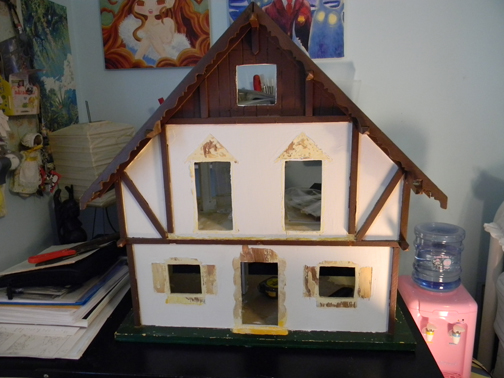
You may also notice in the picture that a bit of the old decal is showing through from the bad paint-over I did a long time ago….The yellow color you see is actually how badly the clear part of the decal yellowed, so yeah, it was not a pretty sight. I plan however to at least attempt to re-create those designs using my acrylic paints. We’ll see how that goes. I did manage to find a picture of this dollhouse from the planbook online, so I will use that as my guide for the detailing.
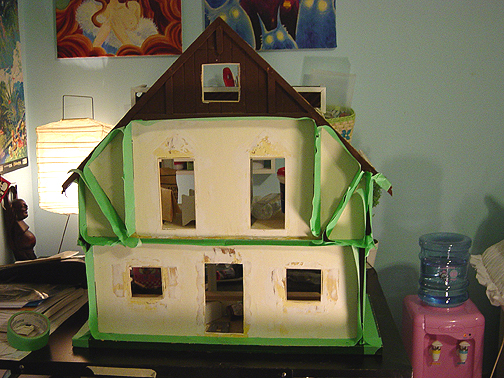
And here is a full progress shot with the dollhouse all taped up and ready to be repainted. I bought a warm beige color from Lowes the other day. I think it will be a tick darker than the last color on there, but when I looked at it in the store it provided nice contrast for both the white and dark brown trim. Well, I can see from here that my paint is dry enough to take a second coat, so I shall be heading off to do that now. I’m note sure what tomorrow’s goal will be, but I imagine it will be window related. 😉
Dollhouse Rehab, Day 2
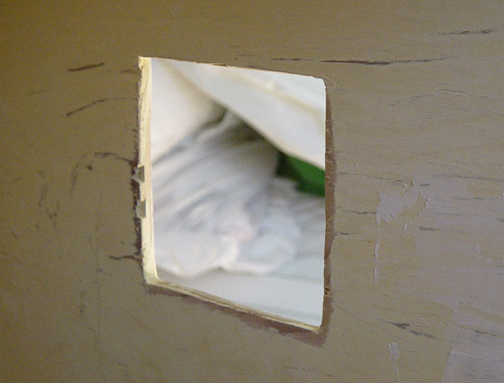
The above pic is what one of the window cuts looked like before I reframed it. I think the before and after shots I will show you will convince you to properly frame out your custom windows and doors! Anyway as you can see, the cut is not straight, and there are a couple chips out of the wood on the side.
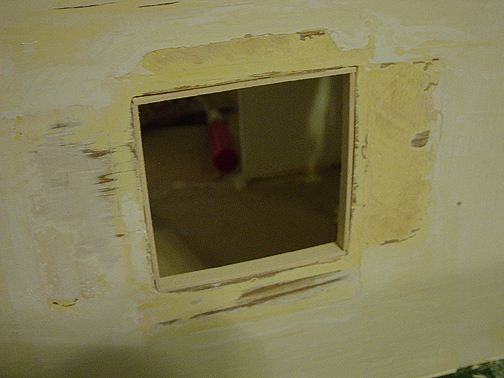
And here is an exterior shot of the same window all nicely framed out. It is now a beautiful, clean square! Hehe….anyhow I spent today reframing all of the windows like this and then I started spackling and sanding the outside of the house to prep it for paint. I want to make sure everything is as baby bottom smooth as possible so painting will be a breeze, and also so it looks good. I am hoping that I will be able to finish all of the exterior spackling and sanding tommorrow so I can begin laying down a coat of fresh new beige paint. Then I will be able to focus more on the inside and start papering/painting the interior rooms and eventually add some nice interior window trim.
Oh, and I almost forgot, I have a more in depth sorta tutorial on framing out your windows from when I made the 1:6 scale house. You can find it in the dollhouses category. 😉
Dollhouse Rehab Part 1
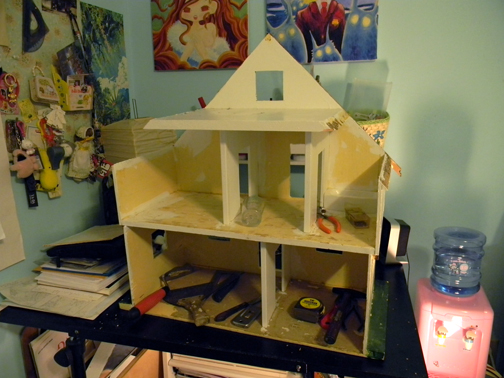
The first task in rehabbing the 1/12th scale dollhouse my grandfather built was to take out all of the old flooring and wallpapers. The wallpapers were mostly easy enough to deal with, except for a few rough patches. I basically just sprayed the walls down with water and then used a straight edge razor to scrape off the wet paper. Some of the paper I was able to pull off dry though. The flooring was another matter however. ^^; First of all, the downstairs floor has a layer of some sort of brown paper-like substance glued onto the wood. I remember a while back when the very original textured wallpaper flooring was pulled up and replaced with carpet, some of the paper was left behind and the carpet and tile just placed on top of it. It looks ugly, but, for the most part, it doesn’t bother anything or make things look bad when covered, so I think I will leave it alone since it’s proving to be a real bear to get off. Even sanding that stuff isn’t yielding fantastic results. The second pain in the rump is that removing that old velveteen carpet was difficult, as lots of little fibers wanted to stay behind and cling to the hardened glue on the floor. Again I used water as a solvent, and slowly but surely pulled the carpet up.
Presumably because my grandfather was just making this for a kid to play with, he didn’t bother to properly frame out the windows and add interior trim. Basically each window hole you see is a pure cut in the wood. This being said, I decided to undertake removing all of the trim in order to properly frame all the windows and add interior trim. Of course this was a very tricksy thing to do because the wood is not only old, but it’s also not the best quality of wood either. Basically I took a spackling knife, and with a hammer, wheedled that knife under each piece of trim and popped them off. Sometimes I had more success than others, and I have a couple “boo-boos”. I’m going to have to take the sander to everything now to clean it up, and spackle my booboos as well as other flaws in the wood.
Finally, I decided that the roof needed to come off as well, for a couple reasons. The first reason is that it was on there a little kaddiewampus. I remember that the roof started coming off a long time ago when I was a little girl….probably from moving it around in the room, so my dad put it back on again and I guess he didn’t bother to be perfect. ^^; The other reason is that it will make it a whole lot easier to frame out the attic window and apply new paint and papers to the upstairs rooms. Right now, the roof is sitting on the floor at the foot of my bed, where my cat is using it as a hidey-hole. XD She’s going to be upset when it goes back on the house!
Anyway, I’m breaking for the night. I’ll resume sanding tomorrow, and then hopefully start work on framing out all of the windows. I went out earlier in the day and got all the wood I needed to do so, plus some extra to make some nifty little swing open windows that I’m going to try to make in the original criss-cross design of the original plastic windows. This means I’ll need more hinges however! Thankfully I still have Xmas money to help me rehab this house. 🙂

