Pullip’s House – Framing the Windows and Doors

dollhouseprog03

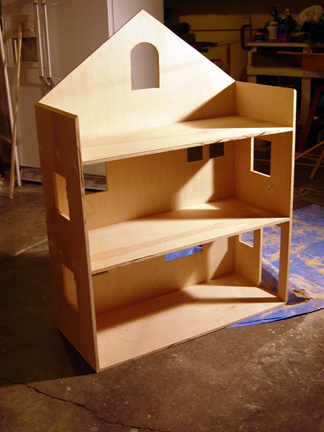
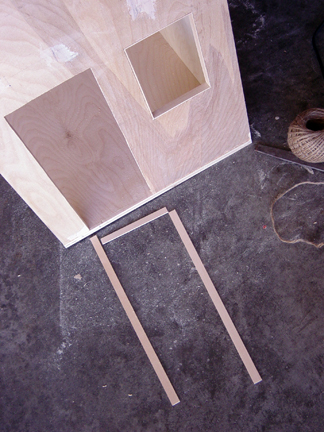
Today I started framing the windows and doors that we cut out yesterday. I’ve begun by taking some 1/16th thick basswood that is 1/2 inch wide as my windows are, and using it make the casing. I had been considering using popsicle sticks, but the longest popsicle stick I could find at the craft store wouldn’t fit the lengths of most of my windows. Anyway you can see a progress pic up above. Since this is very small wood I used a crafter’s saw that is basically like a big X-Acto blade with a serrated edge to cut the pieces to size. I made sure that all pieces were cut to size and had a snug fit before I glued them into place. I think it is worth the extra effort to do this to your windows since it makes a nice clean straight edge, hides any errors you made, and also looks more authentic.

Continue reading more tips about framing windows

Pullip House Progress – Mini Window Cutting Tut

dollhouseprog02

As you can see, we got all of the windows and the door cut out today! It’s finally starting to look less like shelves and more like a little house at this point. 🙂 As it were, it was quite easy to cut out the windows and doors after assembly, but before putting on the roof and base box. You could just turn the dollhouse to which side you wanted to work on and use the saber saw to cut out the window and door holes without need for setting up saw horses or anything. However I would recommend cutting out your door before assembly since the door comes flush to the floor and it can be tricky business to cut it out after being nailed and glued.

I’ve prepared a brief little tutorial on how we cut out the windows and doorway for anyone who is a beginner like me and needs some ideas. 🙂 So read on after the cut for the tutorial

Pullip Dollhouse Project!

dollhouseplan

I had been wanting to build a dollhouse for my Pullip for some time, and I finally decided now was the time to jump in and start building. I’m looking forward to being able to buy cute re-ment to outfit the house, and also I shall be getting a new doll for Xmas, so now I will have a big house for my dollies to live in. It’s so exciting!

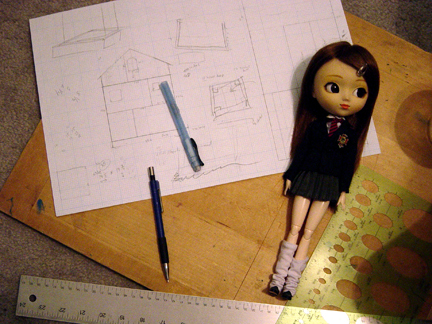
So, first things first, I had to come up with a plan. I really liked a Pottery Barn Kids dollhouse bookcase that was functional, yet also a playscale dollhouse, so I decided to use it as a base for my plans. I planned out everything on graph paper first so all of the measurements would easily transfer to the wood. Then you may also notice in the picture, I plotted out cutting plans on the size plywood I was intending to buy so not only could I get the most out of my wood, but also determine how much I would need to buy. In this case one full sheet and one half sheet was enough to get me started with all of the base construction.

During the planning stage I also used my doll quite a lot to determine the proper height for windows and also the sizes needed for windows and doors. By making to scale paper templates of your window frames and such you can get a cheap and visual idea for how things are going to pan out without spending money, or worse, making mistakes on your precious wood!

Now, I thought I would share some measurements with you, but these can really be variable determining the size of room you would like to have, but after measuring my Pullip and checking up on Taeyang’s height, I decided that I would make each floor 15 inches high, the attic room being the only exception. This will leave about 2 inches of space above Pullip’s head, and about 1 inch above Taeyang’s head. Now you may think to yourself, “well those are some low ceilings” and well, you are correct, but because I don’t want this project to get too tall or unwieldy, I decided I would compromise. Sure it would be fab to have tall ceilings, but I just don’t have the space! However to make things fun I will have the attic room which will have a high vaulted ceiling and I intend to put a dormer on one side of the roof which will add more space and also some interesting architecture. So, if you can’t have it all, at least you can have some of it. 😀

Getting back to the measurements though, I also decided to make the depth of the house 15 inches. This will allow you to put a Pullip sized bed vertically in any room and have it fit. Again, it is tight, but you should consider the space you have. Finally the last basic measurement for the house is that it is 3 feet wide. 3 feet allows for ample space for rooms. I prefer larger rooms, so I plan to only have two rooms per level and I will offset them so one room is larger than the other. For example my bathroom on the second level does not need to be very big, so by making it a 13 x 15 room, I can have a bedroom then on the same level that is almost 2 feet wide! Anyway I’ll be sure to post more measurements for windows and such the further I get into the house construction.
Continue reading behind the cut
Nina’s New Obitsu

ninamod01

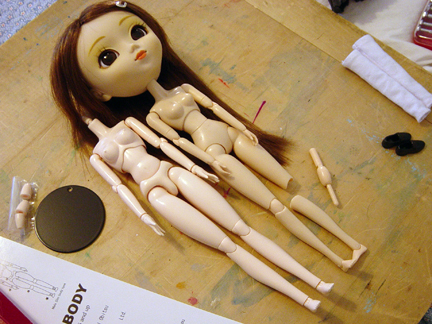
The obitsu I ordered for my Nina arrived on Monday, and I had her new body on her by the evening. I decided to go with the hard bust obitsu because I had heard horror stories about “neck melt” issues with the soft bust variety. However I think honestly I’d probably prefer the 25cm soft bust for aesthetics, but on the other hand I think you get slightly better poseability with the hard bust.

Continue Reading

Dolly Find – Miniatures for Pullip

nina-minis

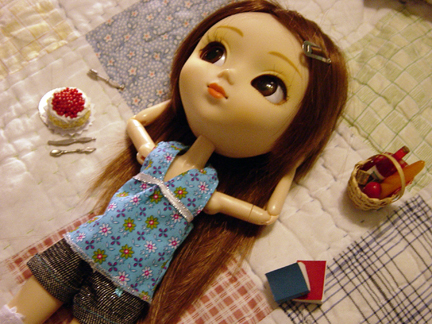
At Hobby Lobby, besides finding the bunny doll from an earlier post, I was also pleased to find that they had a small section of miniatures and dollhouses. None of the miniatures were playscale, but there were quite a few things that you could use with your Pullip or for building a dollhouse for your Pullip. The little shortcake on the left is one of those items that I found there. They also had mini books, silverware, an adorable set of tiny cookies and many other things that Pullip could use.

I was also really pleased to find that they had some dollhouse construction materials like tiny baseboards, crown molding, windows, tiny faux tile, and other things you could use to make a dollhouse for your Pullip. The doors though would be too small for Pullip, but it should be easy enough to fashion your own doors. However they had all of the tiny hinges and other fixtures you would need to make and attach your own door. Although Hobby Lobby’s selection was small compared to a miniature store I visited once, their prices were quite a bit cheaper!