I had gotten into an interesting discussion on DoA about the different types of eyes available and peoples preferences and such which I thought might make for a good blog topic. A lot of this information might be common knowledge to someone who has been deep into the hobby for years, but I think it might be helpful for people just starting out or even for people who have had dolls for a while but never investigated the different types of eyes available.
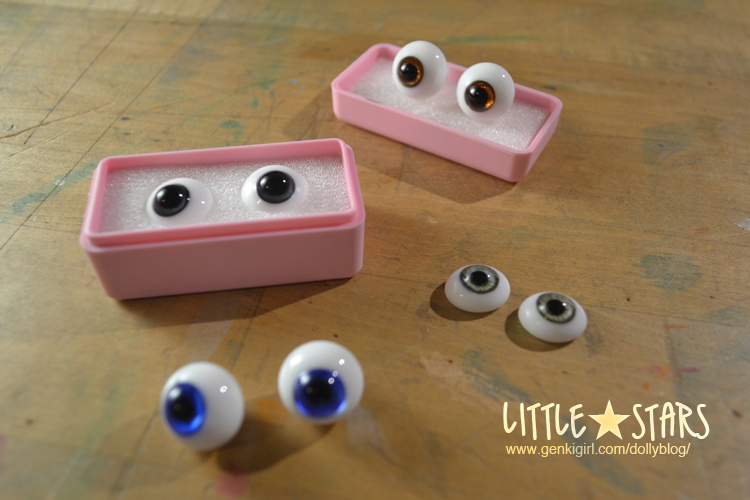
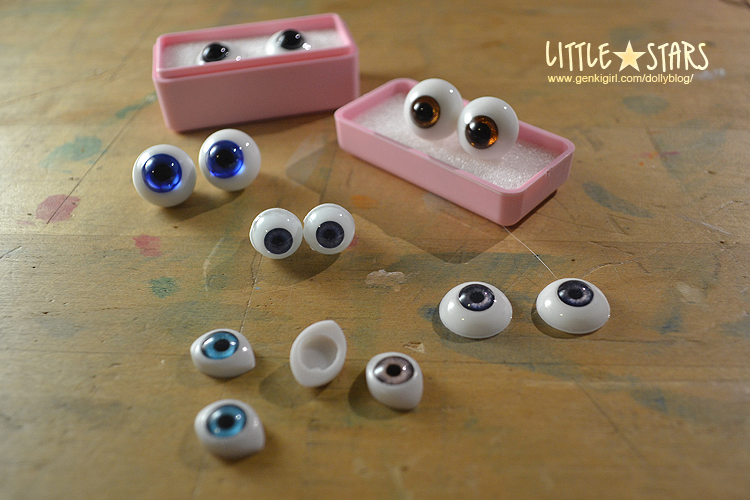
So the first type of doll eye we have are glass eyes. There are a few of mine in the picture below. I have others but I wasn’t about to go removing eyes from my dolls or anything, lol. Glass eyes are naturally, made of glass, and by many doll owners are considered to be the best type of eye. Glass really reflects light the best and can really make an eye light up, but often they will be less realistic than acrylics, silicon and sometimes even resin. It also pays to keep in mind not all glass eyes are created equal. Cheap glass eyes are just that, cheap and often they cannot even rival a good quality acrylic eye.
The blurry set of eyes in the foreground of the pic above are Mint on Card eyes, which were a free gift. The flatback eyes are Miniworld, and the black and brown pair sitting on parts of the pink box are both Dollmore. The black eyes, which if you look closely are actually a very dark charcoal gray are really very good quality. Rather than being straight black, the deep charcoal will give a slight hint of depth in the eye. They are a bit tricky to photograph though as often they will appear just black. The other pair are special Dollmore eyes and are extremely pretty, they have great clarity and the brown glitter in the glass really makes the eyes sparkle. Both of the Dollmore eyes I consider good quality.
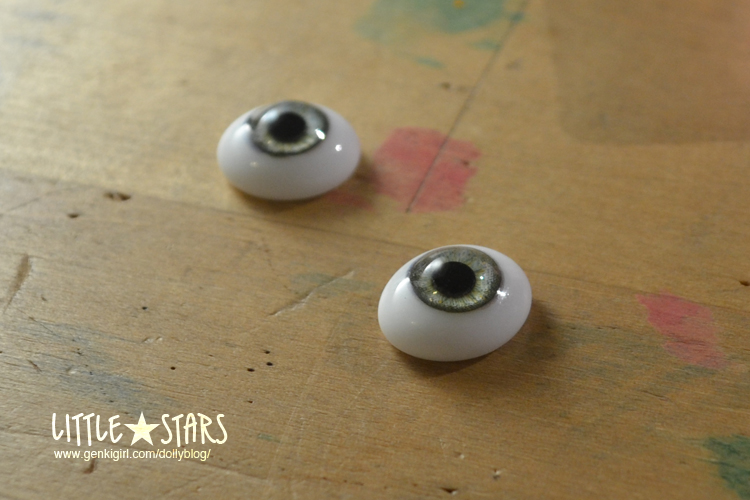
Now on to the lesser quality eyes. Above is a cheap pair of glass eyes from Miniworld. Inside them there is a dotty print in a low lpi of an iris. Of course it has all the transparency and glossiness of glass eyes, but because the iris is some sort of print, it does not really refract the light.
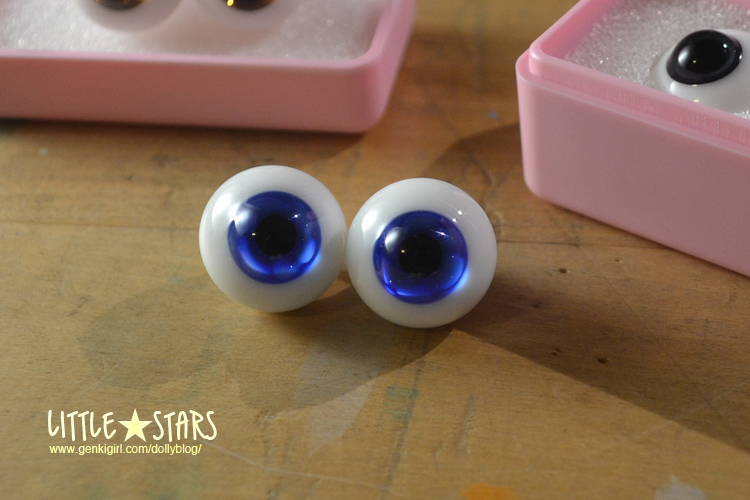
This next set of eyes are from Mint on Card, they are just their basic glass eyes that they sell. These were a freebie so I shouldn’t be too hard on them, but on the other hand, buyers should be informed. These eyes are not as bad as the Miniworld ones, they are all glass and they light up quite nice under the right conditions, BUT they are certainly a very goofy color of blue and the threading which you can just barely see in this shot is irregular. They also seem to like to cast their blue color into the whites of the eye at places as well. If you compare these eyes with the Dollmore eyes, there is no comparison, Dollmore wins.
Next up are silicon eyes, this pair in specific is eyeco A113 I belive. The benefits of silicon eyes are they they are rubbery and therefore can bend and be pushed quite flush in the eye wells of a doll. Their irises are basically a print encased in clear silicon. Because they are a print they can be as detailed and as real looking as a human iris. However because they are a print, they can’t refract light, all sense of light from a printed silicon eye comes from the high contrast of light against dark in the print itself. Another drawback of silicon eyes are that because they are rubbery they can collect dust easily and may need to be wiped with a damp cloth periodically. Overall I do like silicon eyes, you can get some really nice variations of irises and if you have a doll with an odd or irregular eye well it’s easy to squish the eyes in there so you no longer have any hollow spaces around the eyes. I haven’t tried any other silicon eyes besides eyeco though, however people do seem to praise Soom eyes as well.
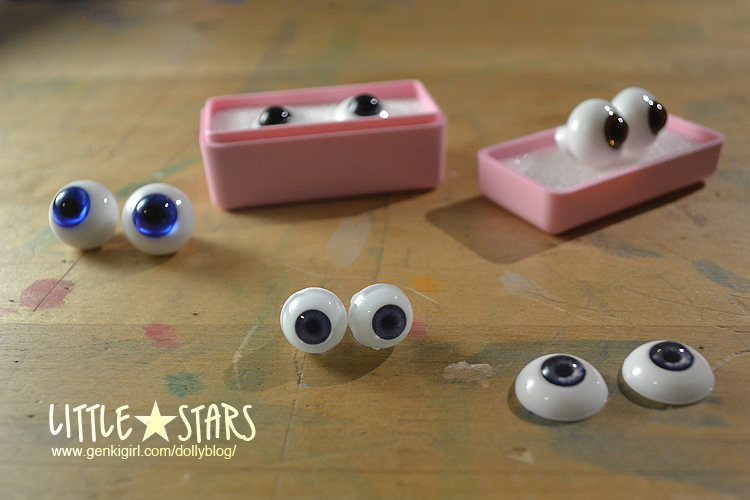
So now draw your attention to the pair of eyes in the middle of the shot above. Those are acrylic eyes and this particular pair happens to be my default unoa eyes in a dark blue. This isn’t my best pair of acrylic eyes sadly and they are just dark and don’t offer much reflection at all. If you want to see a better pair of acrylic eyes then have a look at my Lusis here: http://www.genkigirl.com/dollyblog/?p=1168 Her current pair of acrylic eyes can light up a little bit similar to glass, but not nearly as well as glass. So, acrylic eyes usually also rely on a print of an iris that is set under plastic. Occasionally you can also find hand painted irises, but those are kind of rare. Another benefit of acrylic eyes are because it’s a print, many different types of eyes such as cat eyes or fantasy eyes with symbols embedded in them can be done.
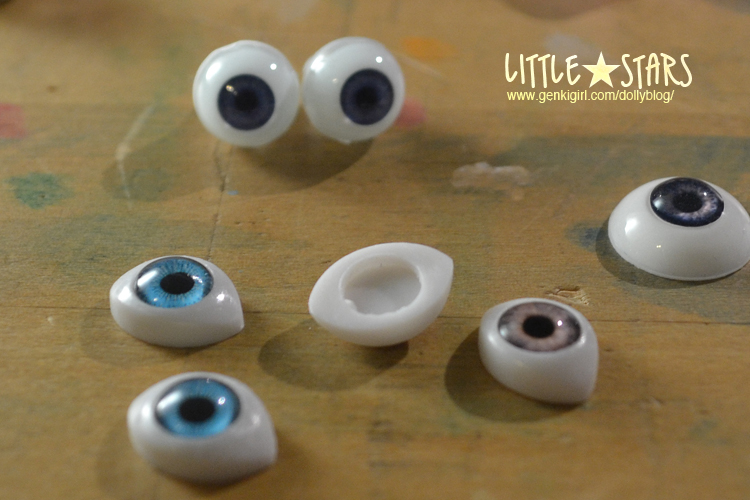
As with glass eyes, acrylic eyes can be good or bad quality. In the above pic you can see the worst quality acrylic eyes I have which came standard with my AE Yara. They are little hollow flatbacks in an odd shape that you can really play with to angle up, down or side to side because usually you wind up seeing the side of the eye and having a gap. On top of this the iris section of the eye is a completely different plastic part and there is a visible seam between the iris and white of the eye. The print of the iris isn’t anything to write home about either.
The last type of eye I will talk about are resin eyes. I do not have any resin eyes yet, but I do know that they are the best at imitating the reflective qualities of glass. Their only drawback is that like your dolls, they can yellow over time, that and they are often very expensive. Enchanted Doll sells eyes for $50 a pair, but they are definitely beautiful and something I might like to own one day.
So, in the end basically remember this….you get what you pay for…If you buy a cheap pair of eyes, that’s what you are often getting, something cheap. A really great pair of eyes can make a big difference in the way you doll looks and is photographed.
Here’s a quick list of the eyes in this post: Miniworld glass flatback, Mint on Card glass eyes, Dollmore glass eyes in Y03 (black), Dollmore Special glass eyes ET27 (brown), Asleep Eidolon acrylic, Unoa default acrylic, eyeco silicon A113. I will also be posting the “group shot” of eyes on my flickr and annotating them.


