Little Rebel Seven – Face-up!

seven-faceup700w

I finally had a chance to give my Seven a face-up. It actually took 2 tries since I bungled the first iteration of this face-up and had to wipe it off. ><;; Anyway I just feel excited because I feel like a "leveled up" in the face-up department with my last two dolls (Zaoll Luv and LR Seven). I still have a long way to go I think, but I am starting to feel more confident. This face-up is also my first time painting the face of a boy doll. I was really nervous about attempting this, but as it turns out it's not much different from painting the girl's faces. I still need to get my Seven a proper wig, pair of eyes annnnd yeah, even a body. ><;; I'll be tackling the wig and eyes first since they are less costly and I'm still trying to hold onto my savings since I'm also still hoping for a Supia event with a boy re-release. Oh well, it gives me lots of things to look forward to in the end. I just hope I can get him a body before the end of the year.

Zaoll Luv Face-up!

I finally had the time to give my Zaoll Luve a face-up, and I must say that it’s the best face-up I’ve done so far! It’s always nice to have a breakthrough art-wise and also I am very much smitten with my Luv now. X3 Actually this wasn’t the first time I attempted to give my Zaoll girl a face-up. I attempted it when she first arrived, but my liner decided to smear and frustrated I wiped her and put her away for a little bit. Then when I came back to try again I had another goof that I had to completely wipe her face again. After two failures I started to wonder if maybe the Zaoll sculpt and I weren’t going to get along, but then the third time worked perfectly, so I guess it was a “third times a charm” moment.

zaollweb

Anyhow I think she’s just s pretty as can be now, and I am so very happy to have her. :3 Next up I still plan to make her a custom wig, but I do really like her in the monique wig I just bought, so who knows what her hair will be like in the future. I am thinking I also want to change her eyes. I really love the blue glass eyes, but I think they may be a bit large for her. I’m probably going to go get a consensus about good eye sizes on DoA. Well that’s it for now, but I will have a small photoshoot to share later!

Second Wig Cap + Tips

So I decided I wanted to try to correct the flaws in the first wig cap and went on to make a second. I was successful in fixing some of the problems in the first wig cap and now I figure I will use that first wig cap for testing purposes. Anyway on with my findings…

eartamp

So the first thing I did to prevent the tenting around the ears is I used a rubber band and attached it across the front of the face from ear to ear. Above is the side view, and I’ll show the front side view below for better understanding. 🙂

eartamp02

So, doing it this way across the front of the face basically it helps keep the rubber band out of the gluing area on the nape of the neck. It also successfully tamps down those ear tents that happen for a much more form fitting wig cap.

wrinkles

The second problem I encountered while making the first wig cap is that the fabric likes to wrinkle at the base of the neck and this makes for a less than smooth wig cap.

wrinklemigration

You can solve this by pulling all of the fabric over the ear so the wrinkles wind up in the front of the face where they will be cut off anyway. In the pic above I still have a couple wrinkles I need to move forward from the ear area, but with a little time it’s pretty easy to shove all the fabric around so the wrinkles are in the front.

wrinklesgone

And here’s the back of the head now with most of the wrinkles gone. Any wrinkles left over are below where I plan to glue.

secondcap01

And here is the finished wig cap after I went through the gluing and trimming process. As you can see the cap around in the ear area is no longer sticking up.

secondcap02

The left hand side still has a skooch-a-bit of a fly-up, but I figure that with the gluing of the wefts later that it will tamp down nicely. So, I think that about covers it for my experience making a wig cap using Loctite’s flexible vinyl adhesive. I now plan to start on wefting experiments using some cheapo costume hair. When I have enough info to share I will surely make another blog post!

Dollstown Elf Body Arrived!

Kyaaa-h! I’m so excited that my Dollstown elf girl body arrived today! It was actually a little bit torturous because I had to go out to get my hair cut this afternoon right after the package arrived so I had to wait until late this afternoon to open the package and then I was interrupted by the need to fix dinner. Anyhow enough preamble, lets just get on with the pictures!

boxopening01

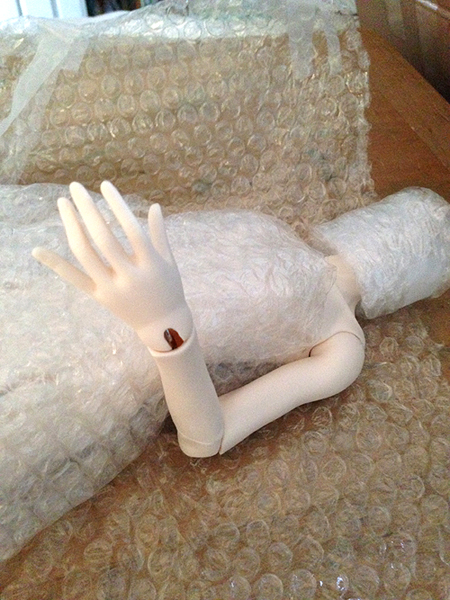
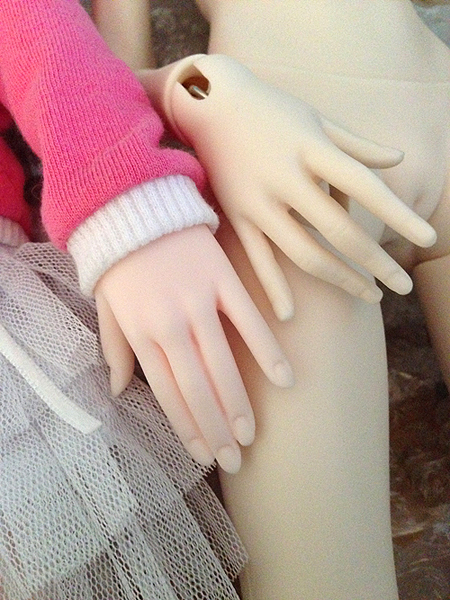
I didn’t actually take too many box opening pics and what I did take are with my cellphone camera. I was really wowed though after taking the bubble pack off the first hand how delicate the fingers are and then I immediately went to open the second packet of bubble pack encasing the second hand and I had a sigh of relief that nothing was broke, lol. The hands of the elf body are slender and each finger is separate, but despite their delicate look, they are not tiny, in fact later when you see the comparison with the Zaoll body you will see they are close in size to the Zaoll hands.

dollmoredollstownresincompare01

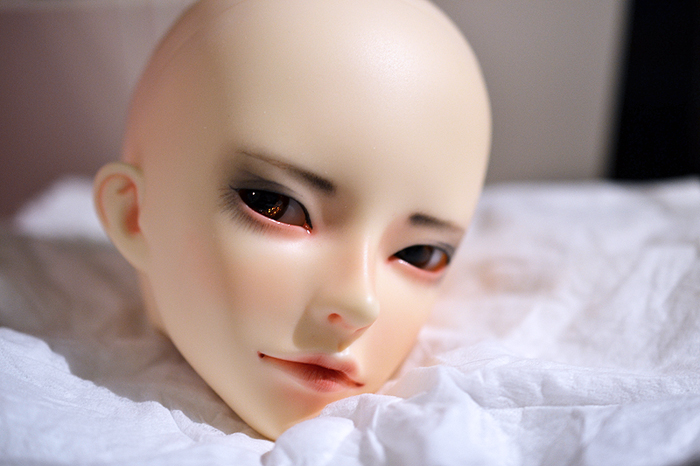
Here is a resin comparison between Dollmore’s normal skin and Dollstown freshskin. They are actually very close, but Dollmore’s resin has a slightly warmer pinkier cast, however this difference is not horribly noticeable which hopefully you will be able to tell by all of the comparison and hybrid photos I took. In the end if I blush the dollstown body with some pink I think that the difference will be imperceptible, so if you were thinking to make a Dollstown/Dollmore hybrid, this is a very viable option for you.

zaolldollstownresincomparison

And I thought I’d throw this in here, but it’s a Zaoll / Dollstown freskin comparison. As you can see, Zaoll is very pinky, so if you wanted to do a hybrid with a normal skin Zaoll, you would have a lot of blushwork ahead of you. ^^;

miodollstownelfBA

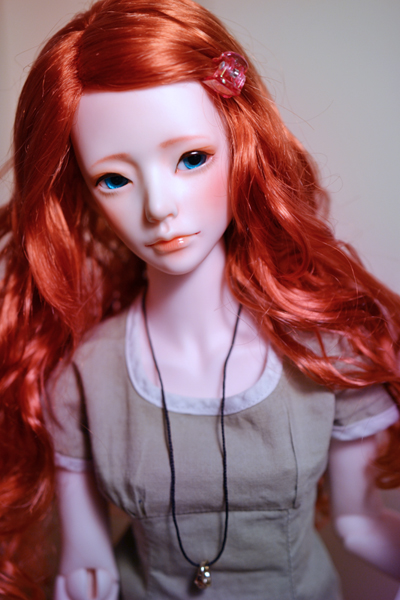
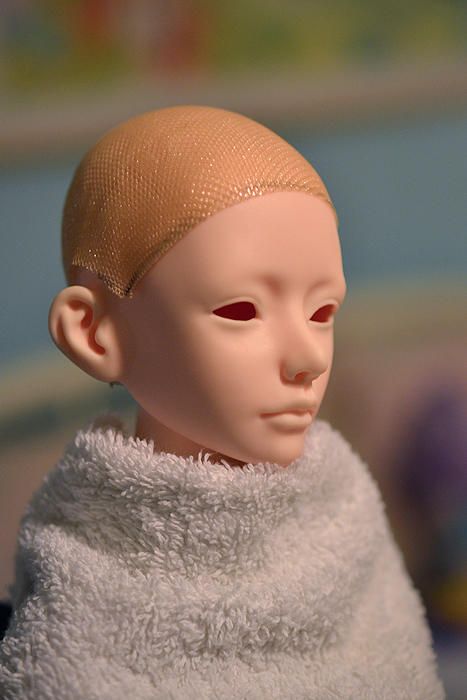
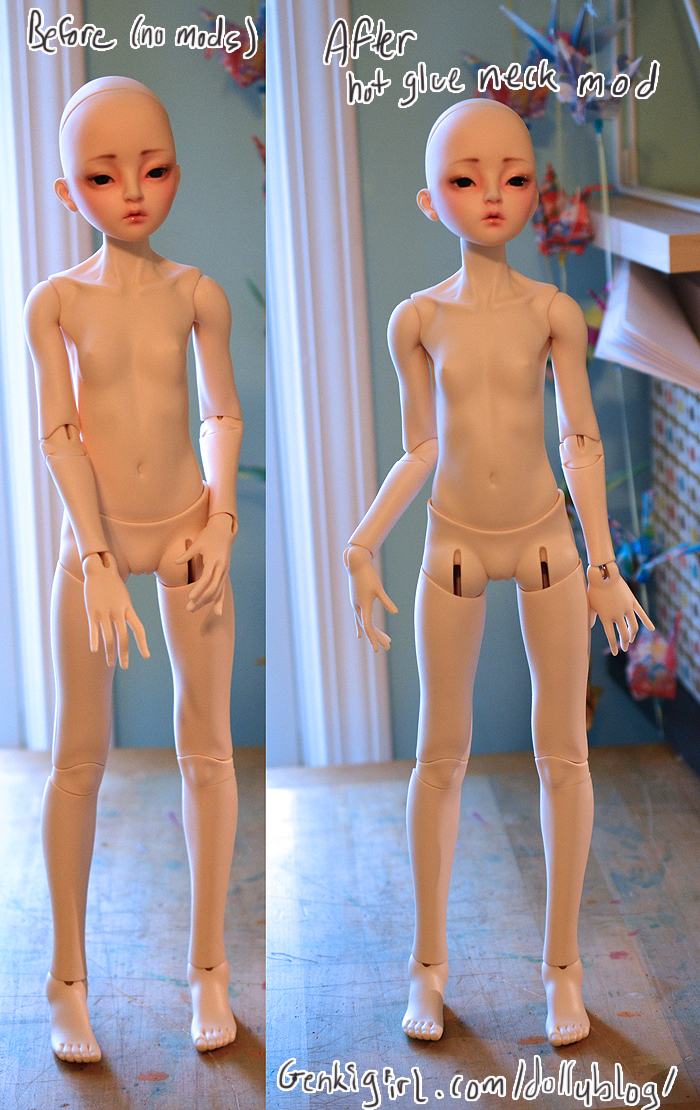
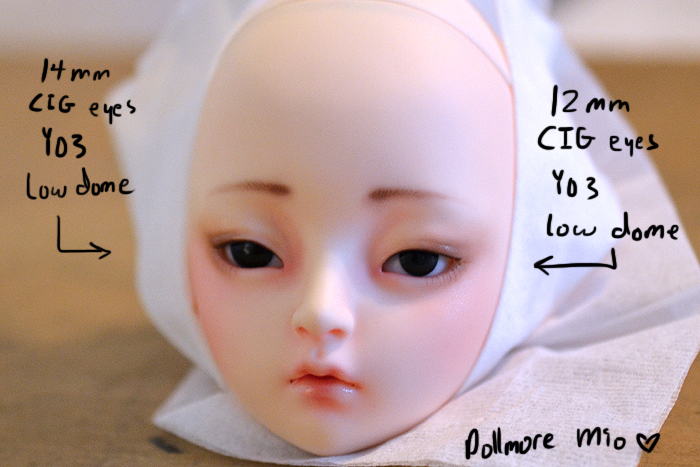
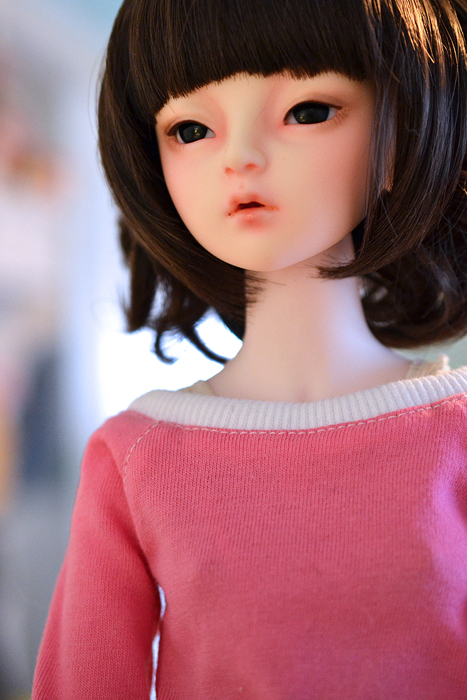
Ok, so here’s my Dollmore Mio head on the Dollstown elf body. The first shot is me just popping the head on the body…unfortunately the elf neck is a bit short so I added some cool temp hotglue to the inside of Mio’s neckhole. The after shot is after about 1/4inch-ish of hotglue applied to Mio’s neckhole. I think it’s a pretty big improvement, but I think in the end I may order one of those neck ring things coolcat sells after I get back from vacation. The hot glue essentially suedes the neck joint and I feel it makes it a little more difficult to move her head and takes away a little bit of mobility, at least in my opinion. Size wise I’m happy with the size of the head on the body. Zaoll and the Dollstown elf body have just about the same shoulder width measurements of a little over 4 inches or between 10 and 11cm, so it’s not much different than she used to look. I know a lot of people have their own preferences for body to head ratios, and some people may consider her “bobble headed”. but to me she is fine. 🙂

zaolldollstowncomparison

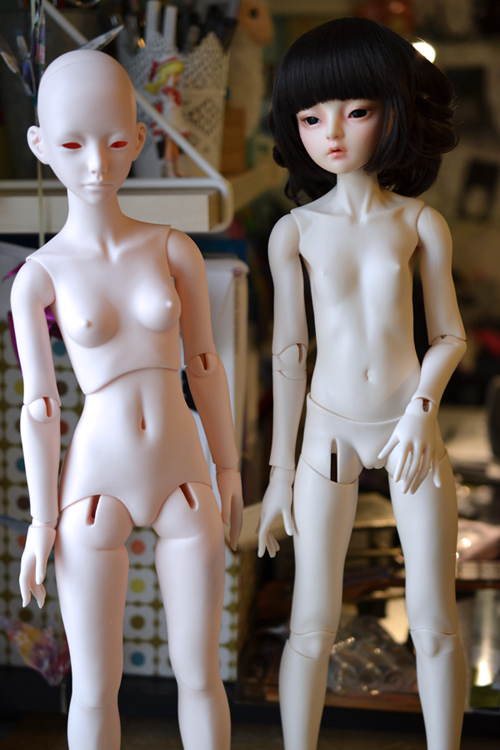
Here is a quick comparison shot of Mio on the elf body next to Zaoll. My apologies that my Zaoll has no eyes or face-up. ^^; I need to wait for a warmer day to give her a face, and at this point it probably won’t happen until after my vacation. So in comparing these two bodies, the elf body is a little bit taller than Zaoll and that height comes from her legs. The torso’s of both dolls are about the same length. Zaoll of course has curvier hips and a bit larger bust, her legs are also a bit thicker.

miozaollclothes01sharp

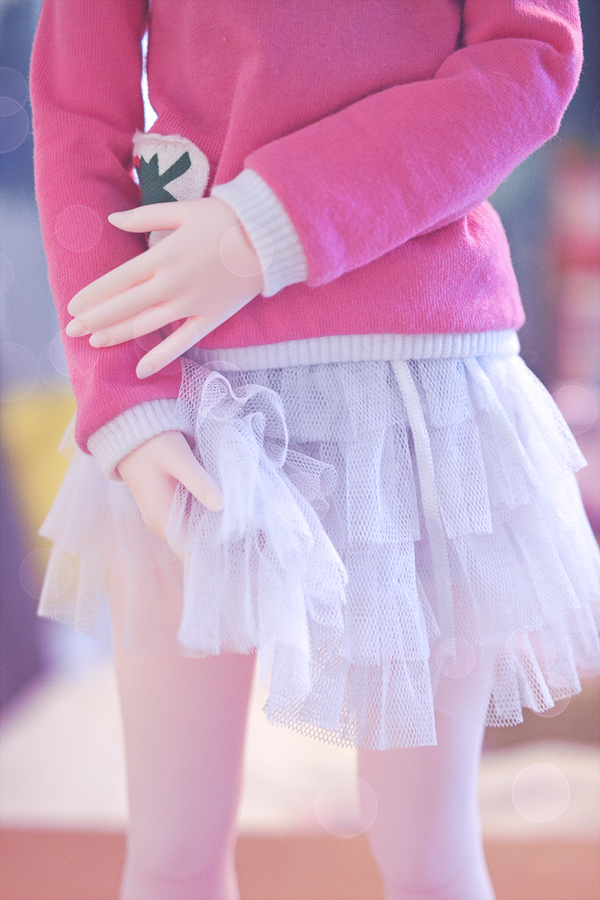
Clothing wise, the elf body can swap clothes with Zaoll, BUT, because Zaoll has more width in her hips, clothing like underwear and pants will be a bit loose.

miozaollclothes02

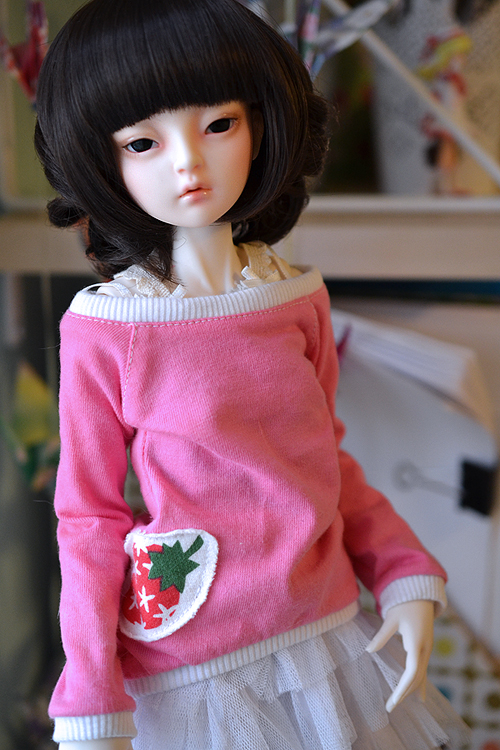
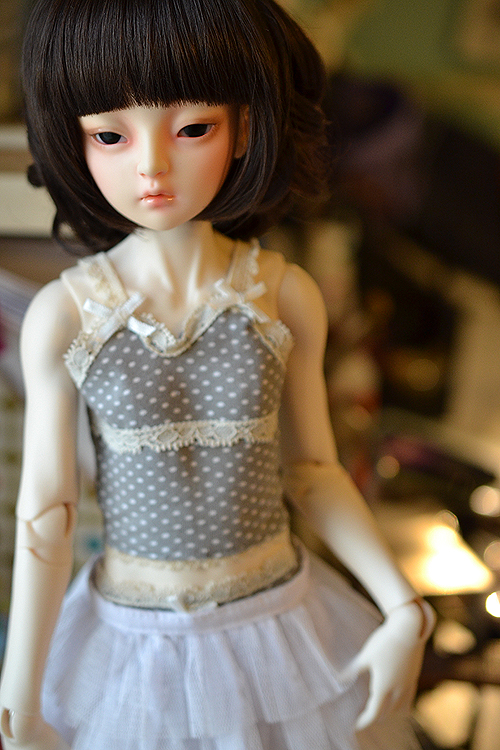
And she can still wear the Dollmore SD girl top I bought for her when she was on the Zaoll body. Oh and I should also mention that Zaoll shoes also work for the elf body as well. 🙂 Though I only have the white mary janes from their website. Well, I think that’s about it for the info. Overall I’m super happy with this hybrid, though on occasion when I glance in her direction I think her neck may still be a smidge too short, but overall I’m just super smitten with Mio in general. X3 I can’t wait now for the weather to stop being quite so bitter cold so I can blush the new body and I think I also need to re-do Mio’s face-up since she was blushed to match the Zaoll body. For the time being though she is fine.

New CIG Eyes for Mio and Customs Update.

I was surprised today by two things. One was that my Captured in Glass Eyes I ordered earlier in the month showed up and the second thing was that my Dollstown elf body has made it out of customs! I am hoping since Chicago is close that I might receive the package tomorrow, but if not tomorrow I feel confident that it should definitely show up by the end of the week. I can’t wait to get my hands on the new body and I am crossing my fingers and hoping that a hybrid with my Mio head will go well. Then my Zaoll can get her body back, lol. Anyhow enough about that, on with the eyes. 🙂

mioeyesinfo

I ended up ordering two different sizes to give them a try in Mio as you can see from the pic above. Even though all the info is in the photo, I will reiterate it here, but I ordered Y03 low dome glass eyes from Captured in Glass (CIG). The lighting isn’t the best in this photo, but for the most part the Y03 color photographs black, which is what I wanted so I am totally cool with it. In person the eyes are a very dark gray with a slight blue tinge to them when you look at them up close. They are very similar to Dollmore’s Y03 glass eyes…so similar in fact you might suspect them as being the same eyes. When Mio is wearing the 14mm eyes, she looks more relaxed, and the 12mm eyes make her look more alert. In my opinion I think the 12mm are a bit small for the Mio headsculpt, especially if you want a light colored eye, because I fear she would look startled rather than just alert. In the end I decided to use the 14mm for Mio and I gave the 12mm eyes for my Withdoll Taren to try.

mioneweyesfin

And here she is looking all proper with matching eyes. XD Oh, I also wanted to mention….Dollmore lists Mio’s eye size as being 16mm and this is far too big!! So please save yourself some grief and buy 14mm eyes for Mio!

wreckedeyes

Here is what happened to Mio’s old eyes. These were the acrylic Dollmore eyes that came with my Zaoll. As you can see they are all cracked and starting to get a hazy look under the plastic. :p I’m not quite sure what happened here. I don’t know if perhaps the sculpey they put the eyes in with caused the eyes to go bad, or…..well I think I mentioned this before, but the very edge of my Zaoll faceplate (behind the ear and hidden) has a chip out of it. D: I think this happened because it was dropped at the factory/store because there was no resin chip in the packaging anywhere. So it could be that when the faceplate fell it jarred the eyes enough to start a crack, and once an acrylic eye gets a crack, more cracks start blooming all around. In the end I plan to save the wrecked eyes and use them when I am sculpting so I don’t jack-up any of my good eyes. May as well I figure.

mioskirt

And somehow while I was changing out her eyes, she wound up grabbing her skirt and I thought it looked cute so I took an extra shot. XD I played around with photoshop a little and did some post processing. I usually use PS for illustration, not photo processing, so this is another thing to learn for me! Well, hopefully I will have more news to tell later this week when I hopefully get my Dollstown elf body, so I’ll blog at you later. 😉