Second Wig Cap + Tips

So I decided I wanted to try to correct the flaws in the first wig cap and went on to make a second. I was successful in fixing some of the problems in the first wig cap and now I figure I will use that first wig cap for testing purposes. Anyway on with my findings…

eartamp

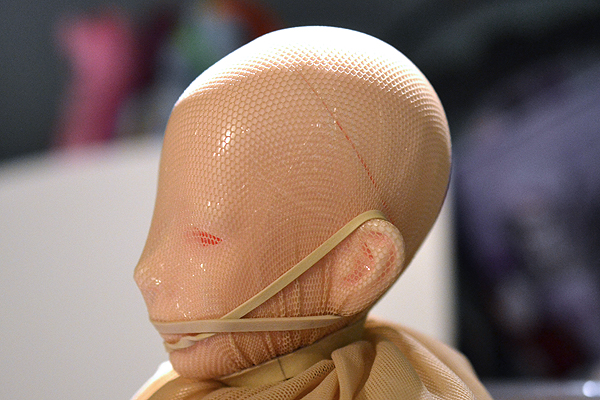
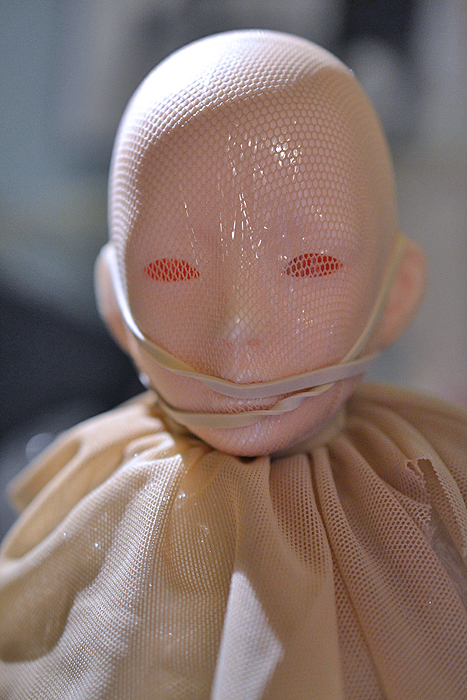
So the first thing I did to prevent the tenting around the ears is I used a rubber band and attached it across the front of the face from ear to ear. Above is the side view, and I’ll show the front side view below for better understanding. 🙂

eartamp02

So, doing it this way across the front of the face basically it helps keep the rubber band out of the gluing area on the nape of the neck. It also successfully tamps down those ear tents that happen for a much more form fitting wig cap.

wrinkles

The second problem I encountered while making the first wig cap is that the fabric likes to wrinkle at the base of the neck and this makes for a less than smooth wig cap.

wrinklemigration

You can solve this by pulling all of the fabric over the ear so the wrinkles wind up in the front of the face where they will be cut off anyway. In the pic above I still have a couple wrinkles I need to move forward from the ear area, but with a little time it’s pretty easy to shove all the fabric around so the wrinkles are in the front.

wrinklesgone

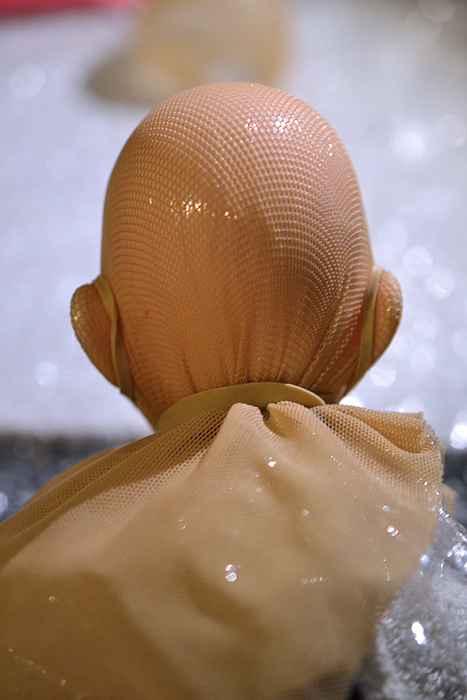
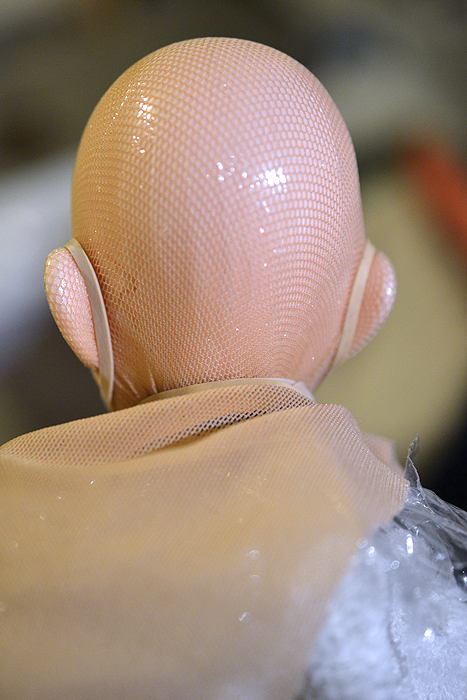
And here’s the back of the head now with most of the wrinkles gone. Any wrinkles left over are below where I plan to glue.

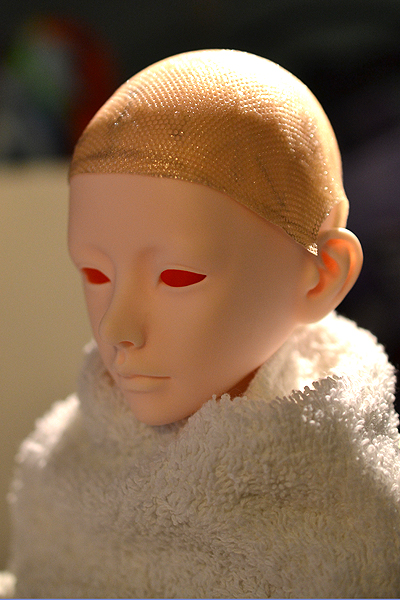
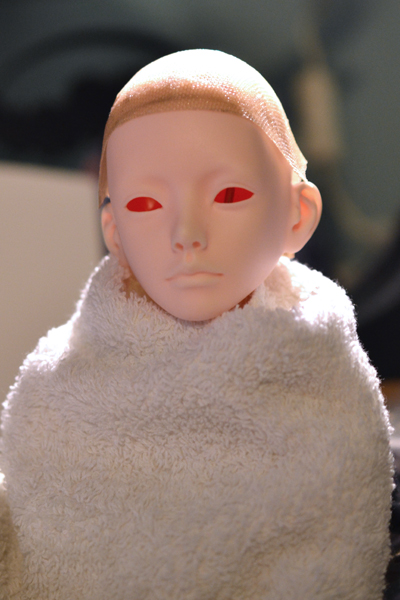
secondcap01

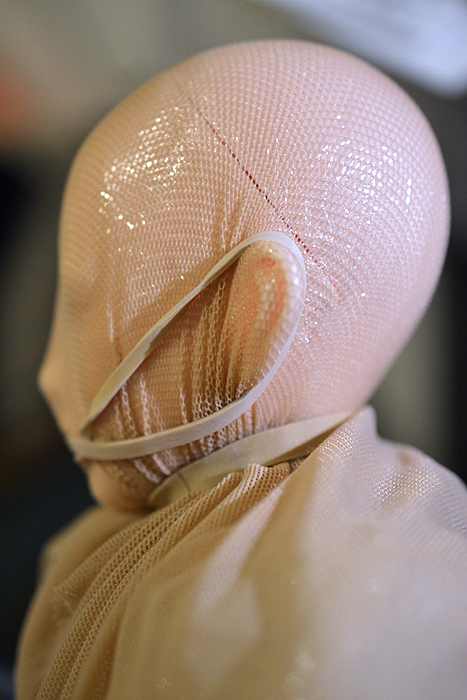
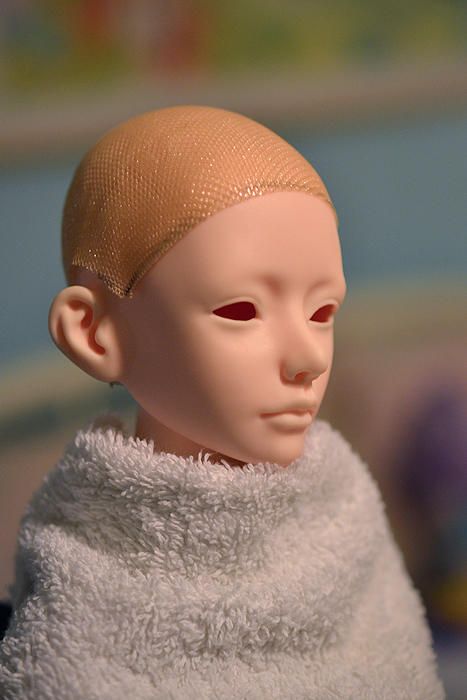
And here is the finished wig cap after I went through the gluing and trimming process. As you can see the cap around in the ear area is no longer sticking up.

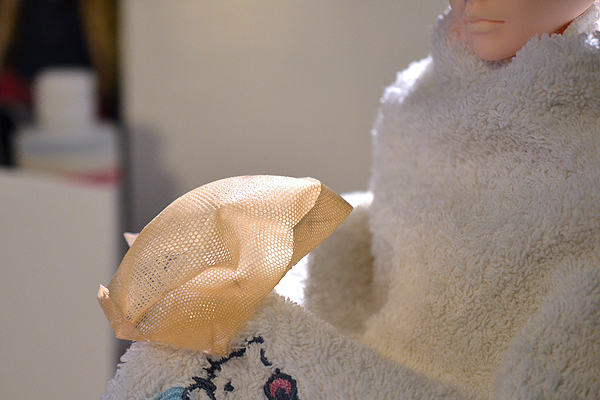
secondcap02

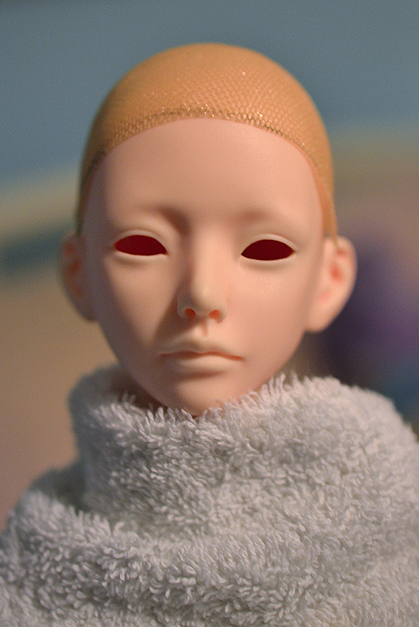
The left hand side still has a skooch-a-bit of a fly-up, but I figure that with the gluing of the wefts later that it will tamp down nicely. So, I think that about covers it for my experience making a wig cap using Loctite’s flexible vinyl adhesive. I now plan to start on wefting experiments using some cheapo costume hair. When I have enough info to share I will surely make another blog post!

Glue Testing for BJD Wig Making Part 2

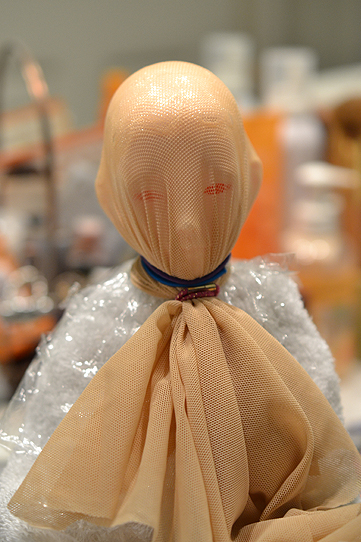
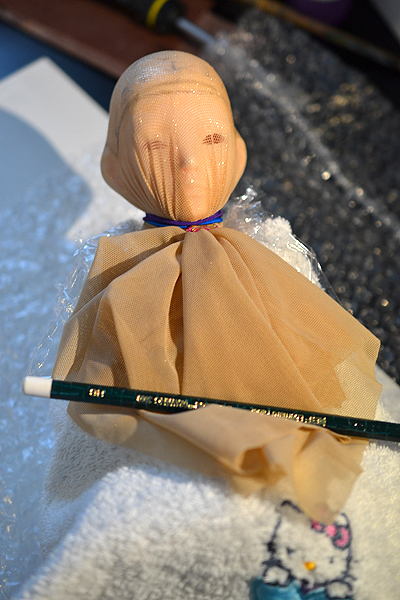
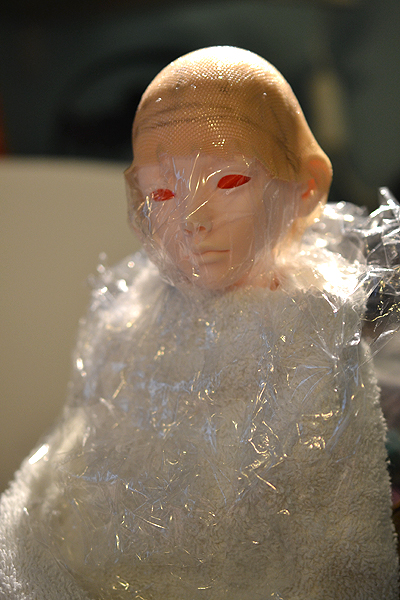
So I continued with my tests in the first part of this post and I went ahead and made a full wig cap using Loctite’s vinyl/fabric adhesive and the power mesh material. Following the directions in the wig making tutorial on DoA, I wrapped my Zaoll’s head in saran, covered her body in an old washcloth and then used old hair bands to stretch the power mesh fabric over her head.

glueprocess01

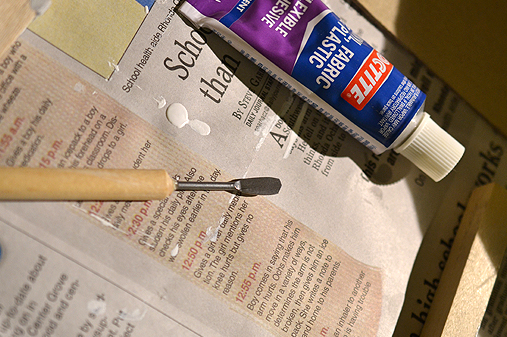
Here she is after having the fabric stretched over her and one application of the glue. I should also mention that is it going to be helpful to have a tool to spread this glue because it is very messy and is not pleasant to get on your fingers. I used this small metal spatula shaped clay tool which you can see below.

claytool

The glue is easily washed off the metal tool after you are done applying the glue, and if you happen to accidentally leave some glue on it you can easily scrape it off since this glue does not bond to metal well. After you apply the first layer of glue you need to let it dry for about 2 hours, then I recommend you add a second coat for durability.

glueprocess02

Here’s my girl now with her glue all dried and I started drawing out the hairline where I plan to cut the cap. It was recommended in the tutorial that you also mark which direction you want your hair to go, this is helpful if you are gluing small batches of hair at a go and have a complex hairstyle. For me I have pretty much decided to use a synthetic fiber that I plan to weft, so I only marked the top center and a few directional lines. Also my hairstyle plan is not very complex. You should do what you feel will be best for you.

trim01

Here I did a rough trim, just taking off the excess fabric I had. In the next step I plan to cut along the lines I drew for the hairline.

trim02

Here I have the cap mostly trimmed to where I want it to be. I may need to take off a little more, but it’s always best to cut off too little rather than too much since too much and you have to start over again.

problem

Here’s the front of the wig cap…one thing that I feel is a problem is that it sticks up a bit around the ears since the fabric naturally tented around the ears when stretched. I don’t know if there is a way to prevent this from happening, but I think I am going to try making another wig cap tonight and I will do some more experiments. Overall though I think it’s a pretty stable wig cap to apply hair to. Here are some of the pros to using this type of glue….

flexible

The first pro is that it’s flexible, you can flip the wig cap inside out if you want to. It doesn’t have much stretch though, especially with 2 layers of glue.

watertight

The second pro is that it’s watertight. It may be hard to see in the pic above, but I poured water from the tap inside the wig cap here. Because the glue is water resistant this means you can use synthetic fibers like saran and nylon and be able to use all of the wet styling methods for these fibers. Though I imagine this opens up wet styling methods to natural fibers like mohair as well. Also because this wig cap can get wet you can also maintain it like you would a normal wig, like giving it a wash or using conditioning treatments on it.

One last pro for using this glue is that because it’s rubbery, there is more friction when it’s on your doll’s head so it is less likely to slide off or around on you. Actually this fact makes me want to try a silicon glue next because maybe you can make wig caps straight out of that and have all the benefits of a silicon wig cap inside your actual wig.

The things that are not good about using this method is that it stinks. You’ll want to apply the glue in your bathroom with the bathroom fan running. Let me be clear and say it’s not particularly toxic like spraying with sealers as there are no particles than can find their way into your lungs, but if you have sensitive sinuses the odor could give you a headache. When the glue is dry however it doesn’t smell anymore, it’s only when it’s still wet does it smell.

The other con would be the dry time. It takes 2 hours to dry, though I applied my second coat of glue a bit sooner than that since it was dry to the touch before then. The last con would be the price. Each tube runs around $3, which compared to inexpensive PVA glues at $1 a bottle and more glue per bottle, well I think you can see the difference. This being said though $3 for a polyurethane based glue is not a bad price, and you do have all the benefits of a polyurethane glue.

Well, I will have more info for you as I continue my experiments. Right now the Loctite glue is working well for me, but I haven’t actually applied any hair or tried to make wefts yet, so I don’t want to pass judgement on this glue just yet. 😉 Anyway more to come!

Glue Testing for BJD Wig Making

After being inspired by the “Crafting your own custom angora wig” tutorial thread on DoA, which is here if you are a member, I started to think I might like to try to craft my own wig too. I read through the thread about what glues to use and etc.. and then I thought to myself, why not try to use Loctite’s Vinyl, Fabric and Plastic flexible adhesive. It is waterproof, completely transparent, and FLEXIBLE! On top of this the base of this glue is type of polyurethane which in theory should make it safe for use on our polyurethane dolls. I have also used this glue in the past to plug up holes in the heads of Monster High girls, so I already know it’s safe on vinyl and doesn’t have any bad reactions to saran hair.

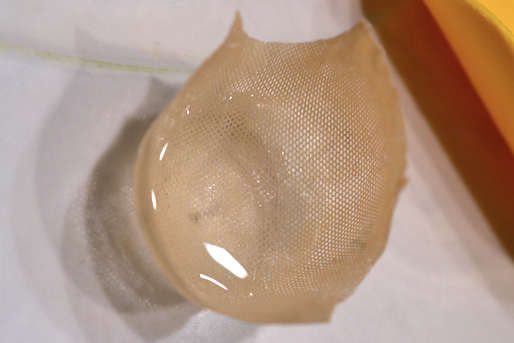
So, the first thing I did before going whole hog on making a test wig, was to test the glue with the material. I used power mesh fabric which is the fabric I bought for making wefted wigs a while back. I wrapped a highlighter with saran wrap and using rubber bands I stretched the test fabric onto the saran covered highlighter. Then I applied some glue to the test strip and spread it around with my smallest palette knife. I left it for 2 hours to dry and here are my results below.

glue-teststrip01

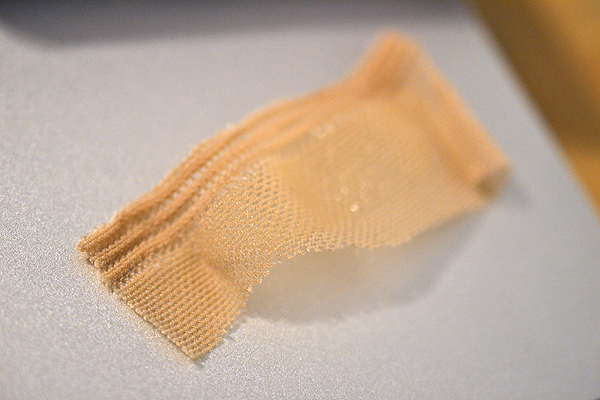
I was really happy to find that the glue peels right off of the saran. That was my first concern, that possibly the glue could bond to the plastic thus not being a viable option for wig making since nobody wants a layer of saran wrap inside their wig. XP Thankfully it does not and it also peels off with ease. The above picture shows the side of the fabric that was pressed against the saran. It’s a little shiny, and because it’s a rubbery material it provides some friction which is an added bonus because that means it won’t slide off the dolls head as easily.

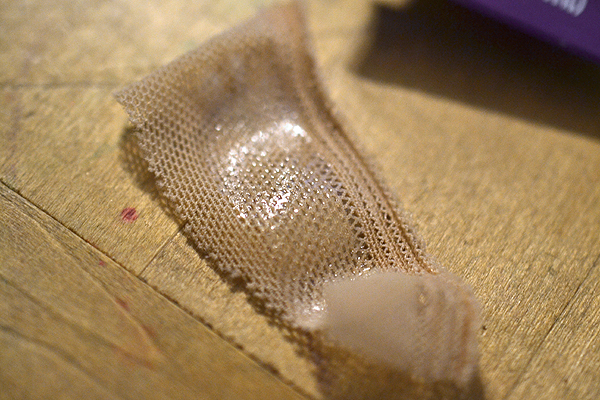
glue-teststrip02

This is the top side of the fabric that was not in direct contact with the saran, note how you can’t see any shininess from the glue. 😉 This glue dries perfectly clear and it will stretch a little bit. There is a decent amount of stretch along the grain of the fabric, but much less stretch against the grain. Stretching too hard against the grain (to the maximum you can stretch the fabric before ripping the fabric) will cause some warping of your fabric and you run the risk of tearing the glue. My suggestion would be to use two coats of glue for added stability before you even begin applying any hair.

glue-tubetest

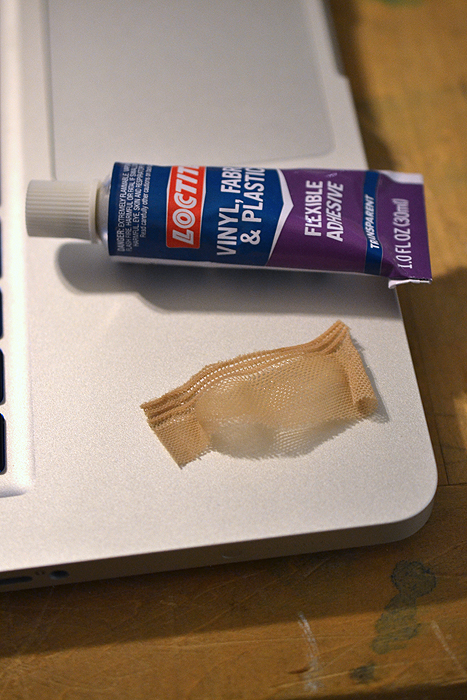
And here’s a final shot of the tube of glue that I used next to my little test strip. So far one of the potential drawbacks to using this glue is the wait time. You have to wait around 2 hours for it to dry. Another drawback is that with excessive stretching the wig cap can become misshapen. I am going to continue on with my tests since snow storms are keeping me inside and I will continue to report my findings as I go. My next step is to create a full wig cap for my Zaoll luv and then I should have more information for you.

SD Room Box – Flooring

I’ve been meaning to blog about the room box flooring for a while now, but it’s been so busy around here and then my Taren arrived, heh. Anyway I’ve made quite a lot of progress on the floor so now I feel I can make a substantial process blog about it. So without further ado, here is how I went about making my room box floor.

miterbox

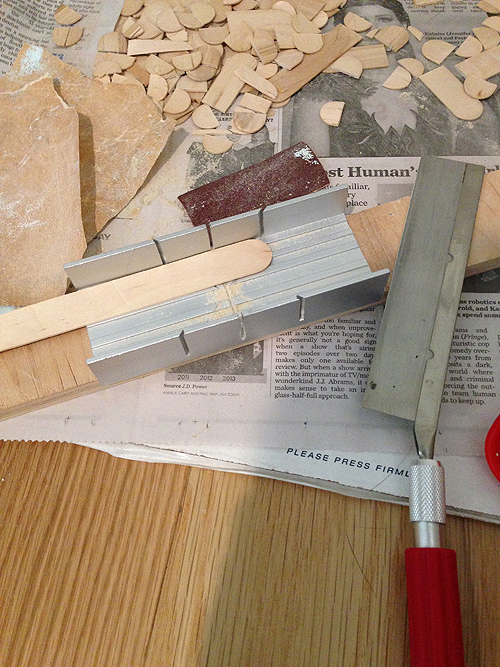
So, materials wise I thought I would try using craft sticks, the jumbo variety that look like tongue depressors. With my craft saw and miter box I sawed off the rounded ends and then started gluing them to my plywood base.

woodfloor

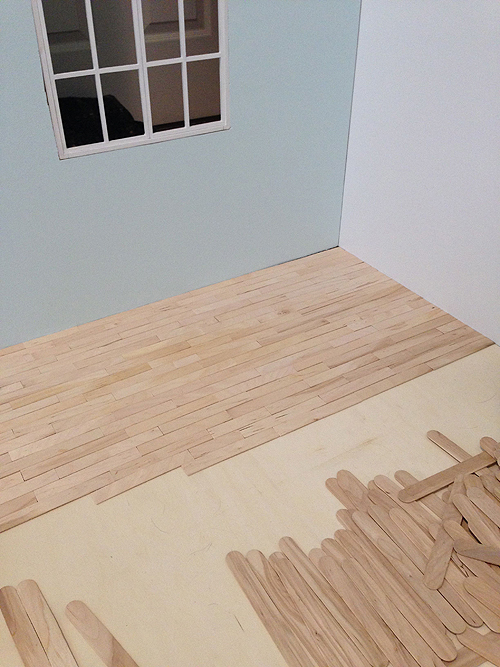
Here is a progress pic of the gluing process. I also want to mention that you need to be sure to have some heavy objects to weigh down the planks of wood after you glue them because glue is wet and causes the wood to warp slightly before it dries. Weighing down your floor will keep things more uniform and save you from having wood planks punking up from the base in an unsightly manner. I suppose I should also mention that I did not cut all my wood and do a test layout of the whole floor. I worked two rows at a time and just made sure that none of the end seams lined up. I wanted the floor to look as close to a real hardwood floor as possible so I strafed all of the board ends and tried to make it as random as possible since real floors are random, well at least ours is.

floorproblems01

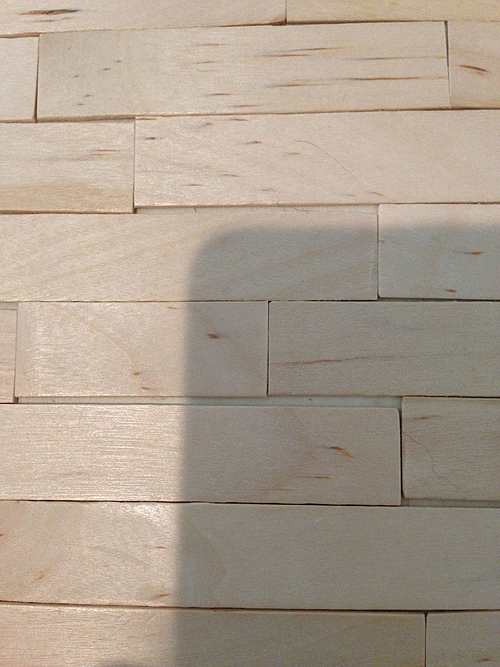
So, you are definitely going to encounter problems when working with craft sticks, and the above picture is one of them. Because craft sticks are not uniform in size and some warp slightly you are going to get gaps between boards, especially when you are working at 1:3 scale. To solve this you will need to fill in the larger gaps with a wood filler.

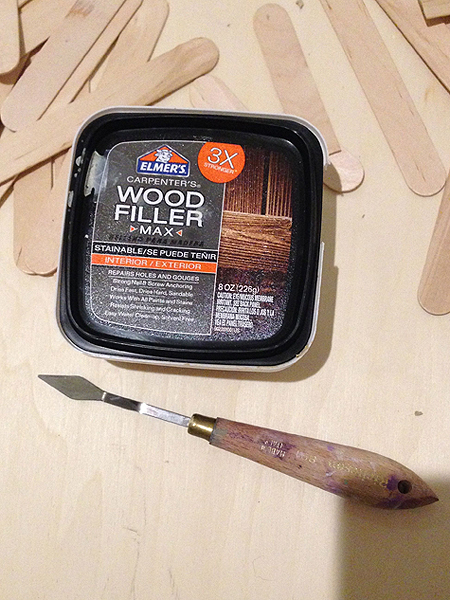
woodfiller

I used the wood filler in the picture above to fill in my gaps. To be honest I was not all that impressed with this wood filler, and I probably would have selected something different, BUT this came to me free from my father’s workshop so I can’t complain too much. The thing about this wood filler is that it has tiny chips of wood in it and I would have preferred something with a much finer grain about it. Lastly I wanted to mention that I used one of my palette knives to apply the wood filler. It really makes filling in the gaps so much easier than using a regular old spackling knife since it’s more to scale.

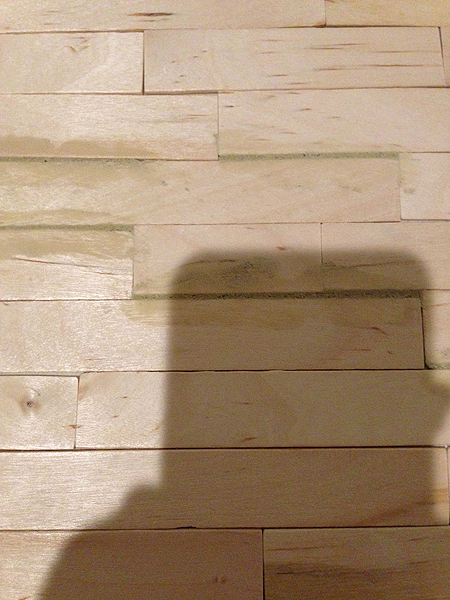
puttyincracks

And here’s where I have filled in some of the gaps with the wood filler.

sanding

The next step is to sand the whole floor. Sanding the floor will help you get rid of the slight bumpy irregular feeling your floor will have that just comes with using popsicle/craft sticks, not to mention that it will prime your floor to take a stain and/or varnish as well as smooth out your wood filler. I really think this is a necessary step if you are making a floor using craft sticks. I don’t care if you say you want it to be “rustic”, it’s not a “rustic” issue, it’s a craftsmanship issue, because even a good rustic floor has good craftsmanship. Haha…sorry for the lecture. XD

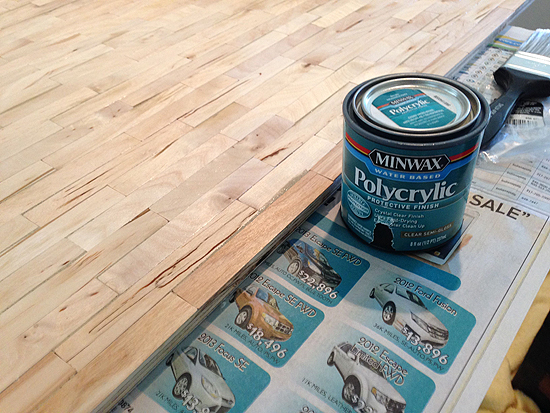
polyacrylic

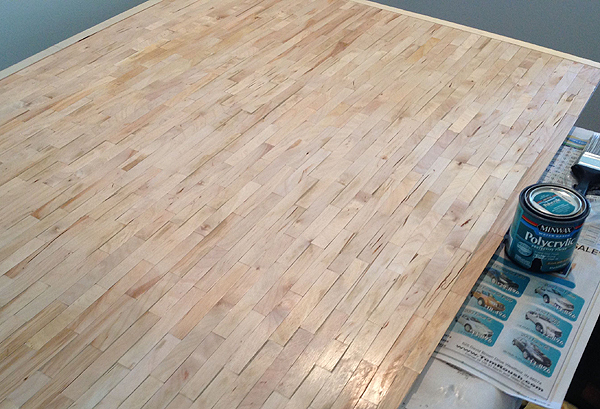
I opted not to stain my floor and decided to go straight to varnish because I just really like the light natural look of wood, plus I think it will be a nice compliment to the shabby beach theme I’m going for with the room box. I had been at a bit of a loss as to how to finish my floor though, because for one thing it’s winter where I live and using a polyurethane varnish inside the house, well I think you can imagine the smell and the headache afterwards. XP My other reservation to using a polyurethane varnish was that I have in the past had issues with some of the plastic or rubber soled doll shoes sticking to the flooring if left sitting on the flooring for any period of time. If not polyurethane varnish, your other options are to use linseed oil or a polyacrylic varnish, which is basically an acrylic varnish that washes up with water and is less smelly. As you can see from the pic above I opted to go with the polyacrylic varnish and I am currently waiting for my first coat to dry so I can gently sand it and then apply another coat.

flooronecoat

This is my floor after one coat of the semi-gloss polyacrylic varnish. I ended up doing a really thin coat so it will probably take me 3-4 coats if I keep on like this with the ultra thin coats, but I think in the end it’s better to apply thin coats and build up to a nice semi-gloss. I chose semi-gloss because I didn’t want my floor to look too shiny since the floor looks a bit rustic and I would rather it look a bit more like a worn beach house floor than something high gloss and brand new.

So, now all that I have left is to sand, varnish, sand, varnish until I get the finish I want. I’ll be sure to post up a pic of the finished floor after this. I am getting excited because I am getting closer to having this room box finished! I am getting antsy to start working on some 1:3 scale furniture and props so I want to get it done within the next couple weeks!

SD/SD17 size Room Box Window

I’ve made a lot more progress on the room box, but I just haven’t had much time to blog. I wanted to share with you though my process for creating the pin hinged window. All of these pictures I was a bit lazy and just took them with my iphone camera since it was convenient, so please excuse the photo quality and also my ugly dry hands….They just get so dry and bleh whenever I’m doing woodworking. XP

Ok, so for the basic construction of the window, please refer to my last post where I showed how I laid out the frames, sashes and glued and painted them and etc… Here I will be focusing on the hinges and attaching the window to the house.
windowpinmark01

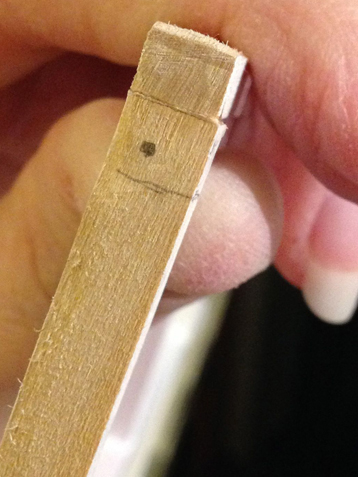
So the first thing I did was mark where the side of the window panel meets the bottom of the frame. I drew the box there so I knew where that wood board would be and then I marked with a dot about where I wanted to attempt my hinge. I decided to put the hinge a little off center and more towards the edge where I want the window to swing open. I made this decision by following this dollhouse pin hinge tutorial here: Pin Hinge Tutorial at about.com.
windowpinstartdrillcomplete

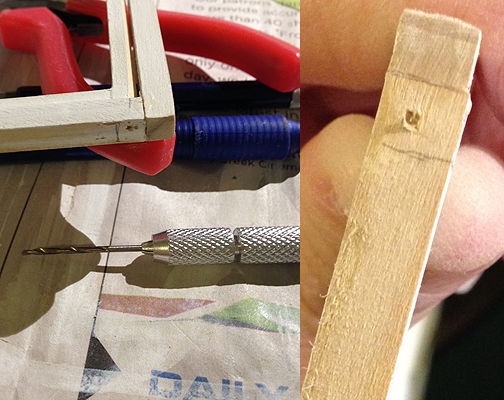
The tutorial at about.com has you using a hand drill for this next segment, but because I do not have a hand drill bit small enough for my liking I ended up using the hand drill here just to make an indentation into the wood to give a starting channel for my dremel which has a much smaller drill bit that is more suitable. Anyway the above shows you my hand drill tool and the starting channel for the dremel.
dremelbit

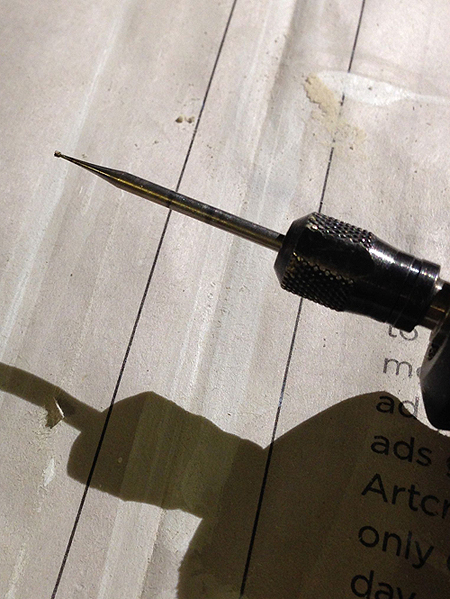
So this is the dremel drill bit that I used. It’s super tiny, but because it expands at the base, it is not possible to drill through the entire width/length of the wood pieces, but this is ok, because we will be using a dress makers pin for the hinge and you can gently force it through the wood the rest of the way.
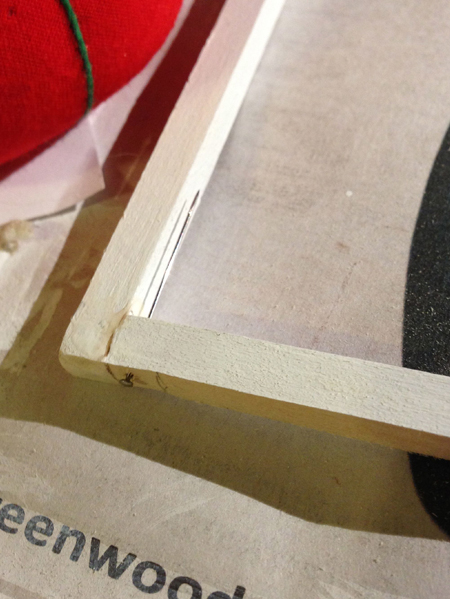
windowpin01

Here is after I dremeled the hole and stuck the pin straight through to the other side. The next step is to line up the window inside the frame and pierce it with the needle.
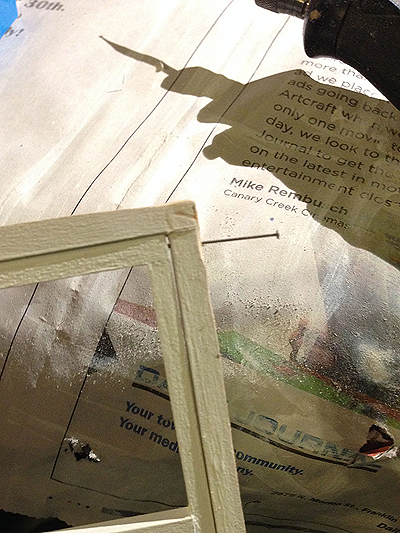
windowpin02

Here I have perfectly aligned the window to the frame as I want it, and I re-inserted the pin through the hole to pierce the wood of the window itself. What this does is it gives you a small hole exactly where you need to drill the corresponding hole in the window.
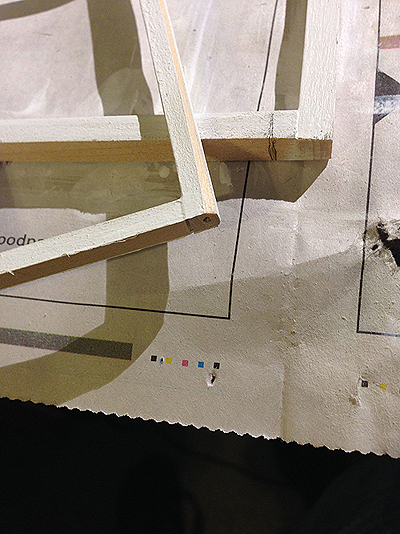
windowbevelplushole

After you pierce/mark the window board, remove the pin again and dremel the hole. If need be start the channel again with the hand drill. I also want to point out that at this time, you need to bevel the side of the window that is facing the direction you want the window to open towards. I have decided I want my windows to open outward since it will be less likely to interfere with any future furniture arrangements. You can see my bevel in the picture above, but I will show another one below.

bevel

Here is a close-up of my bevel. Basically you will sand the corner off of the side the faces the direction you want the window to open…it will be about a 45 degree angle. You don’t need to do much and you can always touch up paint later. The reason why you need to do this is because your window won’t open if you don’t since it will get hung up on the squared corner of the wood. If you are having trouble grasping this section, then please refer to the tutorial I mentioned earlier as they explain it a little differently and it may make more sense to you. Oh and lastly you do not need to bevel where the two window panels meet in the middle, you only need to bevel the side which butts up against the window frame.
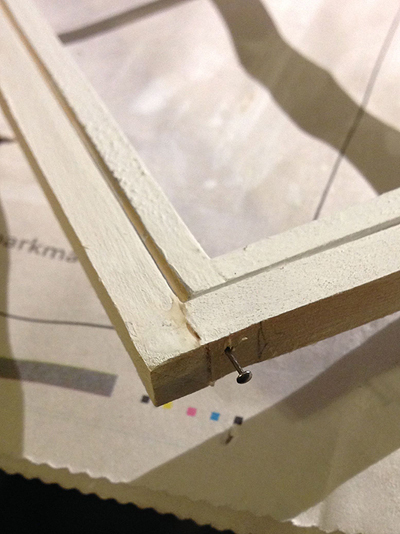
windowpin03

Lastly after doing your touch-up painting you will just reassemble your pin hinge. Here you can see my window snug in the frame with it’s bevel all ready to go. Now, since this is a larger scale window, you have two options to finish the pin here. You can leave the head on like I did and just gently press the pin all the way into the wood so that the head is flush with the bottom of the wood of the frame. If you do this, just take your time and be careful not to bend your pin! The other option which is discussed in the about.com tutorial is you can cut off the excess pin. If you cut off the excess pin though you will need to putty in the hole at the bottom so your pin does not fall out. Take care though not to accidentally fix your hinge in place. Personally I think it is easier to leave the head on, and considering this is for a 1/3rd scale doll roombox the tiny amount of pin head at the bottom won’t matter much in the long run when trying to fit your window into the window cut. That’s just my opinion though and you should do what is best for you and your project.
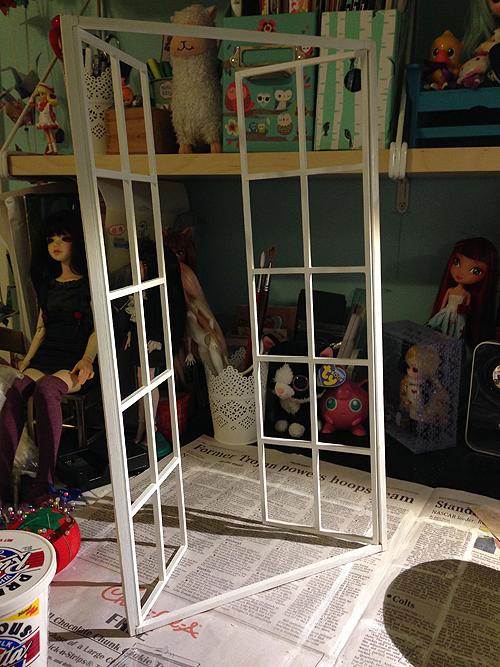
windowtest

OK, so basically you will just need to lather, rinse and repeat the above steps to create pin hinges for the top and bottom of both sides. You will have 4 pin hinges total. Above is my finished product which I tested out to make sure everything was working fine before I went to glue it into place. Once you glue your window into the window cut you are pretty much stuck with it unless you want to remove the window to make changes, which is tough. So, get everything right the first time!
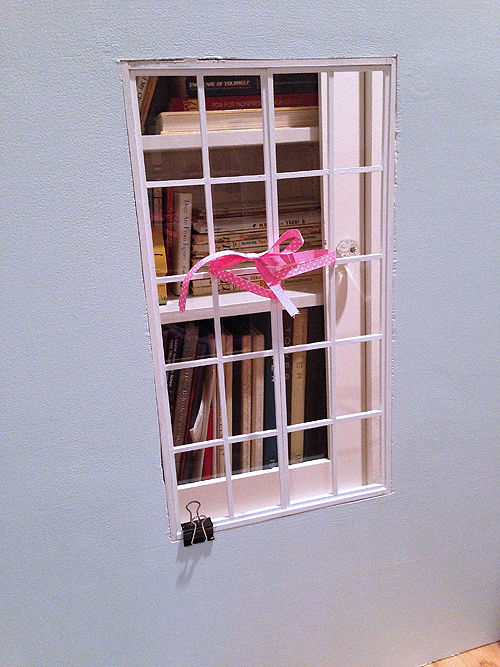
windowgluein

Ok here is the window being glued in. Be sure to have some little clamps handy if there is a section of window that is being testy and wants to come off center. I also tied my window panels together for safety since the pin hinges are delicate. Yes, please do keep in mind that the pin hinges using sewing pins is delicate at this scale. If you want something more durable for rugged play you may consider trying small finishing nails. Also, one more tip and that is to be sure during the whole process of creating the window that you are double checking the fit to the cut in the room box. It is very easy for things to become a little off, especially when gluing in all those sashes, so keep checking up on the fit so you don’t have any unhappy surprises at the end where the window doesn’t want to fit into the window cut without extensive sanding. If you keep checking the fit you can make minor adjustments here and there and save yourself a lot of tears and frustration.
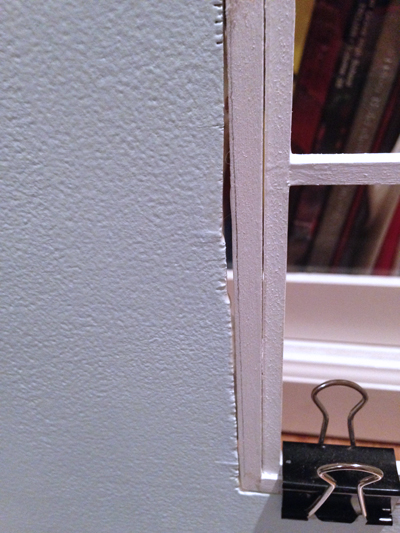
gaps

I also wanted to point out here that making window cuts with the saber saw are never perfect. Here you can see one of the larger gaps between my wall and window frame. You can fill a little bit with glue at this point if you are concerned about stability or you have too many big gaps like this. Keep in mind though that you will be cover the window frame and part of the wall with your window trim anyway and the additional layer of wood on glue will also add stability and perhaps more importantly HIDE YOUR ERRORS!! hahahaha!
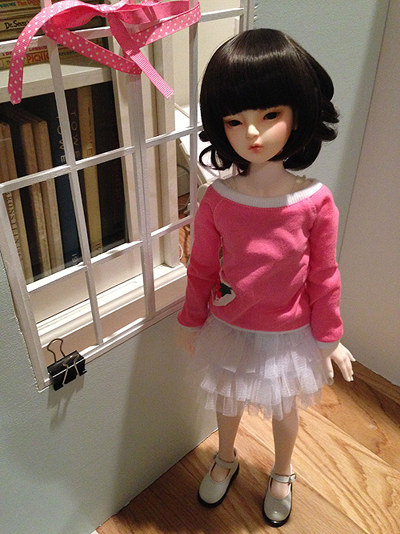
windowscale

I have yet to trim my windows as I ended up getting started on the wood flooring right after this, but I will leave you with this picture that shoes the scale between the window and my Zaoll hybrid. It’s not a very good photo of the doll, but I guess that’s not important. So another thing to keep in mind, Zaoll is only 53cm tall. The current design is probably best for 60cm dolls give or take a centimeter. The 65cm boys will still be able to look out the window, but they will seem a bit overly tall. This is fine for my purposes though because the room is for my girl, and the scale will play up her shortness a little. I’ll be sure to pose the final touches with the trim later and perhaps later on tonight I might blog a bit more about laying down this flooring while the glue is drying yet again.