Glue Testing for BJD Wig Making Part 2

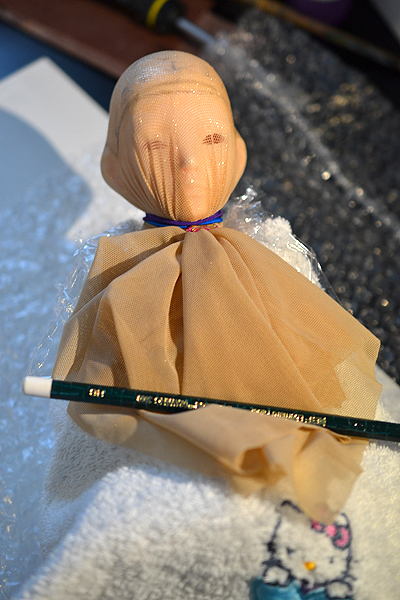
So I continued with my tests in the first part of this post and I went ahead and made a full wig cap using Loctite’s vinyl/fabric adhesive and the power mesh material. Following the directions in the wig making tutorial on DoA, I wrapped my Zaoll’s head in saran, covered her body in an old washcloth and then used old hair bands to stretch the power mesh fabric over her head.

glueprocess01

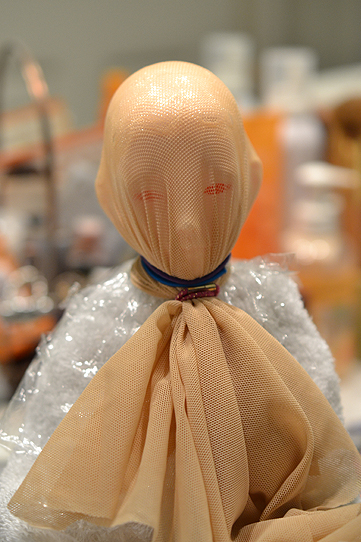
Here she is after having the fabric stretched over her and one application of the glue. I should also mention that is it going to be helpful to have a tool to spread this glue because it is very messy and is not pleasant to get on your fingers. I used this small metal spatula shaped clay tool which you can see below.

claytool

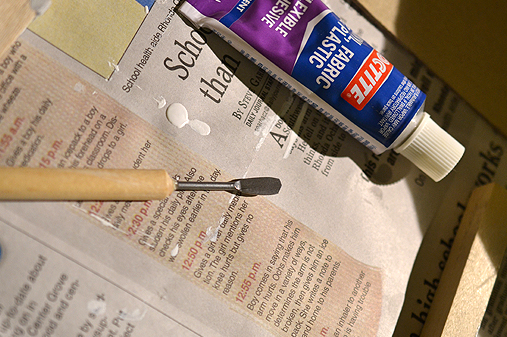
The glue is easily washed off the metal tool after you are done applying the glue, and if you happen to accidentally leave some glue on it you can easily scrape it off since this glue does not bond to metal well. After you apply the first layer of glue you need to let it dry for about 2 hours, then I recommend you add a second coat for durability.

glueprocess02

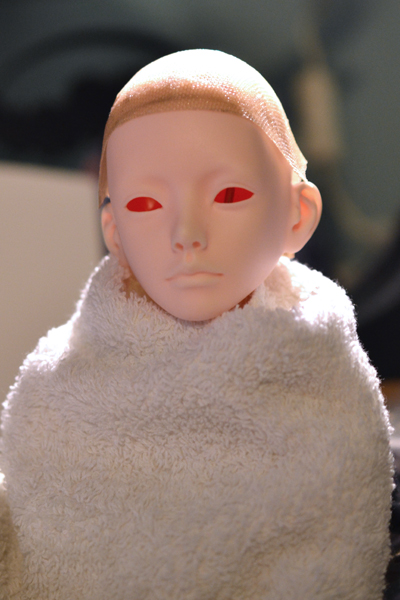
Here’s my girl now with her glue all dried and I started drawing out the hairline where I plan to cut the cap. It was recommended in the tutorial that you also mark which direction you want your hair to go, this is helpful if you are gluing small batches of hair at a go and have a complex hairstyle. For me I have pretty much decided to use a synthetic fiber that I plan to weft, so I only marked the top center and a few directional lines. Also my hairstyle plan is not very complex. You should do what you feel will be best for you.

trim01

Here I did a rough trim, just taking off the excess fabric I had. In the next step I plan to cut along the lines I drew for the hairline.

trim02

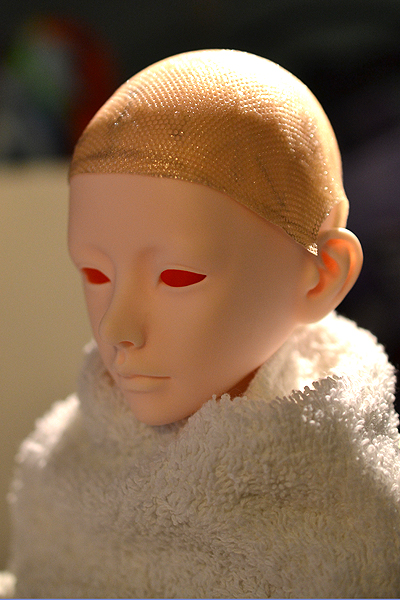
Here I have the cap mostly trimmed to where I want it to be. I may need to take off a little more, but it’s always best to cut off too little rather than too much since too much and you have to start over again.

problem

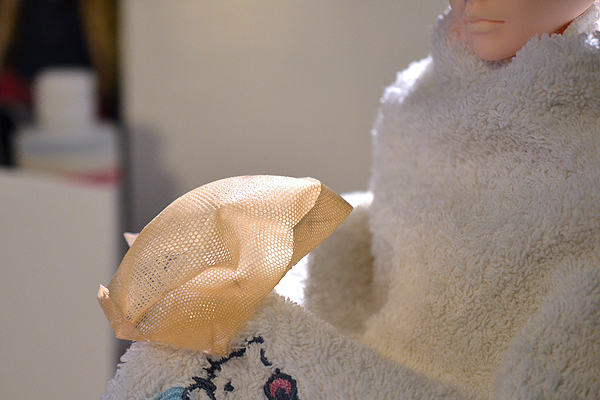
Here’s the front of the wig cap…one thing that I feel is a problem is that it sticks up a bit around the ears since the fabric naturally tented around the ears when stretched. I don’t know if there is a way to prevent this from happening, but I think I am going to try making another wig cap tonight and I will do some more experiments. Overall though I think it’s a pretty stable wig cap to apply hair to. Here are some of the pros to using this type of glue….

flexible

The first pro is that it’s flexible, you can flip the wig cap inside out if you want to. It doesn’t have much stretch though, especially with 2 layers of glue.

watertight

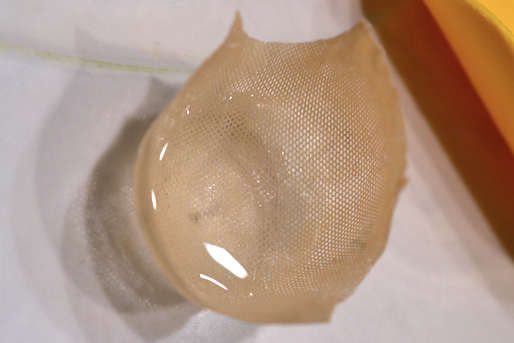
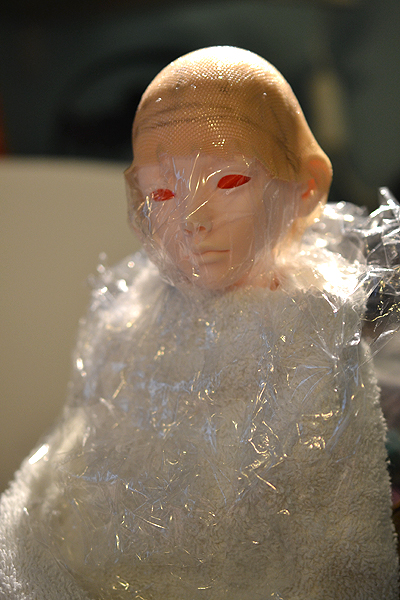
The second pro is that it’s watertight. It may be hard to see in the pic above, but I poured water from the tap inside the wig cap here. Because the glue is water resistant this means you can use synthetic fibers like saran and nylon and be able to use all of the wet styling methods for these fibers. Though I imagine this opens up wet styling methods to natural fibers like mohair as well. Also because this wig cap can get wet you can also maintain it like you would a normal wig, like giving it a wash or using conditioning treatments on it.

One last pro for using this glue is that because it’s rubbery, there is more friction when it’s on your doll’s head so it is less likely to slide off or around on you. Actually this fact makes me want to try a silicon glue next because maybe you can make wig caps straight out of that and have all the benefits of a silicon wig cap inside your actual wig.

The things that are not good about using this method is that it stinks. You’ll want to apply the glue in your bathroom with the bathroom fan running. Let me be clear and say it’s not particularly toxic like spraying with sealers as there are no particles than can find their way into your lungs, but if you have sensitive sinuses the odor could give you a headache. When the glue is dry however it doesn’t smell anymore, it’s only when it’s still wet does it smell.

The other con would be the dry time. It takes 2 hours to dry, though I applied my second coat of glue a bit sooner than that since it was dry to the touch before then. The last con would be the price. Each tube runs around $3, which compared to inexpensive PVA glues at $1 a bottle and more glue per bottle, well I think you can see the difference. This being said though $3 for a polyurethane based glue is not a bad price, and you do have all the benefits of a polyurethane glue.

Well, I will have more info for you as I continue my experiments. Right now the Loctite glue is working well for me, but I haven’t actually applied any hair or tried to make wefts yet, so I don’t want to pass judgement on this glue just yet. 😉 Anyway more to come!

SD/SD17 Size Room Box Progress.

I had a chance to get more work done on the SD/SD17 scale roombox, and I’m really pleased with how things are going so far. Come tomorrow though it’s back to work so I’ll have to focus on that and if I get my work done early then I might have a chance to get a little more done. :3 Anyway the two main things I worked on since the base was created is I started painting the walls and I created the window.

bluepaint01

I decided to pain the back wall of the room box a pale blue color. It was actually some paint we had leftover from repainting the bathroom. I really like the color and since I plan to do a pastel shabby shic, beachy sort of room I thought it would work well.

frame01

While I waited for the paint to dry to add more coats of paint to the back wall I started constructing the window. Above is just the frame of the window. Previously I had always framed out the window directly onto the window cut in my other dollhouses. This time however I decided that I will create the window entirely and then just seat it into the window cut when I am finished. The main reason I am doing this is so I can use pin hinges for the window. If you don’t know what pin hinges are, they are basically hidden pins that hold together the window to the frame and allows them to pivot. For more information, just google dollhouse pin hinges and some great tutorials should come up.

windowpanels02

Here I have two window panels made and I’m preparing to glue in all the sash crossbars. Both of these panels fit inside the frame which is off to the side.

sashes01

Here’s a bunch of the sashing being done.

sashes02

And here it is completed! At this point I start sanding any trouble spots, and I also want to make sure that the window panels will be able to fit nicely together and also be able to open freely. Normally something gets a little off when creating a window so I have to do some sanding on the sides so the window panels don’t fit so tightly into the frame. After sanding everything I started on painting the window frame and panels white. I don’t have any pictures yet because the one shot I took turned out a bit too dark. XP Anyhow I will say though that when painting the window and frame I use acrylic paint that I thin down a little bit. You want it to be thick enough to coat, but also thin enough not to be clumpy or build up horribly. That small fraction of a millimeter of paint on the window could make the window fit too tight again, so it’s best to start with thinned paint and build up slow even coats of paint.

I should also mention that I started painting the side wall white, and I think I’m going to play around a little bit with beams and paneling on that wall. Well, that’s pretty much it for now. I plan to work on it a little more tonight before bed and then if I can get my work done early tomorrow maybe I can squeeze in a little more room box time. 😉

Finished a Unoa/MSD denim jumper set. :)

So I finally finished that denim jumper set I was talking about earlier in the month and I’m super happy with it. 😀 Also if it is now available for sale in my etsy shop! The full set includes: denim jumper, t-shirt, over knee socks, legwarmers and a flower brooch. Anyhoot on with the preview pics.

jumperset05

jumperset03

After finishing this set I kinda started becoming obsessed with making little fabric flower brooches, lol. They are so tiny and hard to make, but in the end you have something really pretty so all the time is worthwhile. 😀

https://www.etsy.com/shop/tsukiyono

New YOSD items in my Etsy shop!

I just updated my etsy shop with two new YoSD sized items. You can now get the off-shoulder pink elephant raglan in YoSD size and I introduce to you “Rabby Pillows”! Rabby pillows are cute rabbit shaped pillows for your YoSD kids to cuddle up to at night. Sadly though I think I may have lost my pattern for the Rabby pillows, so these two will be the last ever (TAT). With that said, if you like them be sure to snap them up! They are available in pink with red trim or purple with pink trim. Please enjoy the preview photos belos or check them out in my etsy shop! On a side note you can access my store through the sidebar banner as well. 😉

yosdelephantraglan02
rabbypillows03

Unoa and MSD Denim Jumper Project

I saw a really cute denim jumper dress online for people that hung below the bust and I wanted to try to see if I could create something similar for Unoa and my other MSD sized girls. Below is the fruits of my labor! 🙂

jumperpreview02

It took me a few tries on muslin to get the pattern cut correct and in this picture is my finished prototype in denim. I really like the red topstitching over the dark denim. I am also hoping that it’s baggy/roomy enough without being too roomy. The original people sized jumper dress was pretty roomy looking! Also the original human sized jumper had a distressed look. I may start researching how to distress denim so I can have more variety in my denim outfits.

I should also mention that the gray t-shirt is also another prototype. It’s a simple pattern that I added a collar ruffle to and I sewed a few seed beads on for sparkle. I might like to try to find more silvery looking beads though, perhaps there will be some sales tomorrow! Eventually I plan to make a denim jumper set to sell on etsy, so if you like this outfit, you may keep an eye out for it. 😉