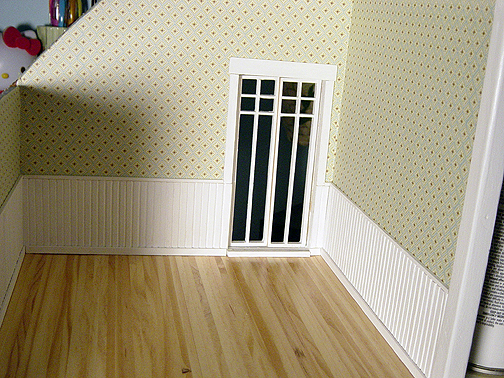
Today I was finally able to finish off the main upstairs bedroom. You can see my wainscot in it’s finished and painted state there. The large window is actually a set of pseudo French doors that will open onto the little terrace that is part of the original house but has been removed for the time being. Aside from making an error in trimming, I am overall very pleased with house this room turned out. Now all I have to do is finish the rest of the house and get the room decorated. 🙂
Dollhouse Wainscot from Flooring Scraps
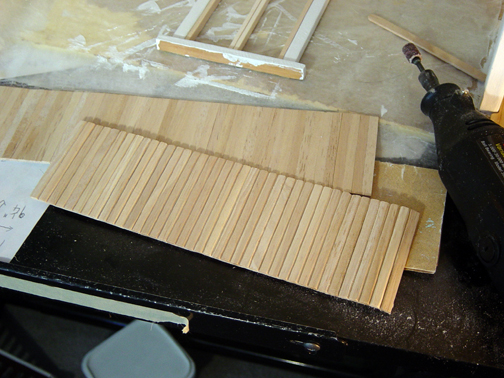
I’ve had these scraps of wood dollhouse flooring left over from trimmings from both the “Big House” ie my Pullip’s house as well as this 1/12th scale house. I had been pondering what to do with them for a while, and an idea came to me that I could probably transform them into wainscot for the 1/12th scale house. How I did this was to take the dremel and using a sanding bit, I just sanded off the edges off of each strip. It only took a couple passes at a low speed to get a defined dip between the boards to imitate the look of paneling. Anyway I think it looks pretty good, and it’s going to help me get rid of my leftover wood flooring. Also I like to be as frugal as possible, because dollhouse building sure can get expensive! Anywhere you can cut your costs is good in my book. 🙂
After sanding the boards I decided I would see what whitewashing them would look like since I had really good success with whitewashing the floor for the living room. It looks OK, but it got a little too wet and some of the paneling separated from each other. I think though that tomorrow I will just paint it straight white as the white wash doesn’t seem to go well with the paper that is already in the room. Anyway more pictures of the house are to come as I get more things finished.
Wallpaper is a Go, Finally!
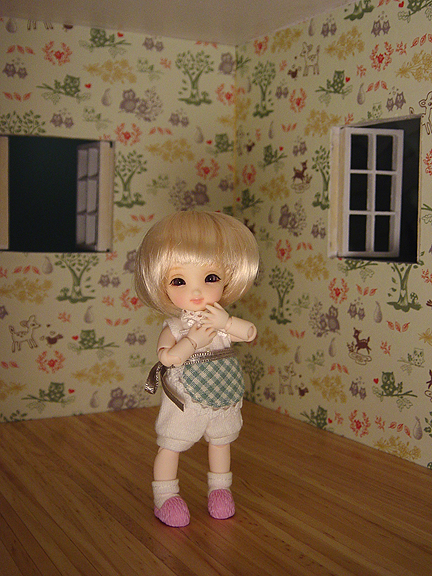
The picture is a little dark because I just took the photo tonight after I finished papering the kitchen, but there it is, I finally got my favorite woodland paper on the walls! This is also the first time my little Brownie has been near the house as well. Anyway I still have all of the trim-work to do, and of course I need to make kitchen cabinets and such, but I am happy with how things are coming together. I’ve also made some progress on the bathroom, as well as the big bedroom upstairs.
So, I thought I would go ahead and share some advice on wallpapering dollhouses, since it gave me so much grief earlier and I went through a lot of trial and error. First of all, I want to say that I got the best advice from the people at the CDHM forums, which is a nice little miniatures/dollhouse site. It would really pay to go check out the site as there is a lot of good information there overall in regards to miniatures. Here is the link: http://www.cdhm.org/
OK, so after trying Modpodge, Elmers Glue, wood glue and Tacky Glue, I have to say that really there is nothing that is going o work better than wallpaper paste. It will really save you a lot of grief and ruined paper if you just bite the bullet and buy some wallpaper paste. Of course you won’t need the giant buckets of the stuff they sell in the hardware store, but you should be able to find a nice sized tub of wallpaper border paste for a reasonable price. I guess they do make wallpaper paste specifically for dollhouses, but you wind up paying an awful lot for a small bottle of it, while for about the same price you can get 6 times as much of the regular paste.
The second key factor I think is important to successful wallpapering is to achieve a nice even coat of paste on your paper. To do this, probably the best thing you can do is to take an inexpensive foam paintbrush and use it to brush the paste onto the back of the paper. Spread it evenly and be generous, but don’t slather it on there. It’s easy to get a nice even coat if you lay your paper down on some wax paper, this way you can brush clean off the edges of the paper so everything gets fully covered. As it is, paper expands a little when it becomes wet and retracts a little when it dries. If you have uneven coverage then different parts of the paper will expand and contract at different rates and thus create bubbles, buckling and creasing.
The third key factor now is to apply your paste to your paper, then apply the paper to the wall, rather than applying glues or pastes to the wall and then adding the paper. It seems like it would be easier to just add dry paper to the paste covered walls, but like I said earlier, you need an even coating and saturation of your paper. While the paper is still damp, it’s pretty easy to slide the paper into place, and you can use a credit card or your fingers to smooth down any bubbles that may get caught as you lay down the paper. The tricky part comes when you are papering over a window. Usually what I do is to just paper over the entire wall and then cut out the paper over the window after it dries. This is easier than trying to perfectly cut and match a window hole, plus you will place trim around the interior of the window later so you don’t need to be perfect. Anyway the point I mean to make is that the paper likes to ripple a little around the windows, but as long as you make certain that the paper is laying flat all around the window, as the paper dries everything will get pulled taught and straight…in fact you can play the bongos on them if you want to, lol.
So those are my tips for having a successful wallpapering session. I hope everyone building a house can go out and get themselves some super cute paper to put in their houses!
Wallpapering Woes
So, I found this adorable woodland animal scrapbook paper that I want to use in the kitchen of my dollhouse. I carefully cut everything to size and when I finally glued it onto the wall of the dollhouse the paper buckled so horribly that there was really nothing I could do to smooth it down properly. Of course initially I am just really ticked off, I rip the paper out of there and I fume for a while before I decide to try it again. This time I planned to apply the glue to the wall and then smooth the paper on. At first it seemed to work fabulously, there was no wrinkling or buckling at all, but then as soon as the paper becomes damp from the glue, it’s buckle city AGAIN, and AGAIN I had to rip the paper out. Of course by now I don’t have enough paper left to finish my kitchen and I’m a mix of angry and sad.
As things stand now, since there is a snowstorm raging outside, I just have to stop working on the house. I only have one more sheet of the paper left, and I’m not going to try papering again until I know I can secure enough paper to finish the room. I did start experimenting with a few of my trimmings scraps though. I tried using modpodge on the test strip, and it spreads better than other glues, but it’s still really wet, and after turning away from the paper for a minute it started buckling again. I did have a more promising experiment using Tacky Glue Gel formula, but since I am only testing with a small strip, I am still suspicious. Either way, the gel glue is a pain to spread, but it stay pliable for quite a while after, and doesn’t seem to dampen the paper very much. I think I am going to try to seek advice on a miniature forum that I found. I’m just so frustrated and upset right now that I feel like chucking the whole damn house down the stairs. XP
Dollhouse Progress & Using Fabric Hinges
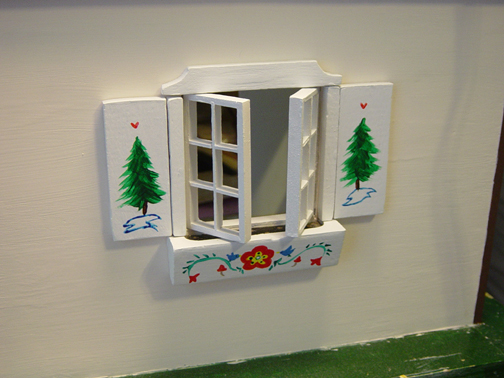
I’ve been making more progress than this on the dollhouse, but a lot of that has been spackling, sanding and painting, all of which don’t make for the best of progress pics. I did however finish my first window finally. Because I really don’t like those tiny brass hinges, and I can’t use pins because of the way the house has been constructed, I decided I would try out using fabric hinges. I had read about fabric hinges online while looking for dollhouse related tips while building my last dollhouse, but there wasn’t much in depth information about how to create/use them. Anyway I’ll go ahead and share my experiences here, if anyone else is interested in trying out fabric hinges to see if they work for them. Just keep in mind I’m doing this on a 1:12 scale dollhouse, not playscale, and I’m not sure how it would work with playscale.


