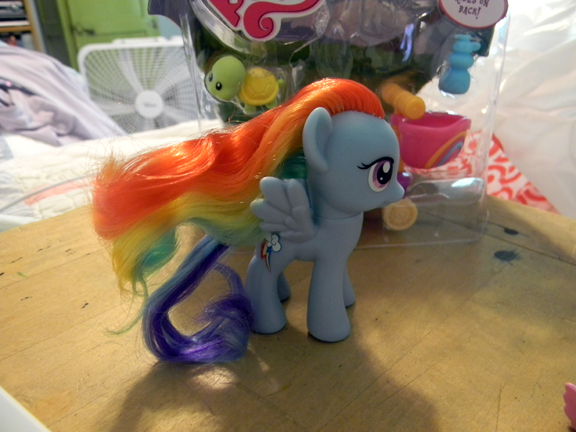
Well I’ve been bitten by the Pony bug now too after watching the Friendship is Magic series that has the absolute best stylization of the ponies to date in my opinion. My favorite pony is Rainbow Dash but unfortunately her toy looks hardly anything like her as you can see in the pic above. Many of the characters from the series suffer from poor toy design but I consider Rainbow Dash being on of the worst. XP
It should be clearly evident from the pic, which is Dash straight out of the carton, that her mane is styled nothing like her character, AND on top of that her mane nor her tail contain a full rainbow, but instead Hasbro cheated and made her tail teal and violet, while her mane is red thru green. Other problems with the Rainbow Dash figure are that her eyes look a little more like Fluttershy’s and she only has a cutie mark on her right flank, while her left remains blank. :/
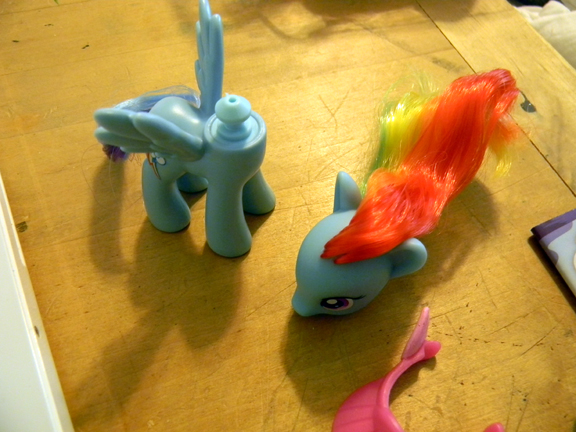
So with all of that said, I’ve decided to embark on a customizing project to try to make Rainbow Dash actually look something like Rainbow Dash. The first thing you have to do then is remove the head.
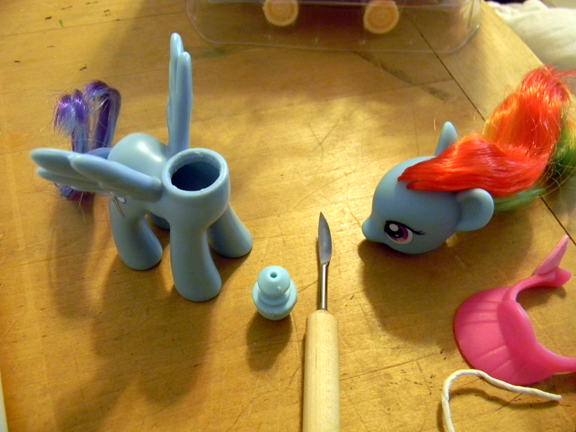
For anyone whose ever removed a head from a doll or toy before, this is super easy. It’s just a simple peg through the hole and you should be able to just pull it right off in a couple of seconds, no biggie. Getting the head-plug out of the neck hole on the other hand is another matter. If you examine your headless pony, you will see that the head plug is a hard plastic, surrounded by the soft pliable plastic of the pony body. The goal here is to separate the two at the seam where they are glued together.
So, I have read some tutorials where people just cut the plug out around the seam using an exacto knife, and I think that will work fine, but for me, I prefer to use objects that are a little less sharp if at all possible since I am accident prone. If you are also accident prone or you do not have an exacto knife then my method should work for you! The first thing I do is I take my blowdryer and on the hottest setting I direct the hot air at the neck. The reason to do this is that it softens up the plastic and makes it easier to insert a knife or other object between the body plastic and the plug plastic. The tool I used, as you can see from the picture, was a small clay carving tool. This tool has a slightly curved bladed tip that you really can’t hurt yourself with. Anyway while your pony’s neck is all nice and warm, you want to find a good spot to carefully force your tool between the body and the plug, then, as if you are cutting out a circle, follow the plug all the way around until you make a complete circuit. If you went deep enough you should be able to wiggle the plug out of the neck now. If it’s still good and stuck, then apply the blow dryer heat and try again. I say it’s always best to be cautious and take your time rather than hurry and make an irreparable mistake.
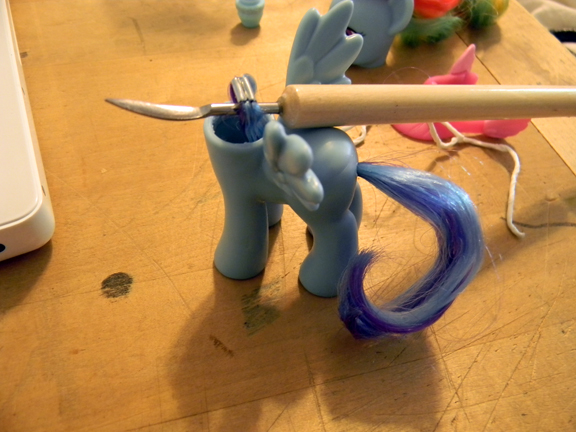
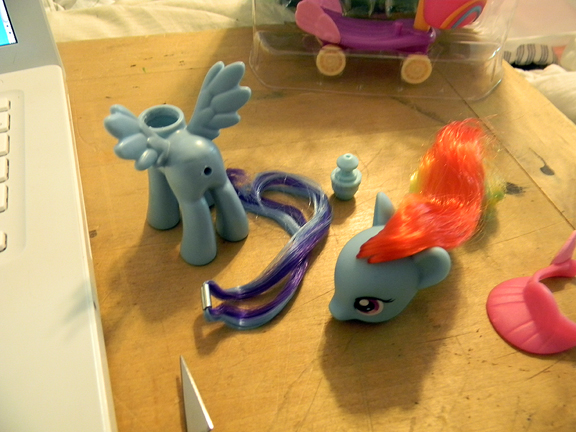
And now here is Dash getting her tail removed. Once you get the plug out, you’ll easily be able to find the tail inside. All you have to do is take pliers or a curved tool to grab ahold of the tail loop and pull it out. The above pic is Dash with her tail half removed. I just fished the tail out with the carving tool I used to remove the head plug with.
And here’s Dash now, mostly taken apart. I haven’t cut her mane yet as I need to order some pony hair to work with, and I don’t want to deal with keeping track of a loose pony mane until I’m ready to sit down and re-root her. I will probably post a continuation of this tutorial later when I re-root if it will be helpful to anyone. Well, have fun customizing everypony! XD

