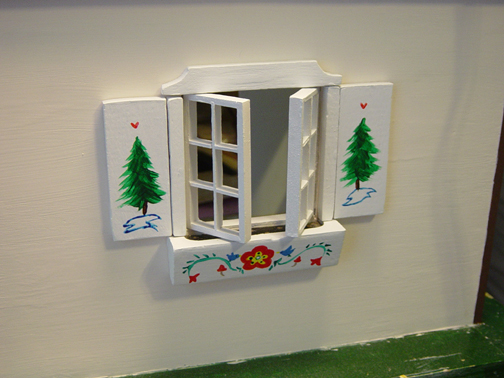
I’ve been making more progress than this on the dollhouse, but a lot of that has been spackling, sanding and painting, all of which don’t make for the best of progress pics. I did however finish my first window finally. Because I really don’t like those tiny brass hinges, and I can’t use pins because of the way the house has been constructed, I decided I would try out using fabric hinges. I had read about fabric hinges online while looking for dollhouse related tips while building my last dollhouse, but there wasn’t much in depth information about how to create/use them. Anyway I’ll go ahead and share my experiences here, if anyone else is interested in trying out fabric hinges to see if they work for them. Just keep in mind I’m doing this on a 1:12 scale dollhouse, not playscale, and I’m not sure how it would work with playscale.
Barbie Sweet Roses Fridge – Refurbishment
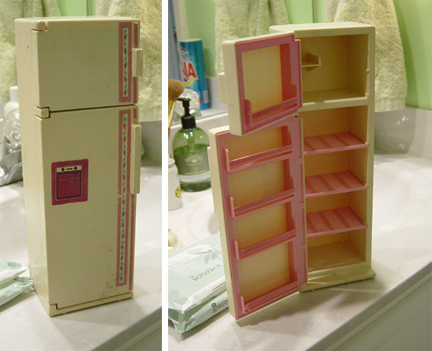
One of my aunts is an antique dealer and knowing I was trying to put together a playscale dollhouse, she kept an eye out for old dollhouse furniture for me and found some of the Barbie Sweet Roses furniture from 1987. She actually found more than the fridge for me, there is also a kitchen set, a cabinet, sofa, chairs and a few other things, most of which are from the Sweet Roses collection. Anyway I decided to tackle the fridge first as I have been wanting a new fridge since I kinda mucked up the repaint of the hot pink barbie fridge I had.
This Sweet Roses fridge had been in an attic and it has yellowed with age and heat. I know that originally the fridge was white, and inside there is some light pink detailing. The great thing about this Barbie fridge is that it’s quite a bit deeper than the current barbie fridges on the market, which means it can hold more cute re-ment food! But more importantly this Barbie Fridge from the 80s is more to scale than the newer fridges, meaning when Pullip goes to open the top freezer, she will actually be looking into the freezer and not looking at the top of the fridge. This old fridge is also much better put together as well, for example the shelves inside are nice and level and don’t sag like the latest fridge does. XP
So the first stage of refurbishment was to scrub down the fridge which was a little dirty, and to get the old yellowed and torn decals off of it. It took some effort to get the decals off, because the glue was really holding them on there. With the newer fridges, just a 15-30 minute soak in hot and soapy water will pretty much remove the cecals easy, but this one required more elbow grease. In the end after a soak in warm soapy water wasn’t doing the trick, I broke out the isopropyl alcohol and rubbed it down, finally removing the decals.
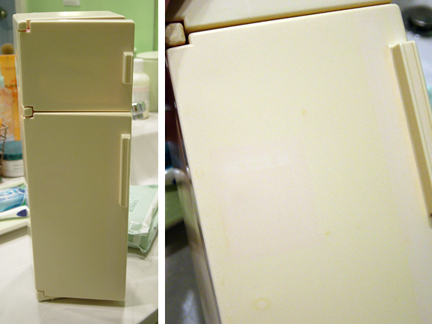
After removing the decals I noticed that the plastic underneath wasn’t as yellowed as the rest of the plastic, which is unfortunate. You can see it just barely in the pic above. Now this leads to me to decide what to do next. I’ve heard that putting yellowed plastics in a bleach or hydrogen peroxide bath can help remove yellowing, but I’ve also heard that it can make the plastics more brittle. I have also considered a repaint, but after my last failure, I’m not too keen in wrecking yet another fridge. There is also the fact that the way this fridge it put together means I can’t separate parts nearly as easily for repainting either. Whatever I decide to do, I’ll probably continue to post the results here.
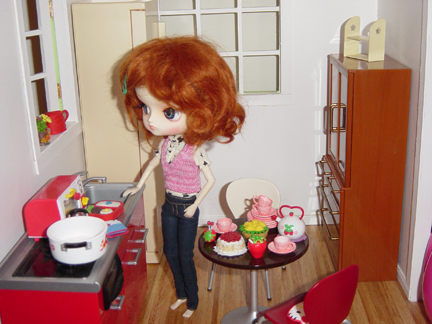
For now though I have placed it in my dollhouse kitchen and been messing around with furniture arrangement. My kitchen is really coming along now, especially since my mother found me the brown re-ment china cabinet when she was shopping in Pittsburgh. The dimensions of the Sweet Roses fridge works really well for my kitchen, it fits neatly in the space between the two windows, but I would need to make some sort of cabinet to go in the space between the red re-ment kitchen and the fridge. I would also eventually like to make some red wall cabinets to match and pull the room together more. Still a lot of work to do, but little by little I am getting there. 🙂
Cookie’s Progress – Trial and Error
So I finally decided to go ahead and get started on Cookie. I am using La-Doll and Premier clay, so I decided I would go ahead and follow Ryo Yoshida’s doll making methods from the Yoshida Style Ball Jointed Doll Making Guide. In the guide you cut your cores/armatures out of styrofoam based off of your drawings. I’ll get more to the method later, but in the picture above was my first attempt at carving the body core using the blue polystyrene insulation foam board. As you can see the core turned out terrible with way too many pock marks. Naturally I was displeased and I tried to figure out whether or not it was my tools that were the problem or whether you just shouldn’t carve out with the blue insulation foam. I’ve seen other people use the blue foam before to good effect, but it just wasn’t working for me with what tools I had so I decided to go out and get myself a sheet of the white styrofoam.
Cookie – Sketch Revision
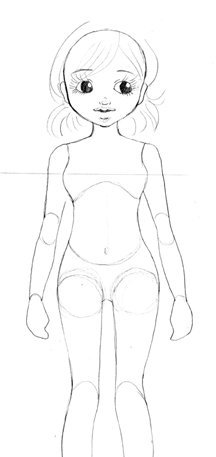 I posted the sketches of Cookie on The Joint, and I had one person make a comment and based on her comments I revised Cookie a little. Basically I redrew her hip piece so it would be easier for joint construction and wouldn’t be quite so thin, and in the process I think she comes out looking more attractive. It was also suggested that I would need to widen her head a little bit or not have her eyes so widely spaced since it would be difficult to get eyes to fit in her head. This sketch also reflects her slightly widened head around the eye area. I still think the original sketch of her head looks cuter, but maybe if I tweak the edged of the jawline a bit it might help out.
I’ve still been waffling on whether or not to start the project in clay. It’s exciting to come up with a doll idea and sketch her out and part of me would love to just jump in and get sculpting, but another part of me reminds me that sculpting is tough and things may not always turn out as you like them. :p I guess though, in the end it really doesn’t matter what I do because even if I start this project and decide part-way through that I don’t like where things are headed, I can leave it unfinished. There are no unfinished project police out there ready to arrest me and send me to rehab for flighty procrastinators who just do as they like. This being said though I think there is probably a small sense of guilt in knowing I already have one unfinished doll project. :p
Possible Doll Project – Cookie
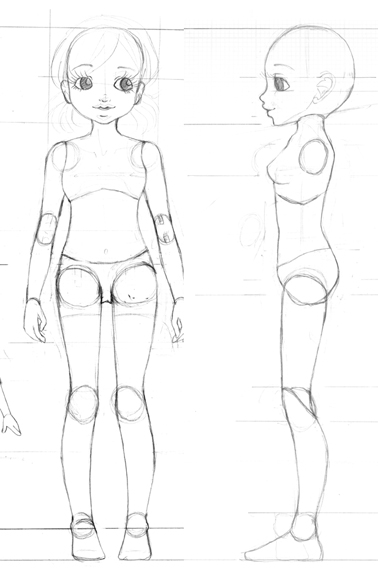
Because I already have some Premier clay stowed away, and I had a gift card and a 50% off coupon to go get some LaDoll clay this week at Michaels, I am pondering the possibility of starting another doll making project. Yeah….I realize I never finished my first one, but I just ended up so unhappy with it, some of which I felt was due in part to the nature of super sculpey.
To be honest I’m still not completely satisfied with my sculpting abilities, but neither am I ever satisfied with my drawing or painting skills despite having gone to art school for X number of years. XP Anyhow I thought I might give it a try again. As they say, nothing ventured nothing gained, or in this case nothing sculpted no skills gained, lol.
So, this all being said, I originally thought I might try to make a slender tiny that was around 6 inches tall, but I wasn’t too pleased with the sketches I had done, so I just started another random doll head sketch that eventually turned into a roughly 12 inch/30cm doll with a mature body that looks like a “Cookie” to me. 🙂 I’m not terribly satisfied with the profile view of the doll, so I think I may post the sketches on the forums at The Joint to get some feedback on her before I start committing anything to clay.
I know her torso is a little short and I think perhaps I like it that way, but I think she would probably look nice with an elongated torso as well, but I think her proportions right now make her a little more child-like which I think adds to her cuteness. If I did elongate her torso I’d probably have to try to turn her into something closer to a 40cm doll though. The beef I have with the profile is that her head is looking too large now, and I think in my effort to remove her belly ponch and fat butt, I’ve ended up making her too think now….*sigh* I dunno. I don’t want her to have a big butt, however being a less shapely no-butt is also out of the question.
Gotta keep working…..

