
I finally finished the roombox today!!! Yay!! I thought I was finished yesterday and then I realized I totally forgot to add the back wall’s baseboards and I was like (⌣_⌣”) *sigh*, but I quickly cut and painted them last night so they would be ready to be glued on today. Anyway without further ado, here are a couple shots…(yeah I need to get better at photography, that is the next goal along with making props).
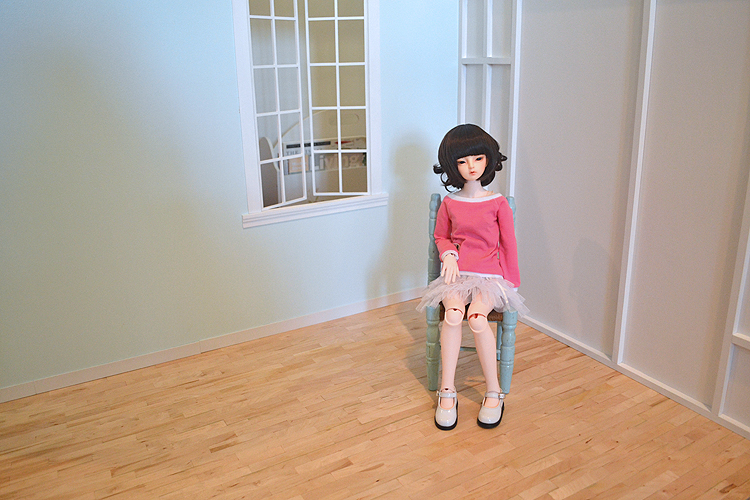
Here is a shot of the whole room with Mio sitting in it. The chair is a little doll chair I found at an antique store. It’s a bit shabby and probably needs a bit of washing, but it’s cute and the perfect color for the room! Actually Mio sits on that very chair on my nightstand in my room. 🙂
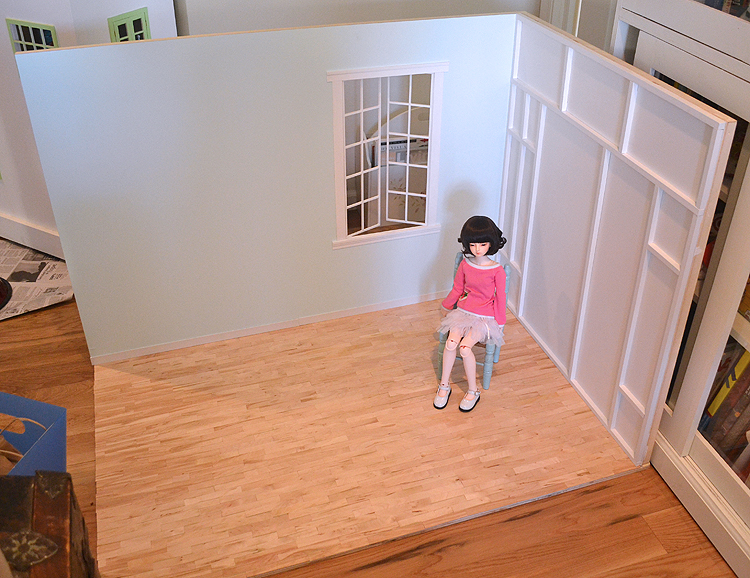
And here’s a zoomed out shot that better shows the scale of the room. Please ignore some of the junk in the background. I still have a few things to clean up now that construction is done.
Well, I’m really happy overall with how it turned out and I hope I get a chance soon to take more photos with it and improve my photography skill. I also want to make a little fake backdrop for behind the window so it looks like there is some nature out the window. I was thinking I could make a large print and pin it to foam core board or alternately I have some inkjet transparency paper left so I could experiment with printing greenery on that and then shine a light through it to see how that looks….Definitely got to get better with lighting overall though.
This turned out wonderfully!! I can’t wait to see some stories happen here!
Is it in its permanent space, or will you be moving it? Is it hard to move?
Thanks!:D And no that’s not it’s permanent space. The walls actually come up off the base and fold over on themselves, so I can store it behind my bed’s headboard. The heaviest part of the room box is the floor because it’s 1/2 inch plywood. The walls are 1/4 inch plywood on frames so it’s much lighter. For the most part it’s easy to move, I just have to take my time as the walls section, even when folded over on itself, can be ungainly and I am liable to whack into things if I’m not careful.
I don’t know if you saw them, but I made some earlier posts about the room box starting with the basic construction. I think they should all be in the tutorials section.
thanks for posting this series. i’m bookmarking it for when i build a room box for my msd sized dolls. i like how you made it collapsible