If you remember from a previous post, I said I was working on rehabbing a couple of pieces of dollhouse furniture. Well today I finally finished up the refurbishment on the chair and I feel I was pretty successful! It took a little experimentation to get it the way it is now, and it has a few flaws, but overall I’m pleased and I also learned a lot about making miniature furniture as well. You can read on behind the cut to see the different phases of construction and how I worked through some issues.
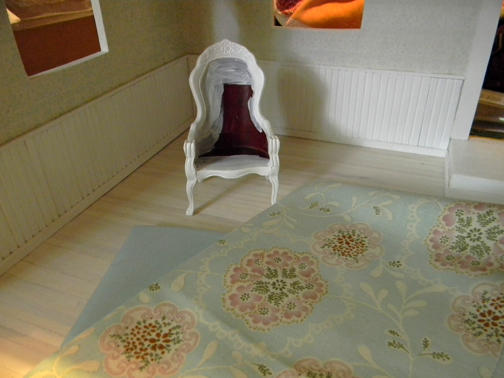
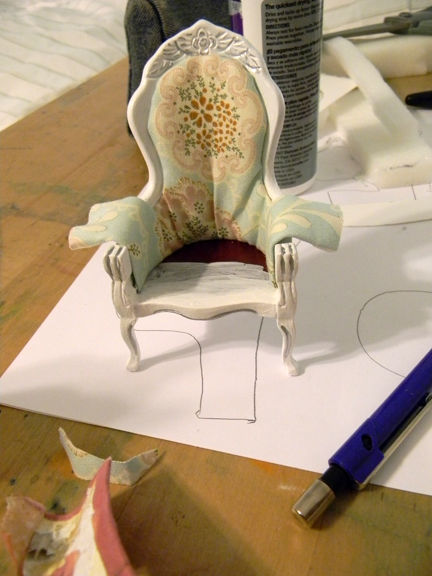
The room this chair is going in is the partially finished room you can see in the picture (I still need to trim out the windows and reattach the door). I’ve decided to go with a cottage-y shabby chic look for this room, so I painted the previously dark wood chair white and I selected some matching fabric. I didn’t bother painting the portions of the chair that will be under cushions as you can tell from the picture.
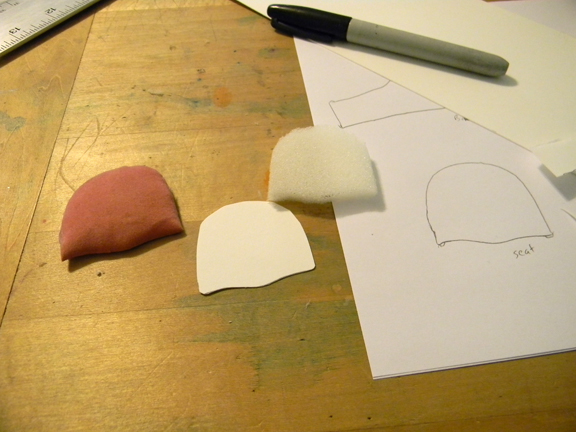
I quickly realized after selecting my fabric that my original plan of using the original cushions and forms was not going to work, because the pink fabric was too dark and would show through the fabric. So I changed my plans and decided I would make my own cushions using the old ones as my guide. Both interior cushions have a cardstock backing with a thin layer of foam. In order to get thin enough slices of foam my mother suggested I use the electric knife to cut off slices of the 1/2 inch foam I had lying around, and I was totally surprised at how well it worked! Anyway after I got my slices of foam I cut them down to the exact same size as the previous cushions and I went ahead and glued the foam to my cardstock using Tacky Glue.
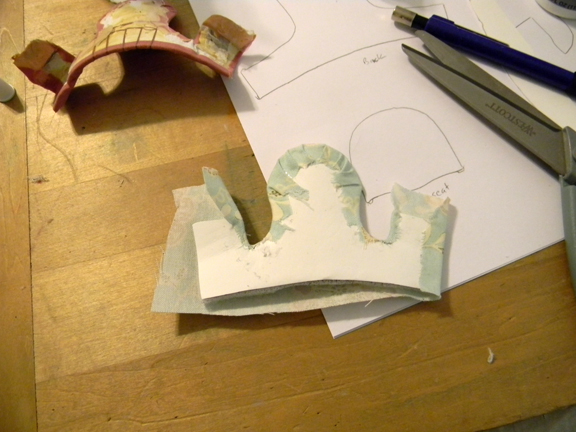
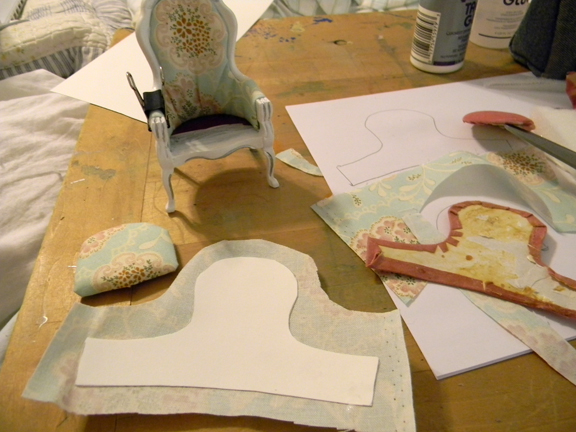
After the foam was glued to the cardstock, I could then go ahead and apply my fabric to each piece. I used the backs of the old pieces as my guide to figure out where to put notches in the fabric and where to fold over certain pieces. Again I used Tacky Glue for this and I tried to pull the fabric as taught as I could to prevent any wrinkling or waviness in the fabric.
Unfortunately despite how taught and smooth the piece is when laying flat, when I tested it in the chair, it liked to fold on itself a little bit. I think my inability to get it perfectly smooth was due to a few factors…First of all the fabric I was using was a soft cotton and the original fabric was a stiffer faux velveteen with a very short pile. The stiffer fabric still buckled in areas, but not as liberally as my fabric did. The second factor could potentially be because I did not choose to glue the fabric to the foam side of the form, and I think the third factor is that having one giant piece like that which curves, makes it very difficult to achieve a perfectly smooth surface. I think in the future it would be better to figure out a way to split it into sections.
After finishing the first piece, I went through and did the exact same thing for the seat cushion and the backing as well which you can see in this picture. The seat backing is the only piece that does not have any foam involved, and for that piece I glued the piece of fabric down to the cardstock before flipping it over to notch and glue down the fabric. Also I would like to mention that mini clips are helpful when re-upholstering furniture! It helps me clamp down the arm rest foam so it would adhere to the proper place.
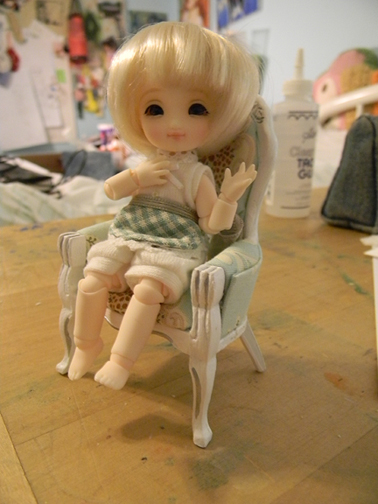
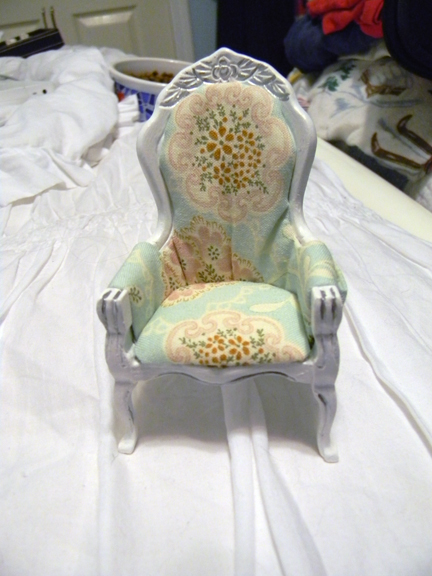
And here is the chair all finished and without a doll blocking out all the details. As I said before, despite it’s flaws, I’m happy with it. 🙂 I also have a matching sofa that I plan to re-cover the same way, but for the time being I will focus on creating the “mattress” and bed linens for my Brownie’s little bed. I have a lot of comic work I need to get done though, so progress will probably be slow. Anyway that’s all I have for now, and hopefully maybe my experiences can help you in your dollhouse creations. 🙂

Ack, your dollhouse is coming along very nicely! I love what you did to that chair, buckles or no buckles, and the bed with the quilt is simply amazing. I just acquired my second Lundby “Stockholm” house, but haven’t even started decorating the first one (which I got as a Christmas present two years ago…)!
Thanks! I unfortunately haven’t had as much time to work on the house lately because I’m trying to focus on my comic work so I can have a graphic novel printed before the summer con season. The house is still sitting at the end of my bed though so I ponder it daily at least. I am totally jealous of your Lundby houses though!! They are so awesome!