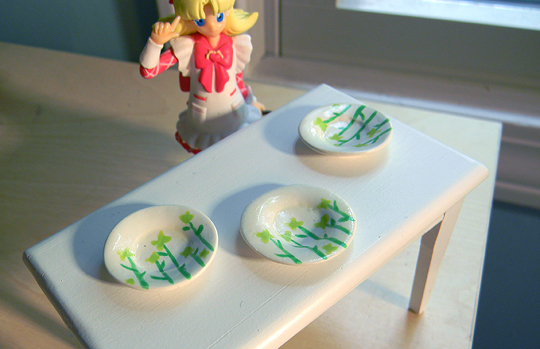
I finished my first set of plates today, and they are the ones you can see in the picture. I hand painted the design and glossed them up so they look glazed. I have a total of 6 “Spring Green” plates and bowls which is the design above, and I am only keeping 3 of each, so I think I will be offering these for sale, but I don’t plan to put them up on etsy until I finish my “Mushroom Forest” plates and perhaps make some 1:12 scale table runners to match.
I’ve been way into polymer clay as of late, and I still need to try out those mini cutters from the previous post, but I’m also feeling the creative urge to get started on making the kitchen cabinetry. LOL, here I am jumping the gun and making plates before I even have a place to store them. XD Fuuu~ there needs to be more time in the day…


How do you make your plates, they’re gorgeous. I’m a nubie to miniatures, so all help is much appreciated. Thx.
There was this tutorial I saw that helped me out, I managed to find a video that goes through the method I used, it’s here: http://www.youtube.com/watch?v=HsIX81SlpwY the only difference is I used a cutter for both the plate and the foot, but I did the pressing technique just the same. It’s actually really easy to make bowls using that pressing technique too.
However while I was googling tutorials to try to find the one I used, I happened upon this tutorial here: http://www.scs-craft.com/2012/11/polymer-clay-plates.html They have a nicer looking foot on the plate, but it might be difficult! Anyway there are tons of other tutorials out there. One tip though is that if you use sculpey you have to use sculpey glaze to gloss your pieces because just painting them with lacquer results in a bad chemical reaction that leaves the plates tacky. If you have any other questions I would be glad to answer them! 🙂