Zaoll Luv Face-up!

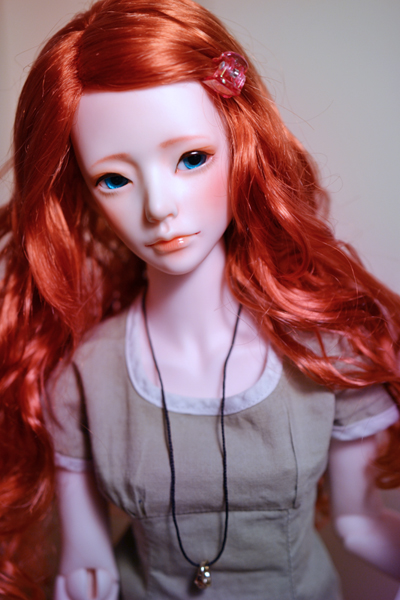
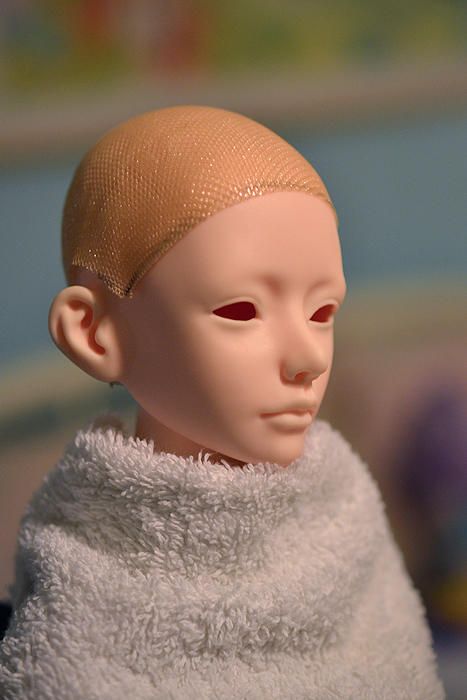
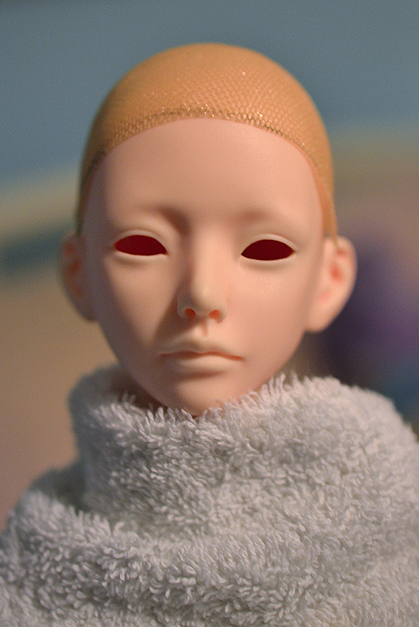
I finally had the time to give my Zaoll Luve a face-up, and I must say that it’s the best face-up I’ve done so far! It’s always nice to have a breakthrough art-wise and also I am very much smitten with my Luv now. X3 Actually this wasn’t the first time I attempted to give my Zaoll girl a face-up. I attempted it when she first arrived, but my liner decided to smear and frustrated I wiped her and put her away for a little bit. Then when I came back to try again I had another goof that I had to completely wipe her face again. After two failures I started to wonder if maybe the Zaoll sculpt and I weren’t going to get along, but then the third time worked perfectly, so I guess it was a “third times a charm” moment.

zaollweb

Anyhow I think she’s just s pretty as can be now, and I am so very happy to have her. :3 Next up I still plan to make her a custom wig, but I do really like her in the monique wig I just bought, so who knows what her hair will be like in the future. I am thinking I also want to change her eyes. I really love the blue glass eyes, but I think they may be a bit large for her. I’m probably going to go get a consensus about good eye sizes on DoA. Well that’s it for now, but I will have a small photoshoot to share later!

Little Rebel Seven Arrived!

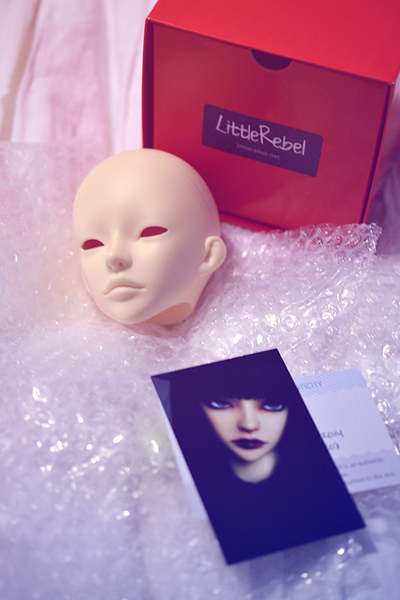
I didn’t mention this earlier because I’ve just been so busy lately that I haven’t had the time to blog as much, but I managed to get in on the last Seven pre-order from Little Rebel earlier this month. He had been on my list of “do wants” for a while because he will be perfect for this character I have in mind that is a little bit sassy. XD Anyhow He arrived just this week and I thought I’d share some a couple arrival photos and some of my thoughts.

sevenarrival02

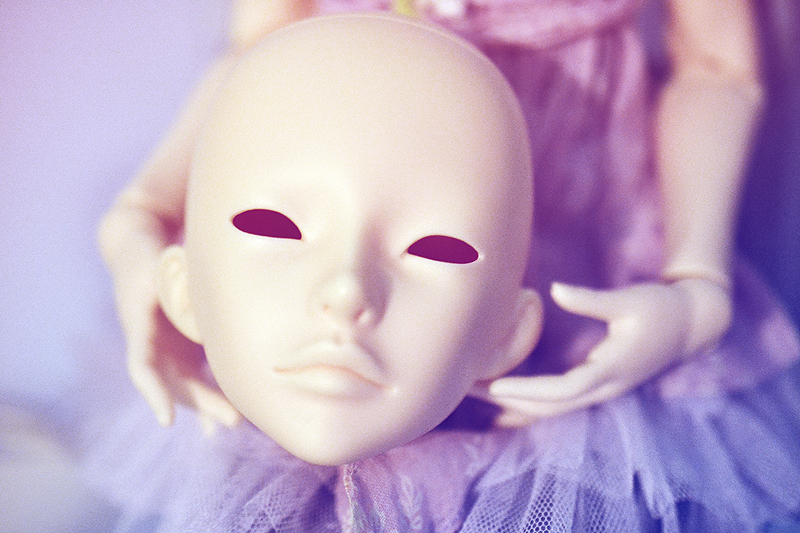
So, he arrived in a cute little red box all safe and sound with an authentication card. 🙂 My first impression on opening the package is that he looks even better in person! I can’t wait to try and give him a face-up but the weather here has been really poopy and rainy. Well that and I just had new flooring installed in my bedroom so I am also in the middle of trying to move all of my crap back into my bedroom along with keeping up with my comic and illustration work…so yeah…time, I need more of it. ^^;;

sevenarrival01

I wanted to see how the resin match was with my Dollstown elf girl in freshskin and I must say that the Seven head is a practically perfect match to Dollstown freshskin. My plan is to eventually get him a Dollstown 15 years boy body. I’m hoping I can accomplish that this year, but I am also saving a little stockpile of money in the hopes that Supia re-releases their boys again since I need a Zion to complete my “dream trio” of Mio, Seven and Zion. Of course I already have Mio, so I’m well on my way!

Ah, that reminds me…I’ve been ornery and I also ended up ordering a Buffdolls Unoa Zero headback, because yes, I’ve decided to take up the quest to assemble a Unoa Zero girl, ah hahaha…I’ll be keeping an eye out for Marion faceplates, and the Switch Humming Dolly Girl body will come with time, so really all I need to worry about there is getting the Marion faceplate.

Well that’s it for now! Back to work so I can afford all these dolls. *dies* XD

New School Uniforms!

sona-luluwork02

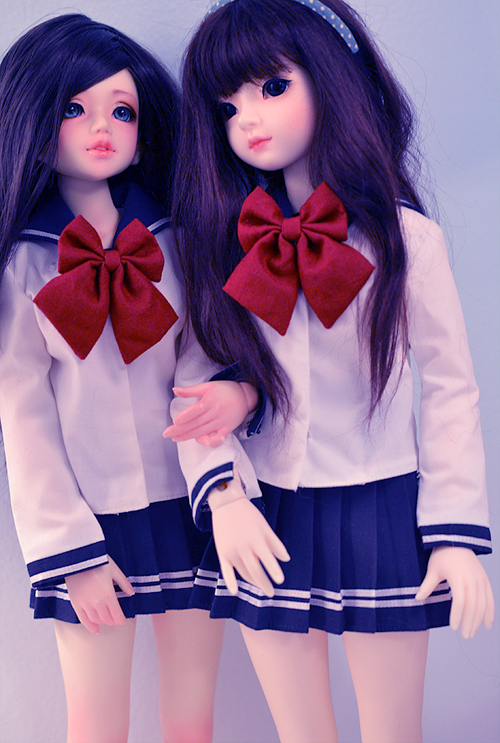
I had been meaning for a while to get matching school uniforms for Sona and Lulu, but I hadn’t until recently found a uniform that fit what I had envisioned for them and was not cheaply made or overpriced. Then I stumbled upon this little site called Promise of the World. They had previously been on etsy and moved to their own website within the past year. They are also on taobao, and what first impressed me first about them is that they don’t inflate their prices for the western market and their stuff is adorable and well made!

I ordered the two sets of uniforms last week on Monday and they just arrived to me today (the next Monday). They had listed on their website that everything was in stock, and apparently it was! The quality of the items I received also was very good and just like the images on the website. The outfits are super cute and very well sewn, though nothing is lined which I know isn’t typical, but the more expensive brands are often lined so I thought I’d mention it. My Sona’s bright pink camisole showed through the white fabric, but what can you expect when it’s bright pink, lol. Either way the problem was easily solved by just removing her cami. A particularly nice touch was the fact that each bow is threaded onto a silken ribbon with a slip knot in the back, so you can easily attach it to your girl’s clothing under the sailor sash. What’s also really nice is you can kind of mix and match your sailor uniform parts to make something a little more unique for you. Aside from the red ribbons, I also purchased two of the pale blue scarves so I could switch out if I wanted.

Overall I am very pleased with my purchase, it shipped fast and is quite lovely. That being said though I didn’t get a shipping notice and I was actually prepared to contact them today about when my order might ship, but then lo and behold I got a text from DHL telling me my package was going to be delivered. So in the end I would recommend them and I would probably buy from them again if they had some things I liked, for the price it can’t be beat!

Second Wig Cap + Tips

So I decided I wanted to try to correct the flaws in the first wig cap and went on to make a second. I was successful in fixing some of the problems in the first wig cap and now I figure I will use that first wig cap for testing purposes. Anyway on with my findings…

eartamp

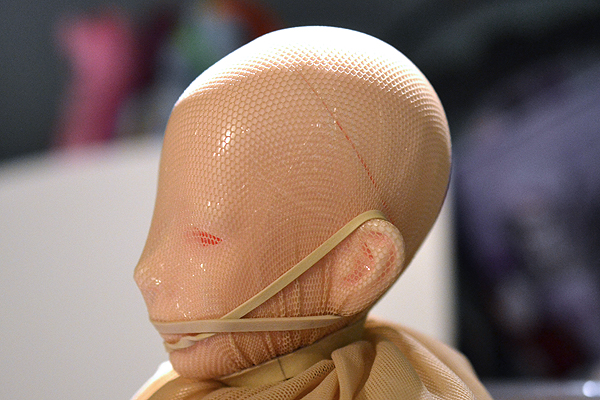
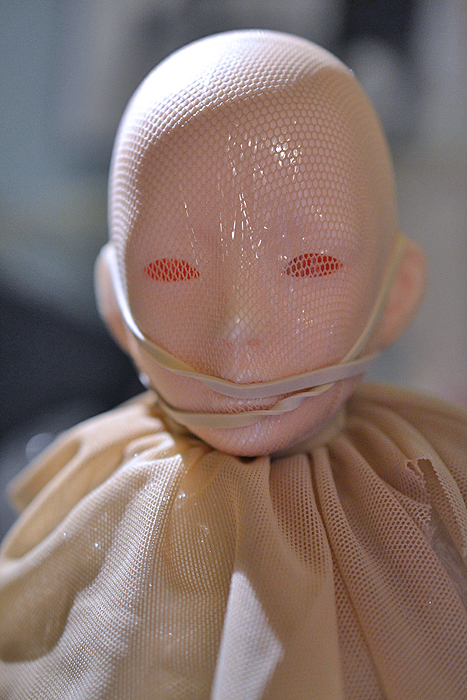
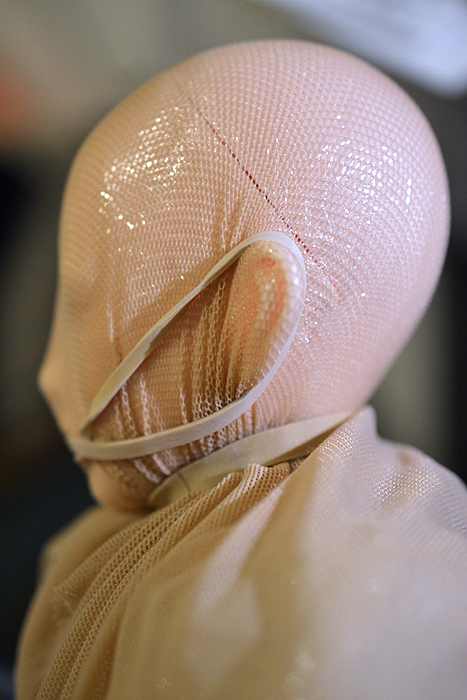
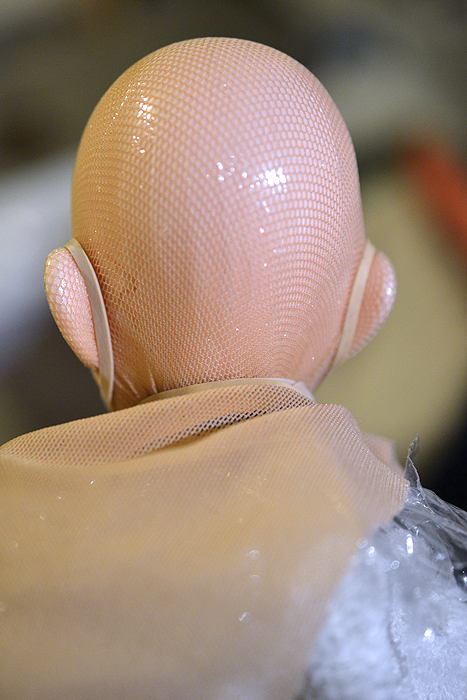
So the first thing I did to prevent the tenting around the ears is I used a rubber band and attached it across the front of the face from ear to ear. Above is the side view, and I’ll show the front side view below for better understanding. 🙂

eartamp02

So, doing it this way across the front of the face basically it helps keep the rubber band out of the gluing area on the nape of the neck. It also successfully tamps down those ear tents that happen for a much more form fitting wig cap.

wrinkles

The second problem I encountered while making the first wig cap is that the fabric likes to wrinkle at the base of the neck and this makes for a less than smooth wig cap.

wrinklemigration

You can solve this by pulling all of the fabric over the ear so the wrinkles wind up in the front of the face where they will be cut off anyway. In the pic above I still have a couple wrinkles I need to move forward from the ear area, but with a little time it’s pretty easy to shove all the fabric around so the wrinkles are in the front.

wrinklesgone

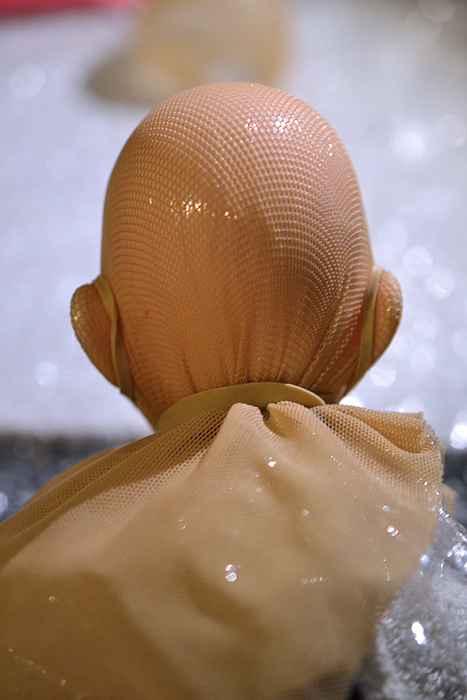
And here’s the back of the head now with most of the wrinkles gone. Any wrinkles left over are below where I plan to glue.

secondcap01

And here is the finished wig cap after I went through the gluing and trimming process. As you can see the cap around in the ear area is no longer sticking up.

secondcap02

The left hand side still has a skooch-a-bit of a fly-up, but I figure that with the gluing of the wefts later that it will tamp down nicely. So, I think that about covers it for my experience making a wig cap using Loctite’s flexible vinyl adhesive. I now plan to start on wefting experiments using some cheapo costume hair. When I have enough info to share I will surely make another blog post!

Glue Testing for BJD Wig Making Part 2

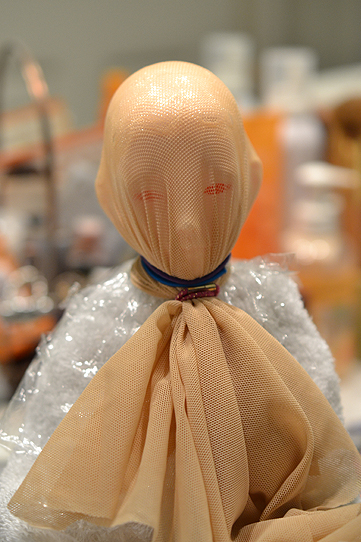
So I continued with my tests in the first part of this post and I went ahead and made a full wig cap using Loctite’s vinyl/fabric adhesive and the power mesh material. Following the directions in the wig making tutorial on DoA, I wrapped my Zaoll’s head in saran, covered her body in an old washcloth and then used old hair bands to stretch the power mesh fabric over her head.
glueprocess01

Here she is after having the fabric stretched over her and one application of the glue. I should also mention that is it going to be helpful to have a tool to spread this glue because it is very messy and is not pleasant to get on your fingers. I used this small metal spatula shaped clay tool which you can see below.
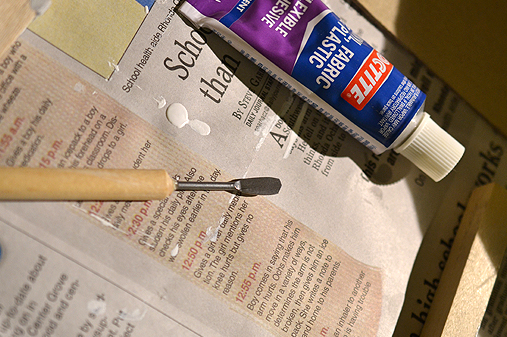
claytool

The glue is easily washed off the metal tool after you are done applying the glue, and if you happen to accidentally leave some glue on it you can easily scrape it off since this glue does not bond to metal well. After you apply the first layer of glue you need to let it dry for about 2 hours, then I recommend you add a second coat for durability.
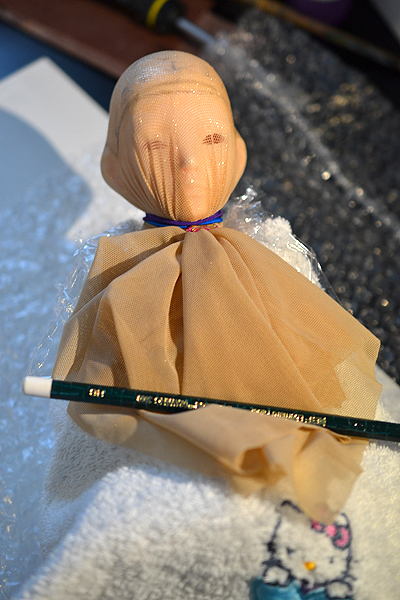
glueprocess02

Here’s my girl now with her glue all dried and I started drawing out the hairline where I plan to cut the cap. It was recommended in the tutorial that you also mark which direction you want your hair to go, this is helpful if you are gluing small batches of hair at a go and have a complex hairstyle. For me I have pretty much decided to use a synthetic fiber that I plan to weft, so I only marked the top center and a few directional lines. Also my hairstyle plan is not very complex. You should do what you feel will be best for you.
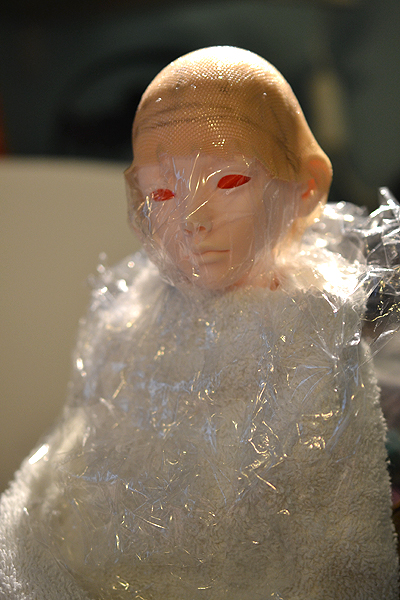
trim01

Here I did a rough trim, just taking off the excess fabric I had. In the next step I plan to cut along the lines I drew for the hairline.
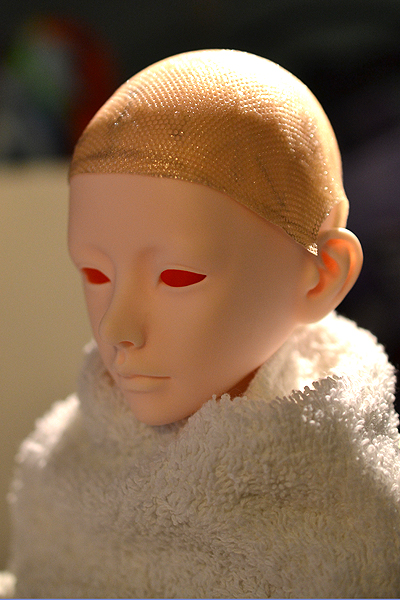
trim02

Here I have the cap mostly trimmed to where I want it to be. I may need to take off a little more, but it’s always best to cut off too little rather than too much since too much and you have to start over again.
problem

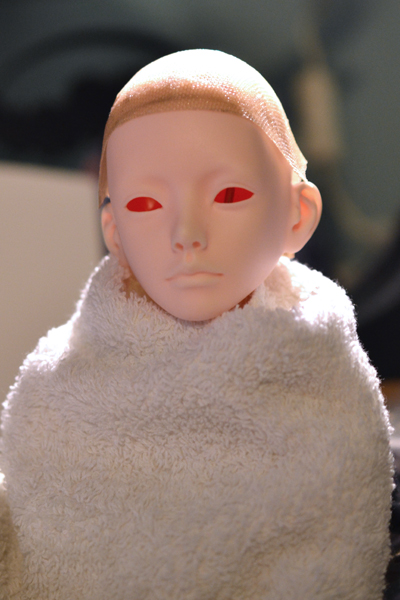
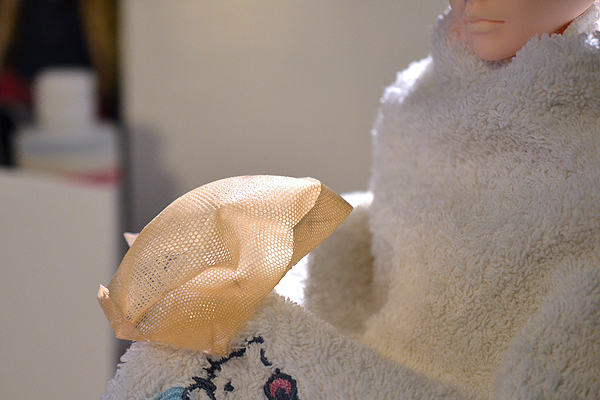
Here’s the front of the wig cap…one thing that I feel is a problem is that it sticks up a bit around the ears since the fabric naturally tented around the ears when stretched. I don’t know if there is a way to prevent this from happening, but I think I am going to try making another wig cap tonight and I will do some more experiments. Overall though I think it’s a pretty stable wig cap to apply hair to. Here are some of the pros to using this type of glue….
flexible

The first pro is that it’s flexible, you can flip the wig cap inside out if you want to. It doesn’t have much stretch though, especially with 2 layers of glue.
watertight

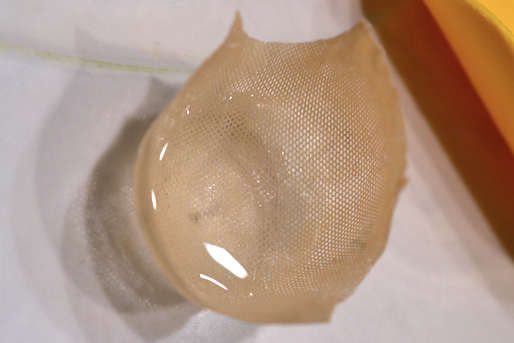
The second pro is that it’s watertight. It may be hard to see in the pic above, but I poured water from the tap inside the wig cap here. Because the glue is water resistant this means you can use synthetic fibers like saran and nylon and be able to use all of the wet styling methods for these fibers. Though I imagine this opens up wet styling methods to natural fibers like mohair as well. Also because this wig cap can get wet you can also maintain it like you would a normal wig, like giving it a wash or using conditioning treatments on it.

One last pro for using this glue is that because it’s rubbery, there is more friction when it’s on your doll’s head so it is less likely to slide off or around on you. Actually this fact makes me want to try a silicon glue next because maybe you can make wig caps straight out of that and have all the benefits of a silicon wig cap inside your actual wig.

The things that are not good about using this method is that it stinks. You’ll want to apply the glue in your bathroom with the bathroom fan running. Let me be clear and say it’s not particularly toxic like spraying with sealers as there are no particles than can find their way into your lungs, but if you have sensitive sinuses the odor could give you a headache. When the glue is dry however it doesn’t smell anymore, it’s only when it’s still wet does it smell.

The other con would be the dry time. It takes 2 hours to dry, though I applied my second coat of glue a bit sooner than that since it was dry to the touch before then. The last con would be the price. Each tube runs around $3, which compared to inexpensive PVA glues at $1 a bottle and more glue per bottle, well I think you can see the difference. This being said though $3 for a polyurethane based glue is not a bad price, and you do have all the benefits of a polyurethane glue.

Well, I will have more info for you as I continue my experiments. Right now the Loctite glue is working well for me, but I haven’t actually applied any hair or tried to make wefts yet, so I don’t want to pass judgement on this glue just yet. 😉 Anyway more to come!