Cookie’s Progress – Face Refining

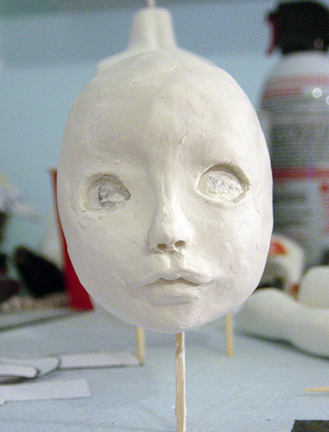
I’ve made a little more progress on Cookie’s face sculpt. She’s really coming along now, but I still have some tweaking to do. I need to work on symmetry a little more and tweak her nose a bit and then sand and smooth her. I’m pretty happy with how things are going, but I also know that sculpting is the easy part. Creating all of the joints, now that is going to be the hard part!

Tomorrow I am hoping to get some more work done on her head. At this point I’d love to make the headcap cut and hollow out the eye wells and see what she would look like with eyes in, but I will wait until I get everything just so.

Cookie’s Progress – 1st Stage Face Sculpt

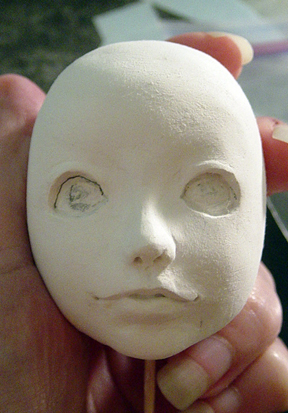
This is the first stage of sculpting cookie’s face. Obviously there is a lot more work that needs to be done, but the clay is just getting way too sticky at this point so I decided to give it a rest for the night. I’m going to let her air dry and sand and add more clay to her tomorrow. Hopefully she will come out looking as cute as my drawing. I think I’m on the right track, but boy, sculpting is hard work. :p

More of Cookie’s Progress

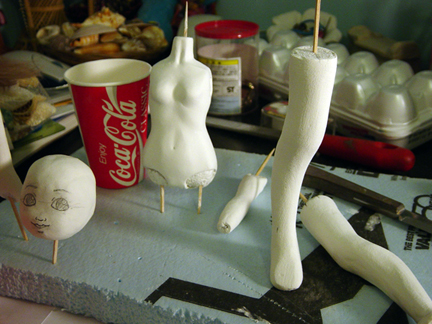
I’ve added more clay and have done more modeling to Cookie’s torso. I think her torso is really starting to come along and by working on the torso first I think it is helping me get a feel for the La-Doll clay. I also started sanding and shaping the legs a little bit. The left leg can totally stand on it’s own, which was a happy moment for me, but her other leg cannot since I realized that somehow the foot got cocked in an odd direction, so I’m going to have a big repair job there. Pretty soon I’d like to find a ball form to get the hips joints done so I can better shape the hip joint sockets. I’d like to do as much as I can with the styrofoam core still in the body, because La-Doll is so light, it makes me fear that I might crush it when sanding if the core wasn’t in there. I’m probably being ridiculous though. Afterall Yoshida’s dolls are all OOAK BJDs made from La-Doll, and are not cast, so obviously they can hold up!

In a bit of other news, I got notification that my Dollmore Kid Sona shipped! Still waiting for the tracking number to work, but I am excited that she is on her way! 🙂

Cookie’s Progress – Torso Shaping

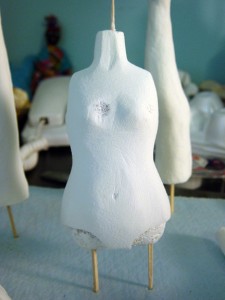
I made some more progress on Cookie today. I’ve been sanding and carving into the base layer of clay, and I came up with a pretty good starting shape to add more clay to, to begin shaping out her bosom, behind and etc….. I had a sorta accident and ended up sanding into her foam core, but, because I plan on pretty much adding her bust anew with fresh clay, I am not too worried about it. After I carve out her foam core I can also add some extra clay on the inside to sure up any thin areas.

I haven’t begun working on her face yet….the head always seems so darned hard, and I’d like to get a better feel for the La-Doll clay before I work on something that has so many small details. I am going to have to put my Japanese classes to good use and actually try to read the sections on sculpting the face in the Yoshida book. I’m pretty sure I just need to get the right tools in order.

Cookie’s Progress – Trial and Error

So I finally decided to go ahead and get started on Cookie. I am using La-Doll and Premier clay, so I decided I would go ahead and follow Ryo Yoshida’s doll making methods from the Yoshida Style Ball Jointed Doll Making Guide. In the guide you cut your cores/armatures out of styrofoam based off of your drawings. I’ll get more to the method later, but in the picture above was my first attempt at carving the body core using the blue polystyrene insulation foam board. As you can see the core turned out terrible with way too many pock marks. Naturally I was displeased and I tried to figure out whether or not it was my tools that were the problem or whether you just shouldn’t carve out with the blue insulation foam. I’ve seen other people use the blue foam before to good effect, but it just wasn’t working for me with what tools I had so I decided to go out and get myself a sheet of the white styrofoam.

Read on