“De-greasing” Saran Doll Hair

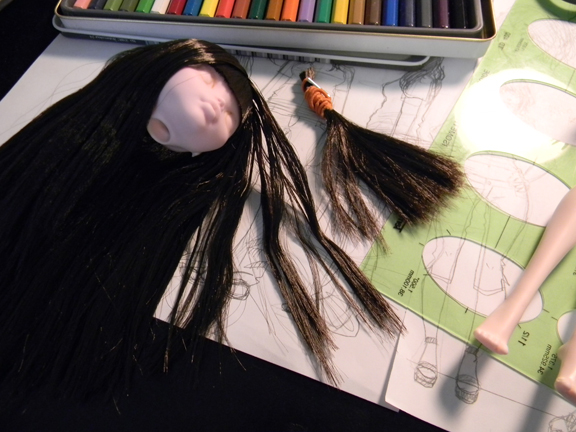
For those of you who may not have been aware like I was, saran doll hair usually has this slight filmy feeling to it, or as others have said it is “greasy” or “oily”. It truly is oily and has the unfortunate side effect of making your doll look like she has nappy no-shower in a week hair if you don’t wash it properly. You can see in the picture above that the doll hair on the left has this oily problem, whereas my freshly washed sample piece on the right does not. I spent quite some time google searching methods to degrease hair with no luck, so finally I just started experimenting with things until thank heavens I found something that works!

So here’s what you need to do to get that greasy, oily feeling out of your saran hair…..wash it with a dish soap that has a degreaser in it. It’s as simple as that. Most dish soaps on the market have some sort of degreaser in it, for me, we had Palmolive in the house so I just used that, but I’m sure any other quality dish soap on the market will work. After I gently washed the fibers in the dish soap I made certain to rinse the hair thoroughly, because obviously you don’t want to leave soap film in the hair. Here’s my tip though, don’t blow dry the hair afterwards. I found that with my test sample of washed hair that blow drying the hair caused it to get a static build-up with flyaway hairs. Letting the hair naturally air dry solves this problem, however it will take all day. 🙁 I even set my dolls head out in our 103 degree summer heat outside and it took her hair all the way until the evening to be mostly dry!

Well, that’s it for now, hopefully if you were struggling with this problem I was able to help you out! Look for more progress on my custom Draculaura soon now that I’ve “de-greased” her hair, lol.

Monster High Custom – Just Beginning


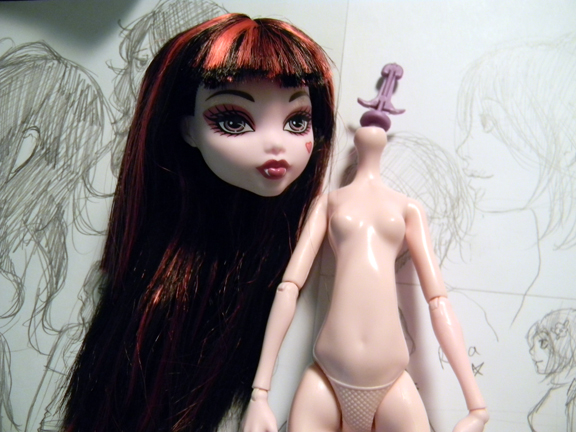
After my dollyhair order came in I wanted to get started on my custom Draculaura right away while I am still feeling all excited about the new hair. The first thing you have to do naturally is remove the head. Most tutorials I saw suggested running the head/neck area under water until the head became soft enough that it would allow the anchoring apparatus to be pulled out of it. Personally if I can avoid using water I will, and I found out that it’s quite easy to just take a blow dryer, blow dry the head/neck joint area for 30 seconds or so until hot, and then just pull and yank the head off while it’s still hot from the dryer heat. It took me all of a minute and I didn’t have to get anything wet or wait for hair to dry or anything.

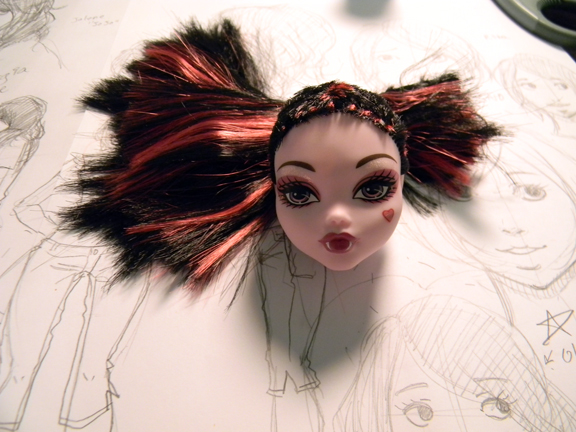
Next step was to cut off all of her hair, lol. Anyway for whatever reason I felt like saving the cut hair, it’s too short to root with, but I imagine it could still be useful for MLP tails or maybe it could even be wefted and used for a Brownie wig, who knows.

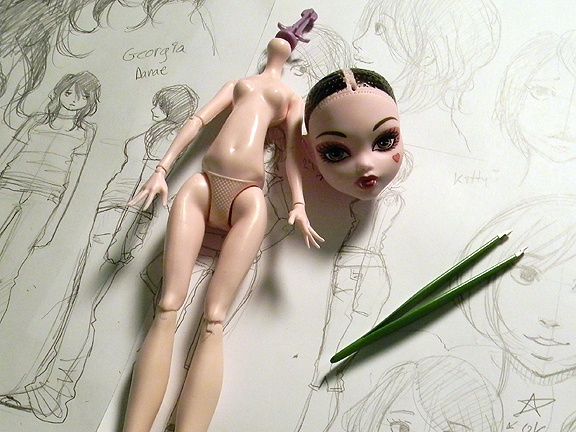
After cutting the hair, you then need to take your tweezers and start pulling out what’s left of the hair from the inside of the head. Often times there is glue inside rooted doll heads, and there definitely is in MLP toys, but I was pleasantly surprised to find that there was NO GLUE inside my Draculaura head. You may be wondering then what was holding it all together, and I shall tell you what I suspect. I suspect they use heat to melt the hairs inside the head, but I can’t be positive. At first I thought it was loop rooted, but then I started noticing these tiny bits of melted plastic bits here and there falling out. Either way because there appears to be no glue, once you start breaking apart and pulling out plugs of hair, you can also pull hair from the outside of the head as well, which is helpful because Monster High dolls have small neck holes. Also one more tip is to squish your scalp close to your neck hole so you can easier see the hair and nab it with the tweezers.

After removing all of the hair, it’s time to wipe the face paint off. Customizers will argue up and down on what to use to do this and what not to use and they are often contradictory. Some people swear by Windsor and Newton brush cleaner, while others will tell you acetone, in the end it’s your call what to use. I myself for this particular doll used acetone. Acetone will without a shadow of a doubt remove all the paint from the head no problem, BUT it will take a while because the paint WILL SMEAR so expect to spend a good 15 minutes scrubbing the head. Don’t panic though once you see a smear, because it will come off with a fresh cotton ball and more acetone. Because the paint smears, you will also have to spend time removing the scalp color because there is no way you can remove the face well enough without accidentally hitting the scalp color and smudging it all over the place. My last piece of advice when dealing with acetone is be sure to rinse your doll’s head thoroughly in water afterwards!! Acetone is a solvent used to remove resins aka plastics, so it can destroy your doll if you do not fully rinse and wash all residue off afterwards. It should also go without saying that you should never leave a doll to soak in the stuff, like EVER.

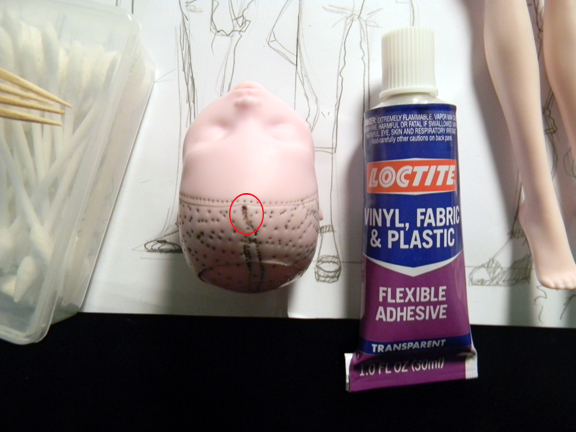
Anyhow, moving along, in the above pic you may notice I have a spot circled on the dolls head and I have out a tube of glue. You see, when they rooted Draculaura’s hair in the factory they put some plugs so close together in her front part that it kinda made a big hole. 🙁 After some research I found that the best thing to do would be to fill the hole with a flexible glue. To be honest there really isn’t that much information that I was able to find out there for patching doll heads. The one site I did find with the most info suggested gel super glue, however just because a super glue says it’s gel doesn’t mean it will dry flexible. I figure that it is necessary for the glue to dry flexible otherwise the glue will just pop out during the reroot process. I have decided to try Loctite’s vinyl and plastic glue that dries flexible. Doll heads are vinyl afterall, so the theory is this should work. Anyway taking a toothpick dipped in glue, I carefully put a few drops in the problematic hole (the area circled). This particular glue dries in 30 minutes, but requires 24 hours to cure, so I plan to leave the doll alone now until sometime tomorrow. I’ll just have to wait and see how well it fares against the reroot tool!

EDIT! – I am happy to report that the Loctite vinyl and plastic glue works fabulously! 😀

Rerooting Tutorials

While I’ve been waiting for my order from Dollyhair to arrive, I’ve been scouring the internet for any tutorials or general information I can find about re-rooting and the different kinds of fibers and such that you can buy. I figure I’d go ahead and make a posting and share what I’ve found so far.

Mohair and Alpaca related

My Monster Crush: This blog seems to focus on Monster High dolls, and this particular posting has information on making doll wigs out of feathers as well as re-rooting with mohair.

Wedge’s Mohair Tutorial: This is a image on flickr…look for the “BIG” link in the description to see the larger image. Anyhow this tutorial is Blythe centric and again focuses on how to reroot with mohair.

Mademoiselle Blythe: This is another Blythe focused blog, but this posting has a TON of information on the differences between mohair and alpaca, as well as an overview of rerooting and TONS of helpful links on where to find mohair and alpaca fibers as well as more tutorial links.

Saran and other fibers

The Manor: This specific posting has a lot of information and pictures to illustrate the differences between Nylon, Saran and Acetate doll hair.

Wide Eyed Girls: This site has one of my favorite nylon/saran reroot tutorials. It has lots of pictures and I think shows the simplest part thatching method for creating part lines n’ that.

Suppi.net: This link will take you to a search result page after searching for “reroot”. Has many different posts with random information on rerooting, BUT it most importantly contains information on good hair color matches for Monster High Draculaura complete with pictures and fiber names.

This is all I have collected so far. Of course Dollyhair, My Little Customs, and Restore Doll each have their own little tutorials section, so it would be a good idea to scour those too if you are looking for more tutorials. Lastly, if you happen to know of any other great rerooting tutorials or fiber information sites please feel free to post the links in the comments!! Any posts containing links though will have to be moderated by me first as a spam prevention, but don’t worry, they will get through!

Progress on sanding my Unoa Lusis.

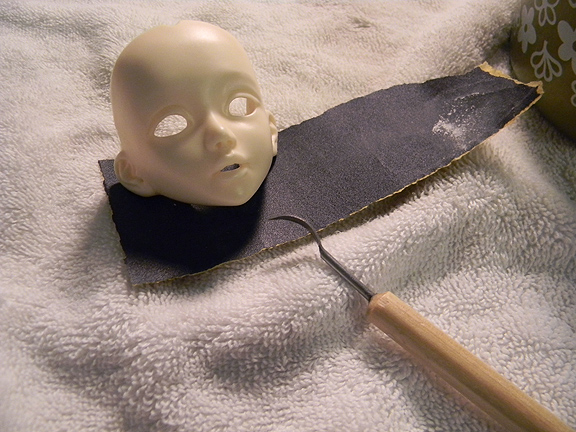
I finally cleaned off my drawing table today so I could start working on customizing my Lusis. I decided to start with her secondary faceplate, the one that has it’s mouth open a little wider. As you can see from the pic above, her open mouth is asymetrical with the right side being more open than the left. I decided I would do some carefully carving of the left corner of her mouth to give her more symmetry. To do this I decided I would use one of my clay carving tools that has a curved bladed edge that whereas it is sharp enough to carve, it isn’t as sharp as a exacto blade. You can see the tool I was working with in the picture.

Read on behind the cut

My Little Pony G4 head removal and etc..

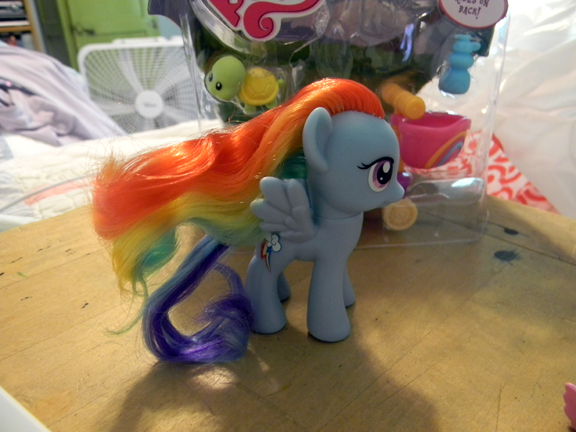
Well I’ve been bitten by the Pony bug now too after watching the Friendship is Magic series that has the absolute best stylization of the ponies to date in my opinion. My favorite pony is Rainbow Dash but unfortunately her toy looks hardly anything like her as you can see in the pic above. Many of the characters from the series suffer from poor toy design but I consider Rainbow Dash being on of the worst. XP

It should be clearly evident from the pic, which is Dash straight out of the carton, that her mane is styled nothing like her character, AND on top of that her mane nor her tail contain a full rainbow, but instead Hasbro cheated and made her tail teal and violet, while her mane is red thru green. Other problems with the Rainbow Dash figure are that her eyes look a little more like Fluttershy’s and she only has a cutie mark on her right flank, while her left remains blank. :/

So with all of that said, I’ve decided to embark on a customizing project to try to make Rainbow Dash actually look something like Rainbow Dash. The first thing you have to do then is remove the head.
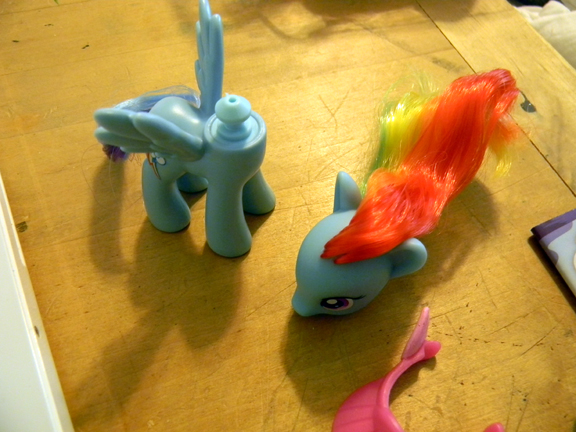
For anyone whose ever removed a head from a doll or toy before, this is super easy. It’s just a simple peg through the hole and you should be able to just pull it right off in a couple of seconds, no biggie. Getting the head-plug out of the neck hole on the other hand is another matter. If you examine your headless pony, you will see that the head plug is a hard plastic, surrounded by the soft pliable plastic of the pony body. The goal here is to separate the two at the seam where they are glued together.
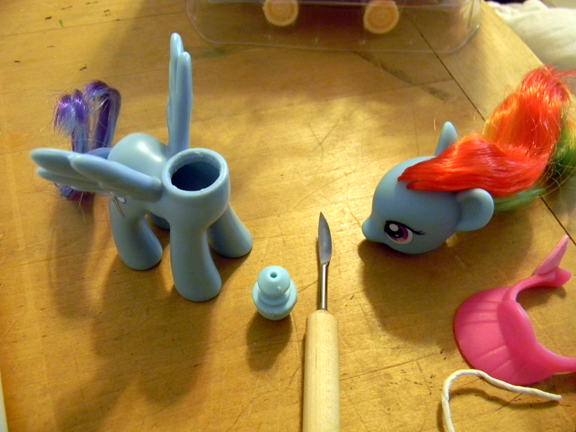
So, I have read some tutorials where people just cut the plug out around the seam using an exacto knife, and I think that will work fine, but for me, I prefer to use objects that are a little less sharp if at all possible since I am accident prone. If you are also accident prone or you do not have an exacto knife then my method should work for you! The first thing I do is I take my blowdryer and on the hottest setting I direct the hot air at the neck. The reason to do this is that it softens up the plastic and makes it easier to insert a knife or other object between the body plastic and the plug plastic. The tool I used, as you can see from the picture, was a small clay carving tool. This tool has a slightly curved bladed tip that you really can’t hurt yourself with. Anyway while your pony’s neck is all nice and warm, you want to find a good spot to carefully force your tool between the body and the plug, then, as if you are cutting out a circle, follow the plug all the way around until you make a complete circuit. If you went deep enough you should be able to wiggle the plug out of the neck now. If it’s still good and stuck, then apply the blow dryer heat and try again. I say it’s always best to be cautious and take your time rather than hurry and make an irreparable mistake.
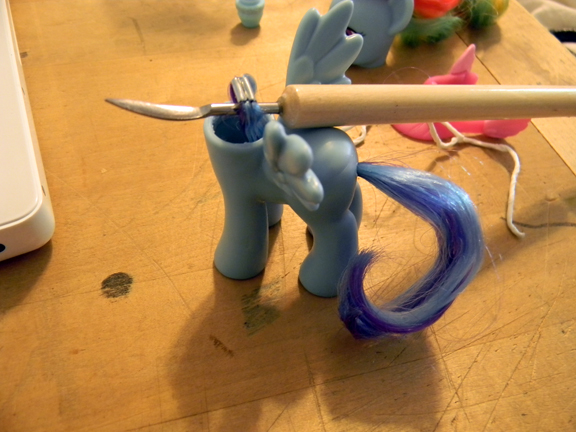
And now here is Dash getting her tail removed. Once you get the plug out, you’ll easily be able to find the tail inside. All you have to do is take pliers or a curved tool to grab ahold of the tail loop and pull it out. The above pic is Dash with her tail half removed. I just fished the tail out with the carving tool I used to remove the head plug with.
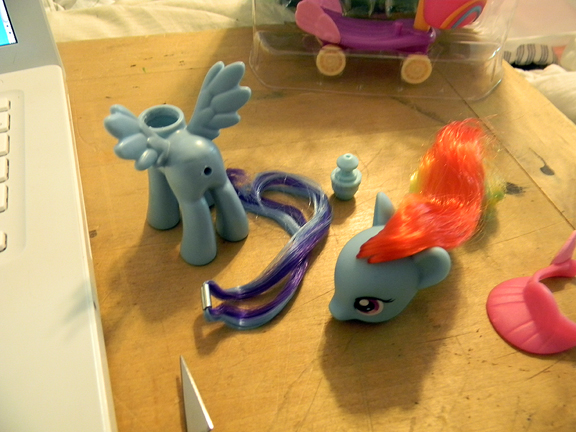
And here’s Dash now, mostly taken apart. I haven’t cut her mane yet as I need to order some pony hair to work with, and I don’t want to deal with keeping track of a loose pony mane until I’m ready to sit down and re-root her. I will probably post a continuation of this tutorial later when I re-root if it will be helpful to anyone. Well, have fun customizing everypony! XD