
I’ve made a lot more progress on the room box, but I just haven’t had much time to blog. I wanted to share with you though my process for creating the pin hinged window. All of these pictures I was a bit lazy and just took them with my iphone camera since it was convenient, so please excuse the photo quality and also my ugly dry hands….They just get so dry and bleh whenever I’m doing woodworking. XP
Ok, so for the basic construction of the window, please refer to my last post where I showed how I laid out the frames, sashes and glued and painted them and etc… Here I will be focusing on the hinges and attaching the window to the house.
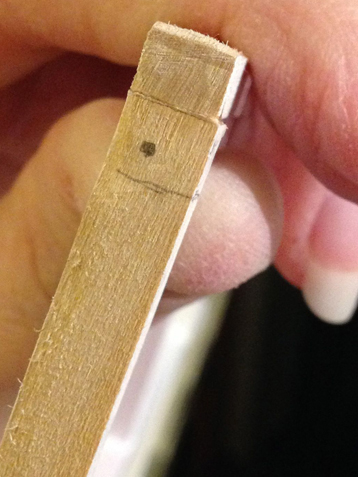
So the first thing I did was mark where the side of the window panel meets the bottom of the frame. I drew the box there so I knew where that wood board would be and then I marked with a dot about where I wanted to attempt my hinge. I decided to put the hinge a little off center and more towards the edge where I want the window to swing open. I made this decision by following this dollhouse pin hinge tutorial here: Pin Hinge Tutorial at about.com.
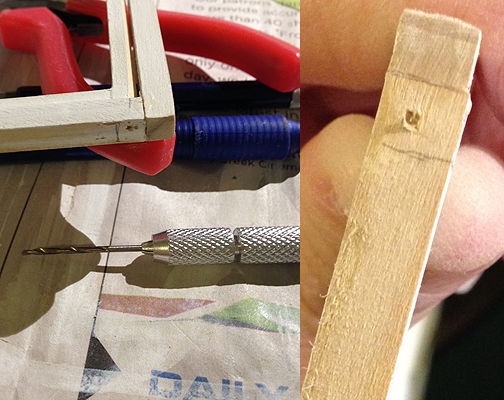
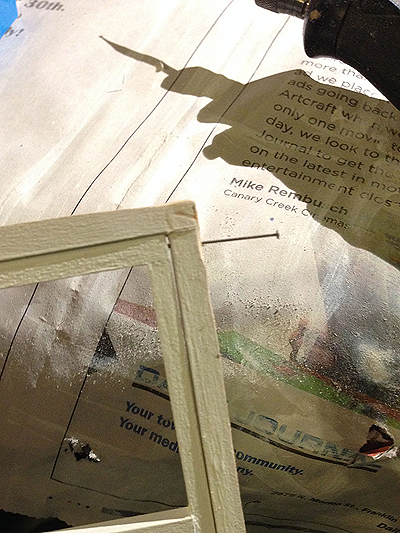
The tutorial at about.com has you using a hand drill for this next segment, but because I do not have a hand drill bit small enough for my liking I ended up using the hand drill here just to make an indentation into the wood to give a starting channel for my dremel which has a much smaller drill bit that is more suitable. Anyway the above shows you my hand drill tool and the starting channel for the dremel.
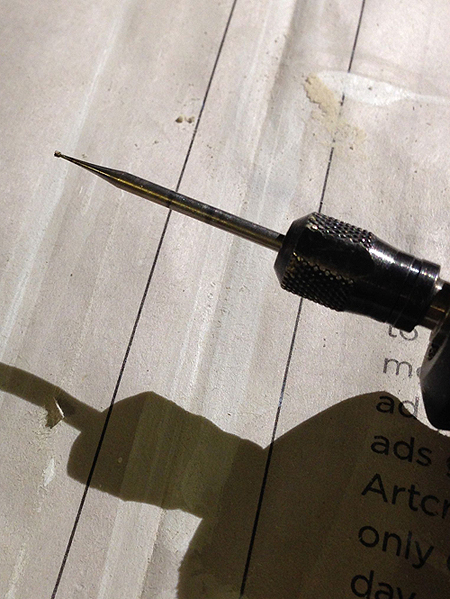
So this is the dremel drill bit that I used. It’s super tiny, but because it expands at the base, it is not possible to drill through the entire width/length of the wood pieces, but this is ok, because we will be using a dress makers pin for the hinge and you can gently force it through the wood the rest of the way.
Here is after I dremeled the hole and stuck the pin straight through to the other side. The next step is to line up the window inside the frame and pierce it with the needle.
Here I have perfectly aligned the window to the frame as I want it, and I re-inserted the pin through the hole to pierce the wood of the window itself. What this does is it gives you a small hole exactly where you need to drill the corresponding hole in the window.

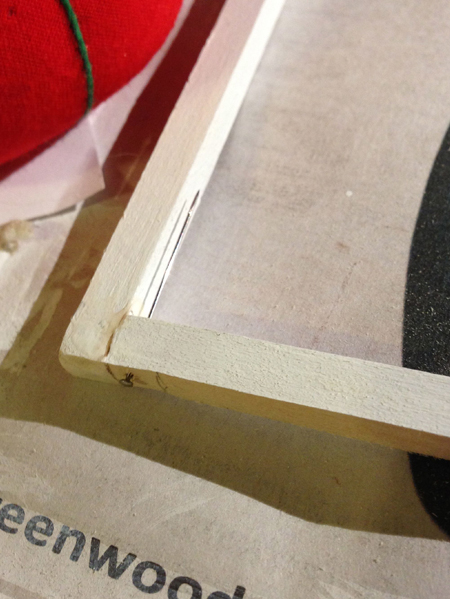
After you pierce/mark the window board, remove the pin again and dremel the hole. If need be start the channel again with the hand drill. I also want to point out that at this time, you need to bevel the side of the window that is facing the direction you want the window to open towards. I have decided I want my windows to open outward since it will be less likely to interfere with any future furniture arrangements. You can see my bevel in the picture above, but I will show another one below.
Here is a close-up of my bevel. Basically you will sand the corner off of the side the faces the direction you want the window to open…it will be about a 45 degree angle. You don’t need to do much and you can always touch up paint later. The reason why you need to do this is because your window won’t open if you don’t since it will get hung up on the squared corner of the wood. If you are having trouble grasping this section, then please refer to the tutorial I mentioned earlier as they explain it a little differently and it may make more sense to you. Oh and lastly you do not need to bevel where the two window panels meet in the middle, you only need to bevel the side which butts up against the window frame.
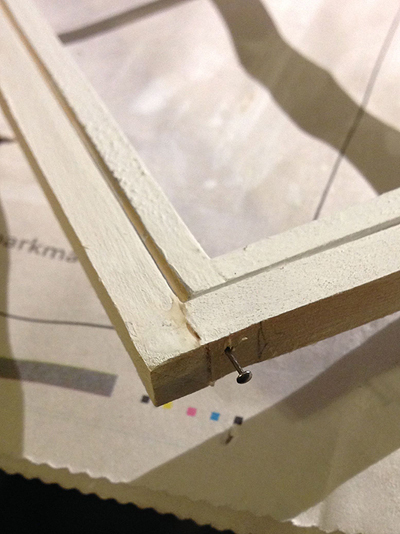
Lastly after doing your touch-up painting you will just reassemble your pin hinge. Here you can see my window snug in the frame with it’s bevel all ready to go. Now, since this is a larger scale window, you have two options to finish the pin here. You can leave the head on like I did and just gently press the pin all the way into the wood so that the head is flush with the bottom of the wood of the frame. If you do this, just take your time and be careful not to bend your pin! The other option which is discussed in the about.com tutorial is you can cut off the excess pin. If you cut off the excess pin though you will need to putty in the hole at the bottom so your pin does not fall out. Take care though not to accidentally fix your hinge in place. Personally I think it is easier to leave the head on, and considering this is for a 1/3rd scale doll roombox the tiny amount of pin head at the bottom won’t matter much in the long run when trying to fit your window into the window cut. That’s just my opinion though and you should do what is best for you and your project.

OK, so basically you will just need to lather, rinse and repeat the above steps to create pin hinges for the top and bottom of both sides. You will have 4 pin hinges total. Above is my finished product which I tested out to make sure everything was working fine before I went to glue it into place. Once you glue your window into the window cut you are pretty much stuck with it unless you want to remove the window to make changes, which is tough. So, get everything right the first time!
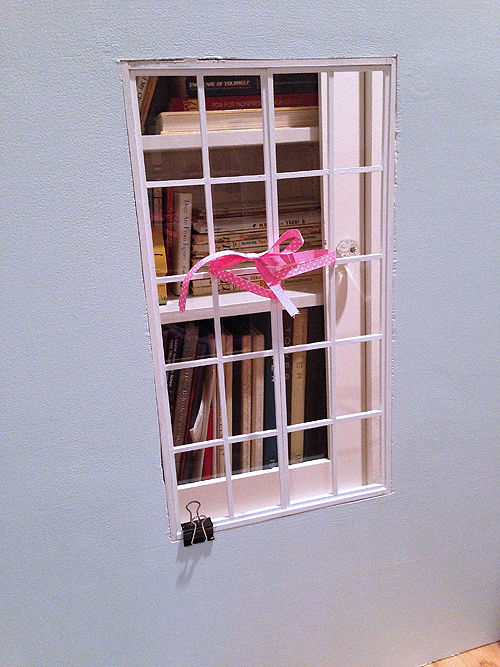
Ok here is the window being glued in. Be sure to have some little clamps handy if there is a section of window that is being testy and wants to come off center. I also tied my window panels together for safety since the pin hinges are delicate. Yes, please do keep in mind that the pin hinges using sewing pins is delicate at this scale. If you want something more durable for rugged play you may consider trying small finishing nails. Also, one more tip and that is to be sure during the whole process of creating the window that you are double checking the fit to the cut in the room box. It is very easy for things to become a little off, especially when gluing in all those sashes, so keep checking up on the fit so you don’t have any unhappy surprises at the end where the window doesn’t want to fit into the window cut without extensive sanding. If you keep checking the fit you can make minor adjustments here and there and save yourself a lot of tears and frustration.
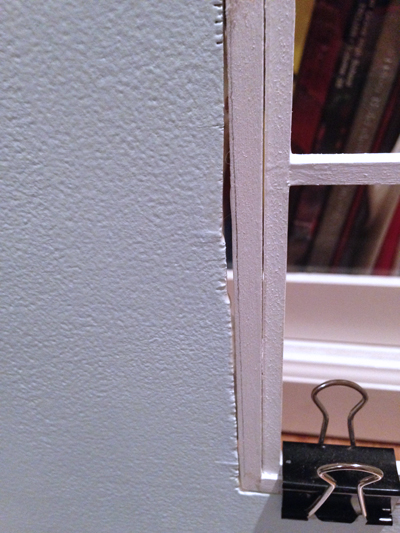
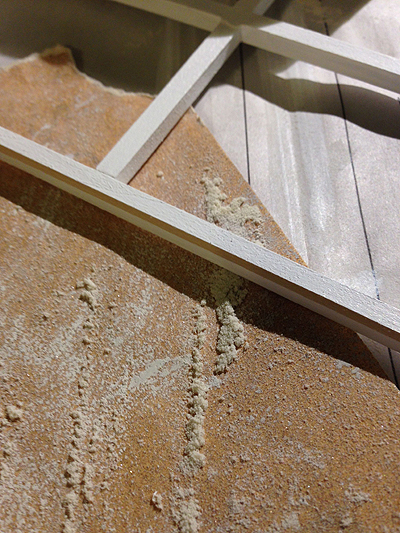
I also wanted to point out here that making window cuts with the saber saw are never perfect. Here you can see one of the larger gaps between my wall and window frame. You can fill a little bit with glue at this point if you are concerned about stability or you have too many big gaps like this. Keep in mind though that you will be cover the window frame and part of the wall with your window trim anyway and the additional layer of wood on glue will also add stability and perhaps more importantly HIDE YOUR ERRORS!! hahahaha!
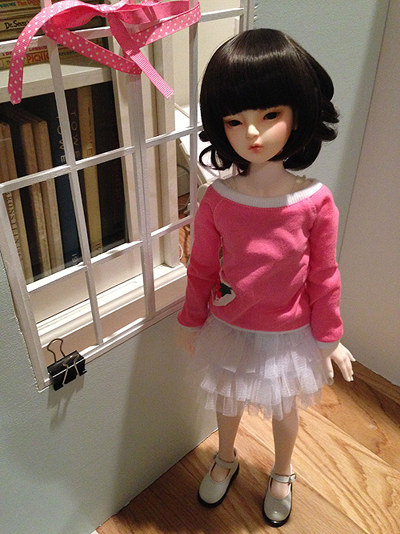
I have yet to trim my windows as I ended up getting started on the wood flooring right after this, but I will leave you with this picture that shoes the scale between the window and my Zaoll hybrid. It’s not a very good photo of the doll, but I guess that’s not important. So another thing to keep in mind, Zaoll is only 53cm tall. The current design is probably best for 60cm dolls give or take a centimeter. The 65cm boys will still be able to look out the window, but they will seem a bit overly tall. This is fine for my purposes though because the room is for my girl, and the scale will play up her shortness a little. I’ll be sure to pose the final touches with the trim later and perhaps later on tonight I might blog a bit more about laying down this flooring while the glue is drying yet again.
That’s so awesome! I never would have thought of using a dress pin for hinges. I love reading you doll related posts, it really blows my mind away! 😀
Aww, thanks! I’m glad you enjoy reading my dolly posts. XD I’m really happy with the pin hinge right now because it is a lot less hassle than using those tiny dollhouse hinges…not to mention less expensive! I think the next time I work on 1:12 or 1:6 scale stuff I’ll definitely be using pin hinges again.
It looks awesome!!
Thanks! I still have so much work to do and the problem is I just want it all done right now, lol….which isn’t going to happen. XD