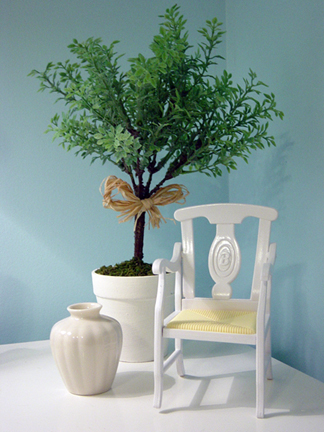
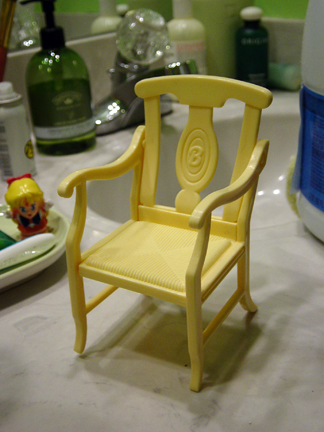
I was finally able to finish my Barbie chair repaint project after the humidity and storms broke a little bit yesterday. I’m not sure what set this chair came from, but it was imprinted with the date 1992. I was surprised to receive this chair in the bag of Barbie goods I got from my aunt, because I have never seen a Napoleon backed Barbie chairs before. I consider this one of my most successful repaints so far, and I think it will be a nice addition to the living room of the dollhouse.
After having a success with repainting, I’ve been considering repainting the sweet roses fridge I have since all of my “whitening” experiments have failed. I started by soaking the fridge in bleach, and after several hours with no change I decided to give up. Next I thought I would try the hydrogen peroxide and oxi-clean bath, but after soaking all day and night with no change in color I gave up and used the solution to clean the bathtub, lol. So after chemical lightening failed me I thought I would test sanding a small corner of the back side of the fridge, which actually lightened the fridge slightly. I decided against sanding to lighten the plastic however, because the amount of work that would be required to sand and buff the entire fridge was out of proportion with the results. I’ve figured out how to remove the pink shelves inside, but I still haven’t figured out how to remove the pink inside door shelves from the door. This presents a problem for repainting, thought I imagine I could just tape over the inside of the doors and not paint them. Anyway I’ll stop my rambling for now and just leave you with my before shot of the barbie chair before the repaint.


Oh I just love what you have done with this chair – it’s charming. I have a couple like this – I think they came with the barbie school set as the teacher’s chair.
Thanks. 🙂 So you think it was the teacher’s chair? I may have to google to see, it might be nice to have more than one of these! 😉
Yes, it was part of the Barbie classroom set, you can see it here:
http://www.polyvore.com/amazon.com_barbie_classroom_playset_1996/thing?id=26089042
I’m tempted to give mine a makeover now I’ve seen how lovely yours is!
Oh I see now! I have to say, go ahead and go for it on the repaint. That chair was the easiest repaint I did. All I did was tape off the “seat cushion” with frog tape and took some white spray paint for plastics to it. It took a couple of coats, but right now, at least where I am, the weather is perfect for spray painting so it should be done in a jiffy!
Great result! I have spray painted a few items myself, amongst those a piano which went from bright pastely pink to glossy black. I still haven’t found a way to create a decent keyboard for it, though, so I photoshop one in each time I use it in a pic. 😉
http://www.flickr.com/search/?q=nomado%20piano
Wow, a little piano, I’ve never seen anything like that before. It’s looks perfect! You know what you might be able to do for a keyboard would be to tape off your keys and hand brush them with model paint. I’ve seen this stuff in my local hobby supply called Tamiya tape…If you don’t know what it is already, it’s a thin special tape made in Japan that is used to block off areas for detail painting on car models and such. I haven’t experimented with it yet, but I think I probably will in the future with some other repaints.
For the piano I am thinking of perhaps making a permanent cardboard keyboard. Problem with just painting is that there are 7 square keys (for itty bitty 6 y/o girls’ fingers), not a conjoined board:
http://www.flickr.com/photos/another-me-net/2748970897/sizes/l/in/photostream/
Gosh, how did I miss that in the picture!? Yeah I guess that would be problematic. Making a whole new set of keys would be best. If you wanted to get really fancy and involved you could probably make keys out of sculpey/fimo….but I think I’m the only nut who likes to make extra work for herself, lol. (^w^;;)