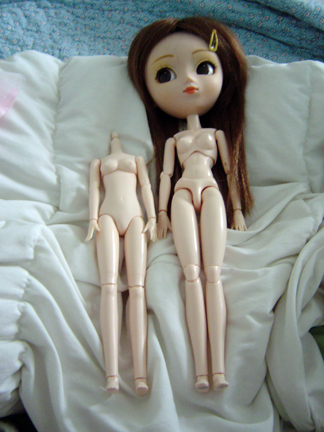
I decided with some left over Xmas money, to get my Nina a new obitsu. I really disliked her 27cm hard bust obitsu because the waist joint would constantly come apart, which meant I always had to worry about her loosing the bottom half of her body if I took her anywhere or showed her to friends. Also I felt like downsizing to the 25cm so she could work better with the dollhouse. I did of course design the dollhouse to even fit Taeyang, but having Pullip at 25cm makes the ceilings higher for her, and the re-ment kitchen works better for her as well. Anyway in the pic above you can see the height difference between the two bodies.
The rest of this posting is going to be behind a cut as it will be pic intensive, but I have a short obitsu deflopping tutorial inside, so .
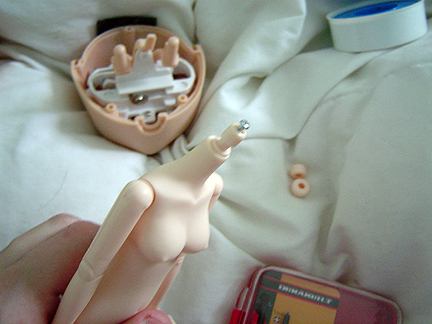
The 25cm soft bust obitsus have a different style neck/peg. Like other obitsus though, you need to remove the screw and take off the tiny neck peg. In this pic I have the screw halfway out.
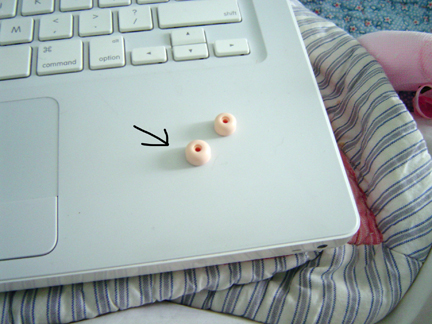
As with the other obitsus you will want to switch out the neck peg with the largest one that comes in the set. I’ve drawn an arrow to point out which one.
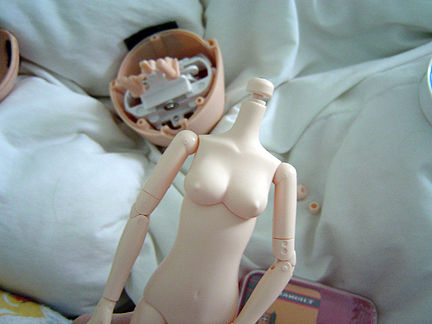
The great thing about this obitsu though is that the neck peg is stumpy, so there is no need for cutting down neck pegs, you just pop it on and screw it in and you are good to go in that regard.
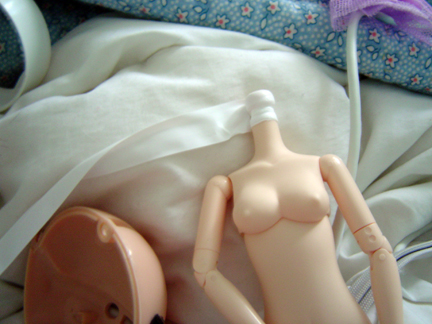
However like the other obitsu models you will still need to add rubber bands or teflon tape to help fill in the gap at the neck joint. Also because this is a soft bust obitsu, you’ll want to be sure that you wrap teflon tape over any part of the neck that make come in contact with the head to prevent any interactions between plastics. As most pullip owners already know, soft bodies have melting issues when they come in contact with the plastic used for Pullip’s head. However I have also heard that people who use a sealer on their Pullip’s neck hole have had no neck melt issues and I also I read on a Japanese site where a collector cut a small ring out of clear duralar plastic to place between the head and neck. I have some duralar, but I haven’t tried this yet, so we’ll see. Anyway with that done you can now reassemble your doll, however……..
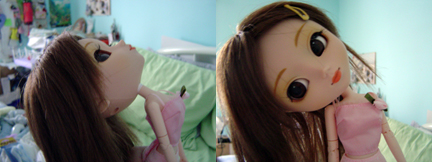
You are going to have horrendous flopping issues! dun dun dun! As you can see the neck flops terribly, and it is also exacerbated by flopping in the torso as well. As she is now, she cannot stand on her own and is a bear to pose. We can’t have that, so we have to go about fixing the flop.
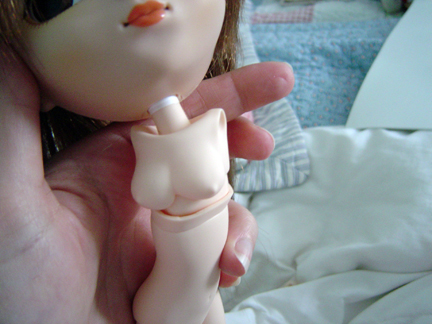
First off, as you can see, you can move and adjust the soft body parts of the soft bust obitsu. Inside are hard body joints, and for this 25cm model you can simply pop the chest part out of the torso socket not unlike how the 27cm hard bust pops apart at the waist. With that said you’ll just need to go ahead and pop it apart.
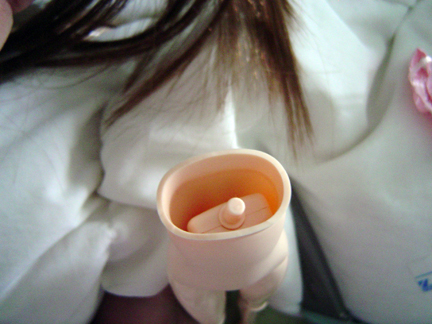
Here’s what the inside of the torso looks like, it’s rather empty really, and we are going to aim to stick some craft foam inside there to add stability.
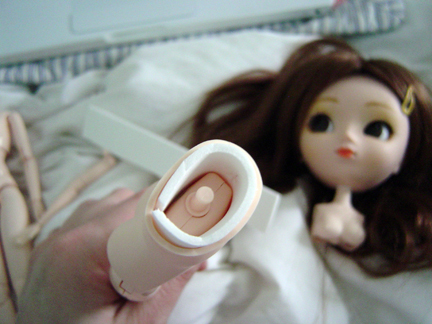
Here you can see where I have started to add a ring of the white craft foam. I actually used two strips of craft foam, but the first strip I gently forced all the way down into the body using a screw driver so it would help give stability to the waist joint. Afterwards I cut another piece of craft foam the same length and width and stuck it down into the torso to help give the bust joint more stability. I went ahead and left that bit you see sticking up like that so when I snapped the chest piece back on, part of that foam would then be overlapping the the interior chest joint, which I think also helps.

Before you reattach the chest to the torso though, you’ll want to add some foam to the neck part. To do this cut two pieces of craft foam about to the size you see in the pic above.
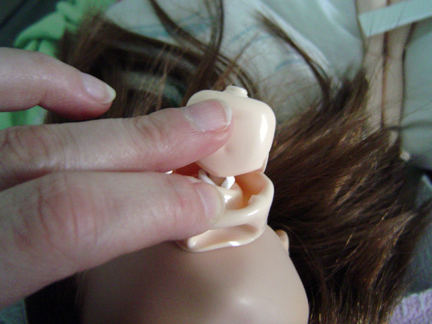
WHat you need to do here is peel back the soft body part to where you can see the neck hole and gently shove the piece of craft foam around the neck shaft in a circle as seen in the pic. The first piece of foam you put in you will want to shove further up into the neck using a blunt tool. I just carefully used my screwdriver. Then after you have it up in there, squeeze in a second circle of foam around the lower neck. After that is done you can then put everything back in order, ie, put the soft body back in place, re-attach the bust, and put her arms back in.
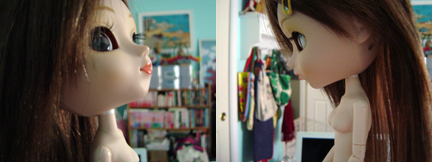
This as you can see, has really helped with the flopping issue, and this is the most she will flop in either direction. She’ll be a little more stiff than she once was however and may lose some of her torso bending ability, but really nobody wants a floppy dolly that can’t stand. Anyway now as she is she can stand on her own with tweaking, but there is still a little neck bobbling because……
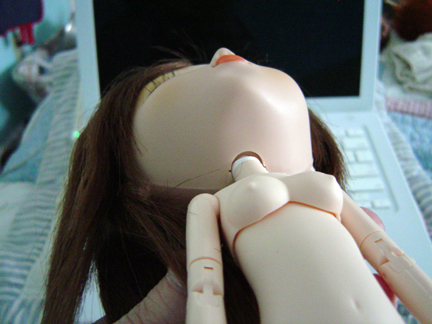
As you can see from the pic there is quite a gap between the head and the neck of the doll. This of course adds floppiness and needs to be solved as well, but right now I have no intention of opening up Nina’s head again until I get new eyechips for her. I’m fairly certain you could fill that gap with those nice clear plastic bands you get for your hair, then you wouldn’t see anything. If I fixed this gap her head would also sit better on the neck and you also wouldn’t be able to see as much of the teflon tape as you do now. I suppose you could just use a bunch of teflon tape on the gap, but that stuff compresses a lot, so I’m not sure. Anyway I’ll be sure to post any findings when I get around to re-doing Nina’s eyechips.
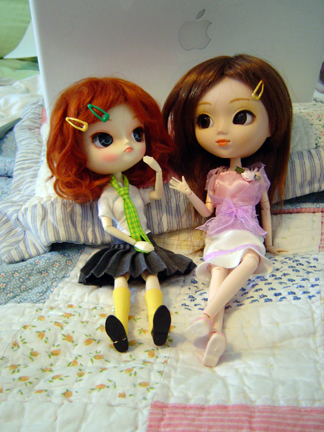
Well, that’s all for now!

This is such a useful entry! I am getting a 25cm for my Greggia this week, and was expecting some floppiness. I’ve seen these craft foam tutorials before, but never actually seen the foam in stores. Will have to look closer the next time I visit a hobby store, I reckon. Have to ponder about that neck opening too, it seems!
I’m glad it was helpful! I will say that this type of craft foam is more like for kids craft, so perhaps you missed it because you ignored the kiddy looking aisle, lol. There should be an aisle in Michael’s or JoAnn’s that has this stuff, and you can buy it in big flat sheets that are maybe 12 x 18 inches…I don’t know the exact measurements, but they are fairly big. You can also get craft foam in packs and they will also have a lot of cut out stick ons in the aisle as well. It’s pretty cheap to buy the sheet though…under $2.
I may get lucky in the kids’ aisle. We don’t have JoAnns nor Michael’s here, but I reckon I should still be able to find that foam. They use it for scrapbooking as well, don’t they?
Yeah, I think they might use it for scrapbooking too. I also just remembered something. In our big box stores around here they also have a some of it down the kids art aisle. I hope you can find it!
I found some yesterday, and managed to deflop my first girl on a 25cm – Prunella, not Greggia (but I will give Greggia one later today). For the head flop, I thread two squares of velcro, the stiff part, down on the neck pin before adding the peg (tried with one first, but it didn’t build enough volume). I cut a small hole in the middle of the velcro squares for the pin to go through. The velcro is stiff enough to support the head, yet at the same time soft enough to allow the faceplate to slide onto the neck pin.
I like the velcro idea, but I’m having trouble wrapping my head around your instructions. It’s probably because it’s late and I’m sleepy, lol. Are you using the soft part of the velcro, the stiff part, or both of them together? I really want to deflop my Nina’s head so I can have more fun with her. Right now she is just languishing in her bed. XP
Haha, I always visit here when it’s late, so I guess that counts for my poor explanation skills. My dolls are stowed away right now, here’s a quick sketch of how I remember to have done that wobble fix:
Adding two squares of stiff part velcro (I never purchase the soft part, I only get velcro tape to hold wigs in place) to the neck peg before re-attaching the head. The velcro goes inside the head. The holes are not this wide in reality, just wide enough to slide onto the slim part of the neck peg.
Hm, seems as HTML isn’t allowed in comments. Hopefully a direct link will work!
http://img.photobucket.com/albums/1003/Birgit/dolls/useful/neckwobble.gif
Now I get it! 😀 Definitely going to try that very soon. Thanks for posting that pic!